
How to open multiple spreadsheets side by side in Excel 2013
The article explains how to put 2 or more Excel 2013 spreadsheets side by side or scroll through multiple spreadsheets at once.
Previous versions of Microsoft Excel allowed viewing of two spreadsheets side by side. However, Excel 2013 makes it easier by allowing you to align two spreadsheets (open in two separate windows) to the left and right of the screen.
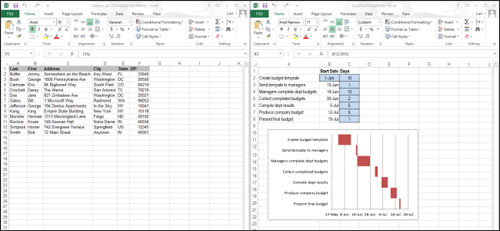
To do this, simply drag a window to the side of the screen until a circle appears at the cursor. The Excel window will be on one side, occupying half the screen. After you place both windows on either side of the screen, two spreadsheets will be displayed but in the image above.
You can also use the 'View Side by Side' option in the 'View' tab of 'Window'.
By default, the 'View Side by Side' option shows two spreadsheet windows horizontally (one window is on top, one is under).
To change the view, click on 'Arrange All' in the 'Window' section of the 'View' tab .
The 'Arrange Windows' dialog box appears. There are options:
'Vertical': 2 windows will be placed side by side, just like when you align them to the left and right of the screen (as above).
'Horizontal': 2 spreadsheet windows are placed horizontally (one window is on top, one is under).
'Tiled': In case you open 2 spreadsheets, 'Tiled' will act like 'Vertical', placing 2 spreadsheets on the left and right sides of the screen.
In case you open more than 2 spreadsheets, 'Tiled' will arrange them into cells on the screen, depending on the number of windows opened. Same as the picture below:
'Cascade': Spreadsheet windows are arranged in hierarchical form.
If you want to scroll to view two (or all) spreadsheets at once, you can turn on the 'Synchronous Scrolling' option in the 'Window' section of the 'View' tab. At that point, you can scroll through both spreadsheets when moving the scroll bar on a window. This approach is useful when you want to compare two spreadsheets to find differences.
You should read it
- Add captions to spreadsheets in Excel 2013
- How to print multiple sheets at once in Excel spreadsheets
- How to protect spreadsheets in Excel
- Complete guide to Excel 2016 (Part 9): Working with multiple spreadsheets
- How to merge multiple sheets into 1 PDF file in Excel 2013
- Assign shortcuts to icons in Excel 2013
- Tips with spreadsheets (sheet) in Excel
- Save, work and share files online in Excel 2013
- How to temporarily hide rows and columns in Excel 2013
- 4 basic steps to color alternating lines in Microsoft Excel
- Instructions on how to create Hyperlink in Excel
- Some experience in Excel spreadsheets
Maybe you are interested
[Answer] Should I fold my laptop screen? AI can now steal your passwords with almost 100% accuracy How to fix white screen on laptop How to adjust the laptop screen brightness with just one operation Instead of OLED or Micro-LED, why did Apple choose a Mini-LED for the new iPad Pro and MacBook Pro displays? Should I use a laptop or phone screen cleaner?