How to protect spreadsheets in Excel
Instructions on how to protect spreadsheets in Excel. Protecting spreadsheets is an essential need of many users, thanks to this feature who makes spreadsheets can secure their data. To protect a spreadsheet, follow these steps: Step 1: Right-click v
The following article provides detailed instructions for you to protect spreadsheets in Excel.
Protecting spreadsheets is an essential need of many users, thanks to this feature who makes spreadsheets can secure their data. To protect a spreadsheet, follow these steps:
Step 1: Right-click the name of the worksheet to be protected -> Protect Sheet:

Step 2: The Protect Sheet dialog box appears:
+ Password to unprotect sheet: Enter the password to protect the spreadsheet.
+ Allow all users of this worksheet to: Select the components to protect. For example, here select Insert Rows, Insert Column (users cannot insert rows and columns for the worksheet) -> OK:

Step 3: After clicking OK, the Confirm Password dialog box appears asking you to retype the password -> OK. (If you enter the password incorrectly, Excel requires you to enter it again.)

Step 4: After clicking OK, go back to the spreadsheet to check whether it is protected or not. Right-click on any line as shown in the figure , the Insert and Delete features are disabled -> the worksheet of the table is protected:

- In case you want to use the disabled feature, proceed as follows: Right-click on the protected Sheet name -> UnProtect Sheet:
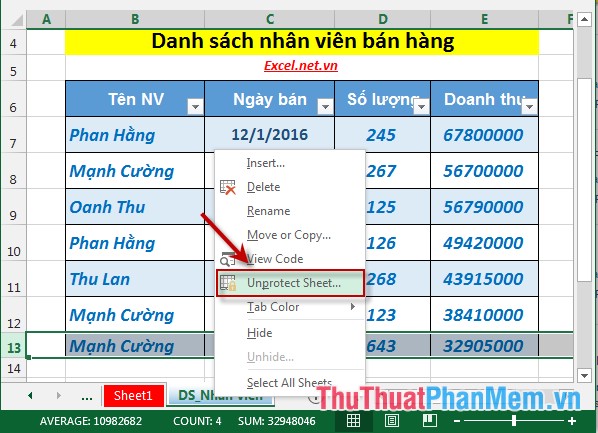
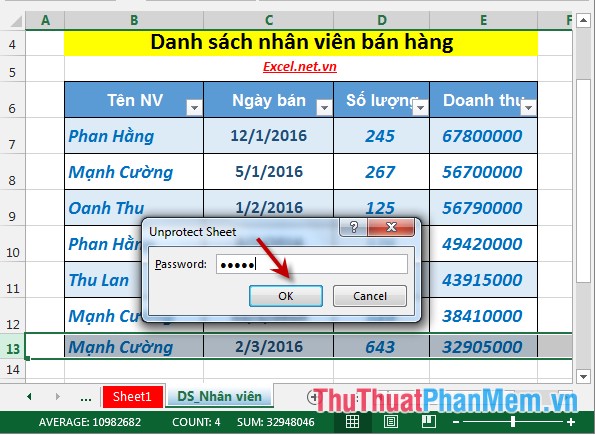
- The Unprotect Sheet dialog box appears -> enter the password created in the previous step to protect the worksheet -> click OK:
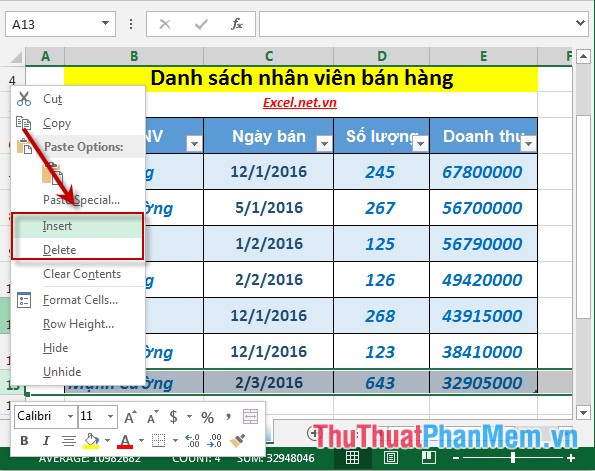
- After Unprotect sheet is finished, go back to the worksheet and check the Insert and Delete features:
The above is a detailed guide on how to protect spreadsheets in Excel 2013.
Good luck!
Was this article helpful?
Your feedback helps us improve.
Related Articles
 8 Ways to Use Excel Beyond Spreadsheets8 minutes read
 How to open multiple spreadsheets side by side in Excel 20133 minutes read
 Guide to cleaning up Excel data tables3 minutes read
 8 Excel Spreadsheet Tips for Teams4 minutes read
 5 source to get macro to automate Excel spreadsheets7 minutes read
 Tips with spreadsheets (sheet) in Excel4 minutes read
Reader Comments 0
Sign in with email or Google to join the discussion.