How to insert Excel into CAD quickly and correctly
Instead of calculating in CAD, we usually calculate the size of the drawing through Excel and insert the Excel file into the CAD. If you do not know how to insert Excel into CAD, you should follow the tutorial below!
Table of Contents
Instead of calculating in CAD, we usually calculate the size of the drawing through Excel and insert the Excel file into the CAD. If you do not know how to insert Excel into CAD, you should follow the tutorial below!

1. Insert Excel into AutoCAD with the Copy / Paste command
This is the simplest way to insert Excel into AutoCAD with just Copy and Paste. Proceed as follows:
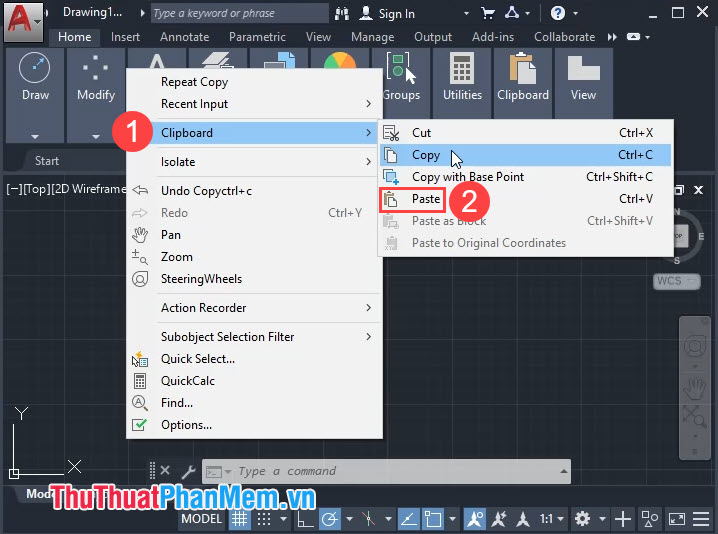
Step 1: Right-click the Excel file to insert (1) and select Copy (2) .

Step 2: Open AutoCAD and right-click on the desktop => Clipboard (1) => Paste (2) .
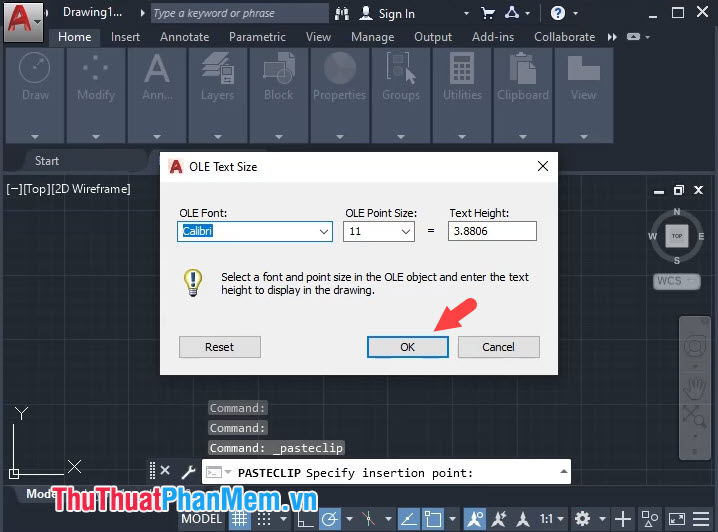
Step 3: Left click and create a table space to insert data from Excel.

Step 4: After a notice appears, click OK to finish.
And finally we have the complete Excel table inserted into AutoCAD as shown below.

2. Insert Excel into AutoCAD with Data link
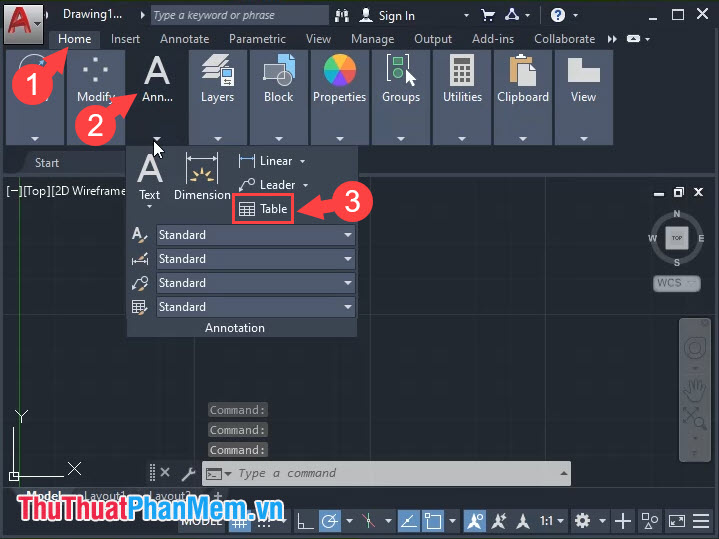
Step 1: Click the Home tab (1) => click on the letter A icon (2) => Table (3) .
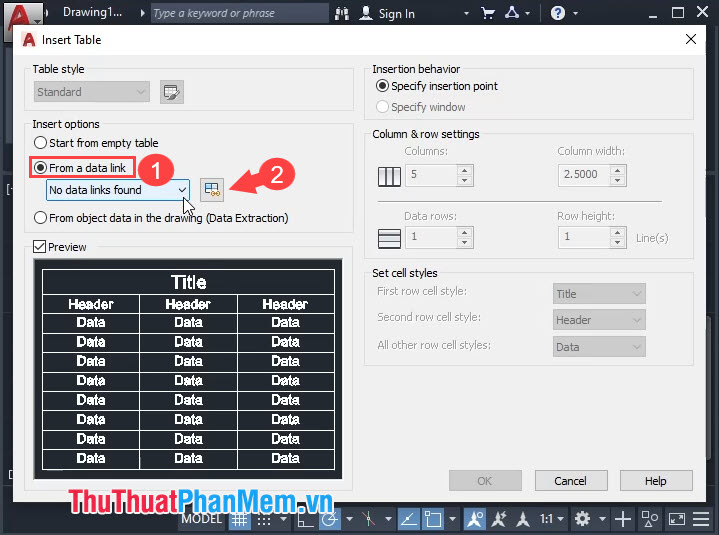
Step 2: Select the item From a data link (1) => Click on the Browser icon (2) .
Step 3: Next, click on Create a new Excel Data Link .

Step 4: You name the Data link (1) and click OK (2) .

Step 5: A new dialog box appears, click the Browse button to open the Excel file from the computer.

Next, select the Excel file to insert (1) => Open (2) .

Step 6: Click OK to finish creating the Data link.

Step 7: A new dialog box appears, select the linked Excel file (1) => OK (2) .

Step 8: You continue to click OK to finish.

And finally you will have the Excel table inserted in AutoCAD and we can edit the table easier and more fully than the way 1.

By sharing how to quickly and correctly insert Excel into CAD, we can easily calculate and bring the data into the most standard and most beautiful CAD. Good luck!
Was this article helpful?
Your feedback helps us improve.
Related Articles
 Insert line shortcut in Excel - Shortcut insert Excel4 minutes read
 Quickly insert multiple images at once in Excel4 minutes read
 How to insert a Word document into an Excel file3 minutes read
 How to insert tick marks into Word and Excel quickly3 minutes read
 How to insert a SmartArt object in Excel2 minutes read
Reader Comments 0
Sign in with email or Google to join the discussion.