Table of Contents
This guide explains how to merge 2 Images into 1 Frame in Word, with clear steps, practical tips, and important checks before you begin.

1. Merge two images into a frame using Table
To be able to combine two images into one frame, we can choose to insert the Table table and then insert the image into the table frame.
First you need to insert the table into Word already.
Open the Insert ribbon on the Word toolbar, then click the Table icon in the Tables group. You click on the first square of the display table to be able to choose to insert a table with only one cell (this will be our frame).

After the table is inserted into Word, click on the table and press Enter to be able to create two adjacent lines in the table.

Next, place the mouse pointer on the first line in the table, click the Insert ribbon on the toolbar and select Pictures in the Illustrations group.

Then you select the image in the computer folder to insert pictures into Word. After you have inserted the first image, click the mouse pointer so that the cursor is at the beginning of the second row in the table.

Continue to insert the second picture in the computer folder like the steps we did when inserting the first picture.
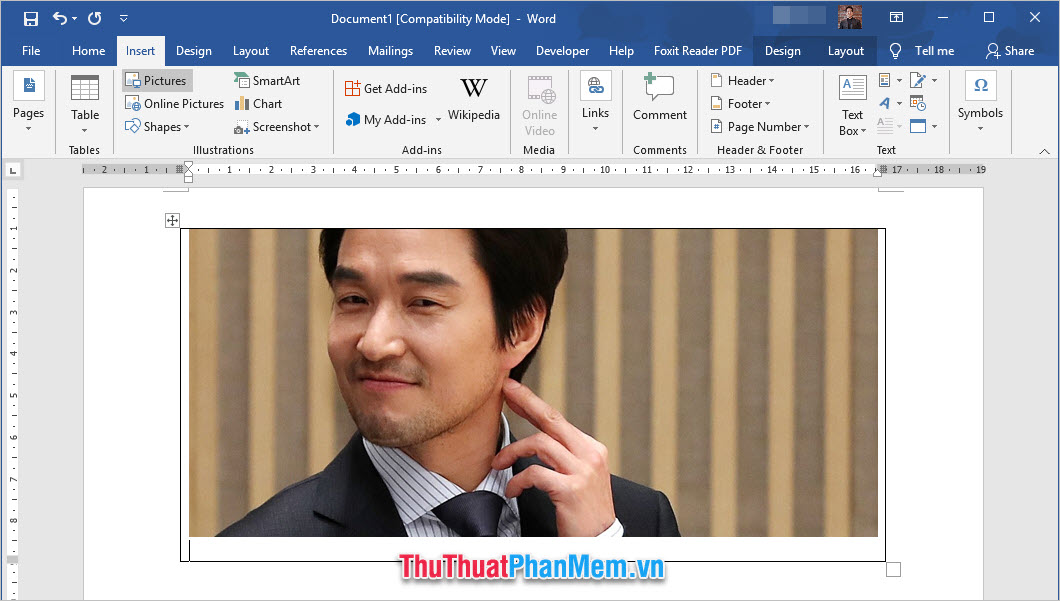
Now you have two inserted images in a table cell that is our frame.

You can now change the image of the frame border by clicking the plus icon in the top left corner of the Table frame to be able to black out the entire frame.

After blacking out, if Word doesn't automatically bounce the ribbon, you can click the Design ribbon in the Table Tools folder (rightmost) to be able to adjust the table design format.
You can change the color of the table borders by clicking on Border Styles .

After clicking a bright border, your cursor will change to a pen, now you can hover and drag on the borders of the table to change the format for each edge.

Or you can choose how to change the entire table border borders by clicking on Borders and select All Borders .

You can also change the different shapes of borders such as connecting borders, dashed dashed lines, seam borders, dark borders, etc.

You can also change the thickness of the borders with different pixel levels.

The result is that you can combine 2 images into 1 frame in Word is quite simple but also very beautiful:

2. Merge 2 images into 1 frame using Text Box
In addition to Table, you can also combine 2 images into 1 frame using Text Box.
To insert Text Box into Word, click Open Insert ribbon in Word toolbar.
Next, click on the Shapes icon in the Illustrations group, then select the Text Box icon in the list displayed by Shapes .

You drag and create the Text Box on the interface of Word. Next, you click on the Text Box frame so that the mouse pointer can be in this frame.
Next, you insert the image into the Text Box by opening the Insert ribbon on the toolbar and selecting Pictures in the Illustrations group.

You select the image in the computer folder to insert into the Text Box and continue to insert the second photo in the selected location in the Text Box .
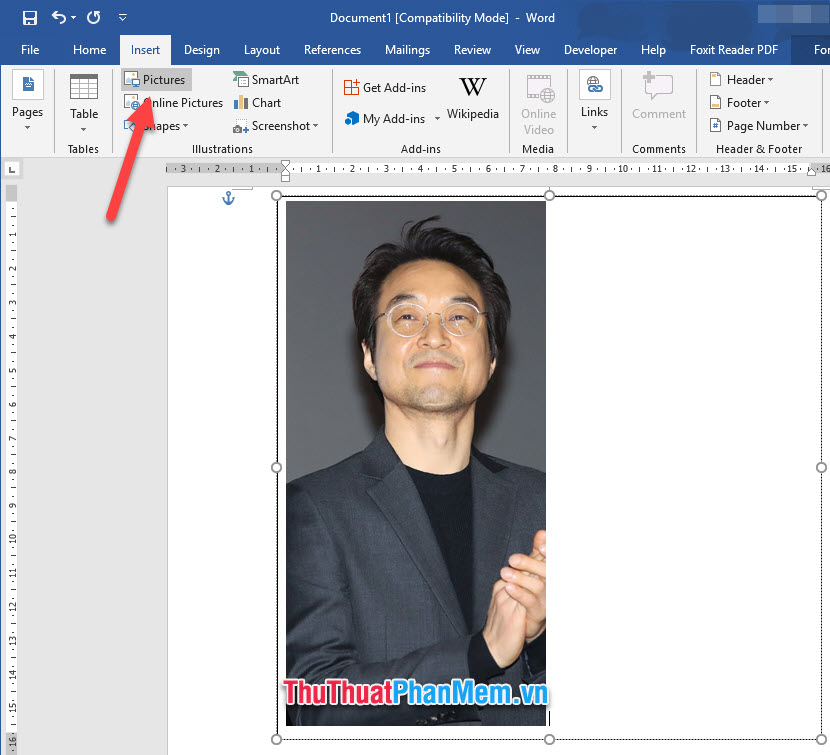
You can customize the size of the image by clicking on the image and stretching the length of its width to fit the size you want.
To change the shape of the border, click on the border of the Text Box border.

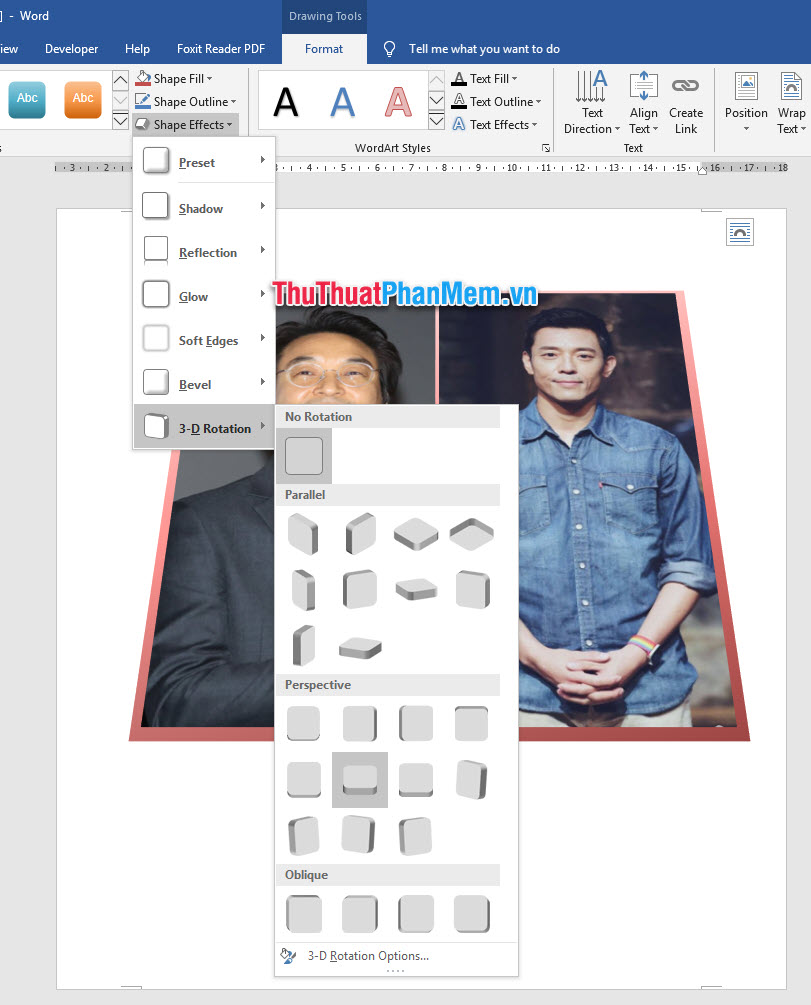
Next you open the Format ribbon of Drawing Tools . In this ribbon, you can choose different styles for the Text Box palette in Styles .

You can also choose additional options for the Text Box frame by changing the options at the side, such as Shape Fill , Shape Outline or Shape Effects .
Thank you for reading and following our article TipsMake. com on How to combine 2 images into 1 frame in Word. Wish you can successfully implement this procedure in the most convenient and fast way. See you in the following tutorial tips.
FAQ
What should I know about Merge 2 Images into 1 Frame in Word?
Focus on the key features, requirements, limitations, and practical use cases explained in this guide.
How do I get the best results with Merge 2 Images into 1 Frame in Word?
Follow the recommended steps, use current software or information, confirm compatibility, and review settings before major changes.
Are there any risks or limitations?
Potential limitations depend on compatibility, data quality, cost, privacy, support, and how the product or method is used.
Related Articles
 How to Merge Messages That Contain Images in Word 20168 minutes read
 How to Show the Alignment Frame in Word: Step-by-Step Guide4 minutes read
 How to Merge Text, Merge Mail Merge Messages in Word 2016: Mix Text6 minutes read
 Nested Frames and Effects for Images in Word3 minutes read
 Merge Multiple Photos into One Common Frame Using GIMP5 minutes read
 How to Merge Mail (Mail Merge) in Word: Step-by-Step Guide4 minutes read
Reader Comments 0
Sign in with email or Google to join the discussion.