Table of Contents
This guide explains how to record and Record a PowerPoint Presentation, with clear steps, practical tips, and important checks before you begin.
* Note: In this tutorial, I use PowerPoint 2016. With other versions, you can do the same, but the interface may be slightly different.
How to record and record video using PowerPoint
Step 1: Open the Slide Show tab, click the extended arrow of Record Slide Show . There are two options: Start Recording from Beginning. (record from the beginning) and Start Recording from Current Slide. (record from the current slide). You choose one or the other at your disposal.

The program asks what you want to record. Leave all checked and then press Start Recording to start recording / recording.

Step 2: Record your presentation for the first slide and then click Next to move on to the next slide, doing so until the last slide.

During the process of recording / recording each slide, you can pause at any time. And if your last presentation was wrong, click Repeat to re-present the slide.

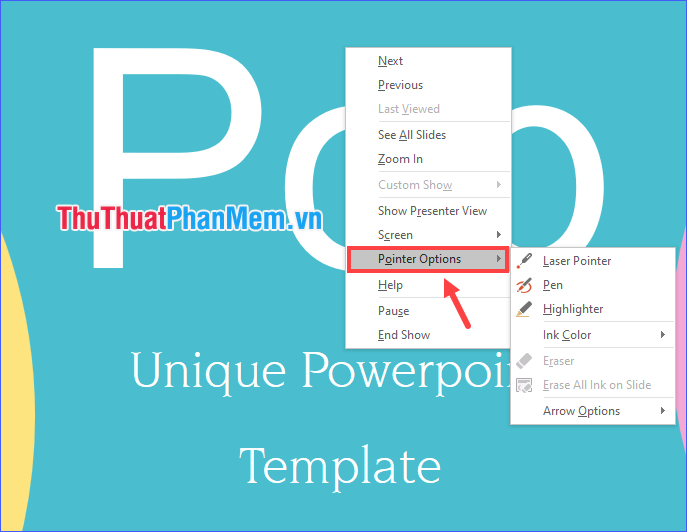
While presenting a slide, you can turn the mouse pointer into a laser pen to point to the content being presented, or turn into a writing pen or highlight pen to mark the points to note, emphasize (right-click on the slide is showing, hover over Pointer Options and then choose a pen style).
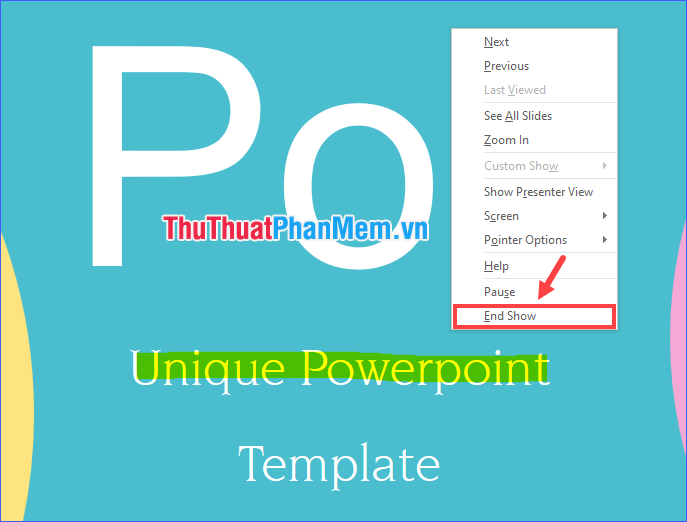
Step 3: Display all slides or you can end the recording / recording midway by right-clicking on the slide currently showing and selecting End Show .
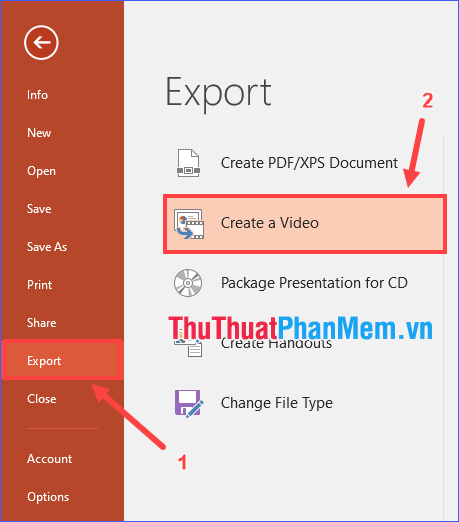
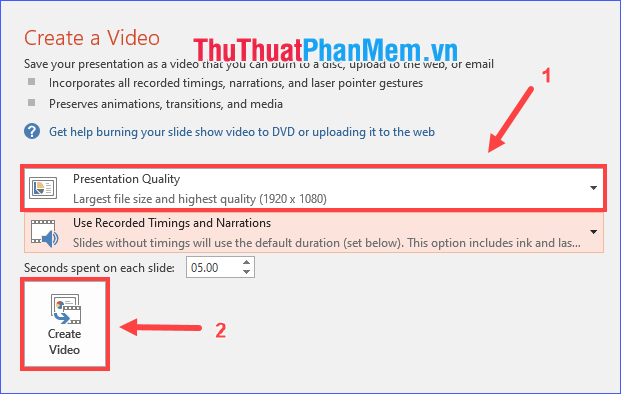
Step 4: Publish what you just recorded into a video. Click File , select Export > Create a Video .

Choose a quality for the video and then click Create Video .
Finally select the folder to contain the resulting video.
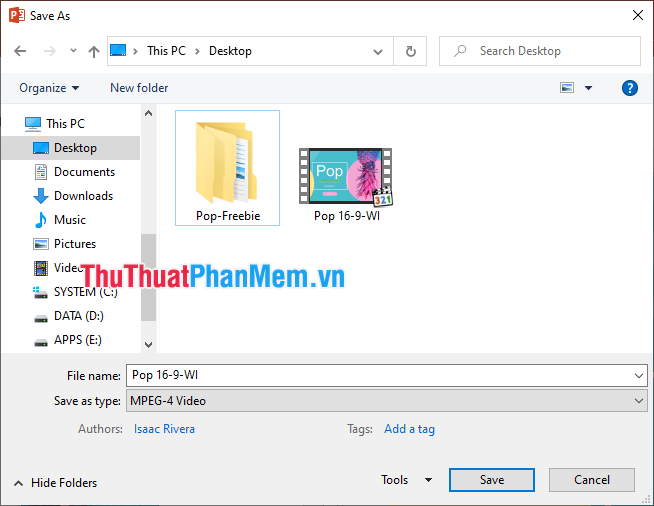
After PowerPoint has finished processing, open the video and enjoy your presentation!

Through the article above, I have detailed instructions on how to record and record a PowerPoint presentation. No need for an extra app, just PowerPoint (and a recording device if you need to give a speech) you can record your entire presentation as a video so you can play it later. anywhere. I wish you successful implementation!
FAQ
What should I know about Record and Record a PowerPoint Presentation?
Focus on the key features, requirements, limitations, and practical use cases explained in this guide.
How do I get the best results with Record and Record a PowerPoint Presentation?
Follow the recommended steps, use current software or information, confirm compatibility, and review settings before major changes.
Are there any risks or limitations?
Potential limitations depend on compatibility, data quality, cost, privacy, support, and how the product or method is used.
Related Articles
 PowerPoint 2016: Rehearse and Record Your Presentation6 minutes read
 Rehearsal and Record Presentations in PowerPoint 20166 minutes read
 How to Record and Record PowerPoint Slides: Record Slide Show5 minutes read
 PowerPoint 2019 (Part 25): Evaluating Your Presentation: Explained5 minutes read
 PowerPoint 2019 (Part 3): Saving Your Presentation: Explained10 minutes read
 Microsoft PowerPoint Is About to Have a Feature to Record3 minutes read
Reader Comments 0
Sign in with email or Google to join the discussion.