How to insert a SmartArt object in Excel
The following article introduces you in detail how to insert SmartArt objects in Excel 2013.
Excel has a tool to help you with SmartArt images that allows you to build complex diagrams quickly and easily. To insert SmartArt objects, do the following:
1. Insert a SmartArt object.
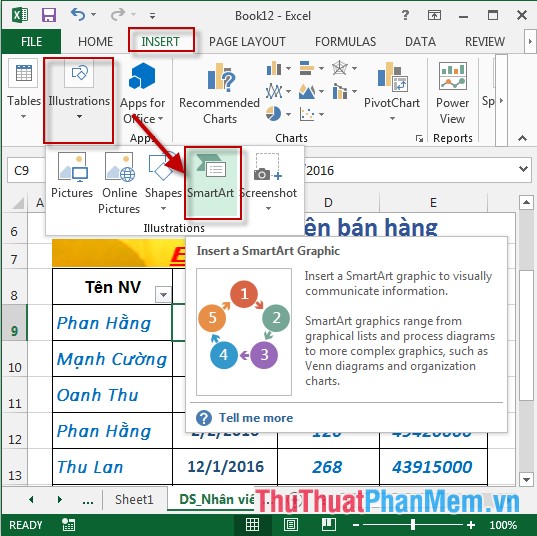
Step 1: Select the location to insert -> into Insert -> illustration -> SmartArt:
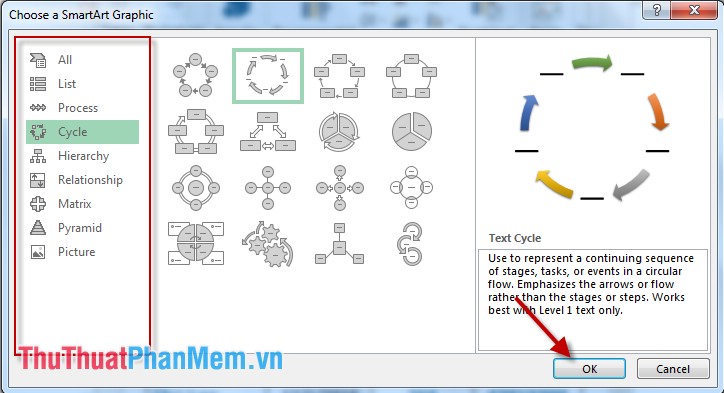
Step 2: The dialog box appears select the objects according to your requirements -> click OK:
Step 3: The Type your text here dialog box appears, enter the text objects you want to display on smartArt.

After entering the text, the result is:

2. Edit SmartArt:
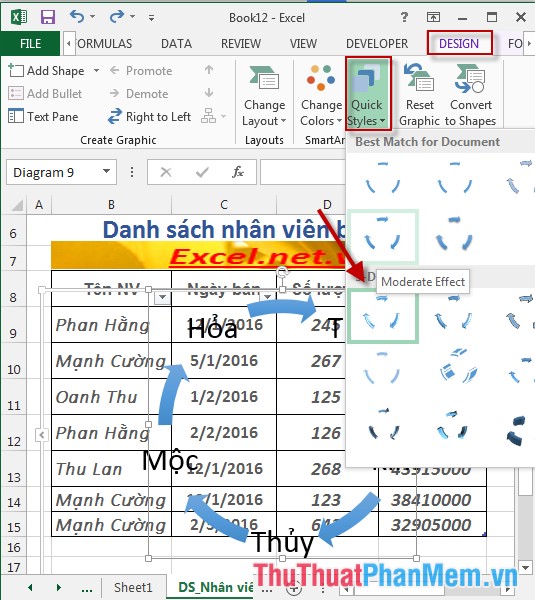
- Change SmartArt style : Click SmartArt object -> Design -> QuickStyles -> choose SmartArt style :
- Change the display type for SmartArt: Click SmartArt object -> Design -> Changelayout -> choose another layout for SmartArt:

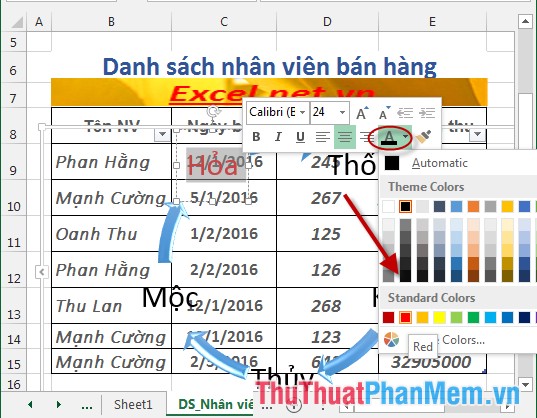
- Change the font style and font color in SmartArt: Click the text option -> display the quick support toolbar for the font -> click the Color icon -> choose a color for the text
- After editing SmartArt, the result is:
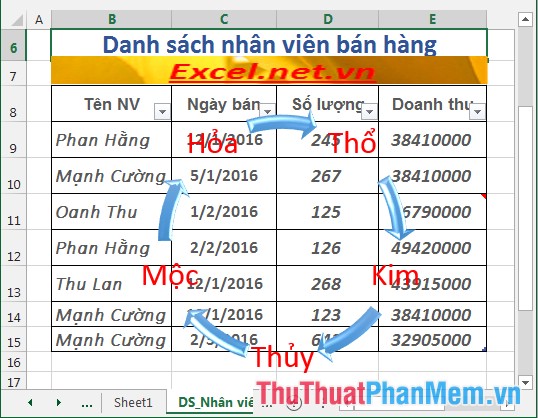
Above is a detailed guide to you how to insert SmartArt objects in Excel 2013.
Good luck!