How to insert WordArt in Excel
To enhance the art as well as the professionalism of the data sheet in Excel, users can insert WordArt artistic text into the document file. Although most Excel data files, we will focus on working and processing data and tables, but adding WordArt to the content will also increase the efficiency of the data file. Viewers will pay more attention to the content that we create artistic text. WordArt insertion in Excel is similar to when you insert WordArt in Word or insert WordArt on PowerPoint. The following article will guide you how to insert WordArt into Excel.
- How to create Text Box in Excel
- How to draw a straight line, draw an arrow in Excel
- How to insert watermark, logo sink into Excel
- How to insert text into images in Excel
Guide to creating art letters on Excel
Step 1:
In the Excel data sheet, users click on the Insert tab and then select the Text item to insert WordArt . There are many different artistic fonts for us to choose to use.

Step 2:
Enter the text in the art writing box as shown below.

Step 3:
Next, you black out the entire content and display the frame to adjust the format for the word art. They can change the font, font size or color for the text if desired.

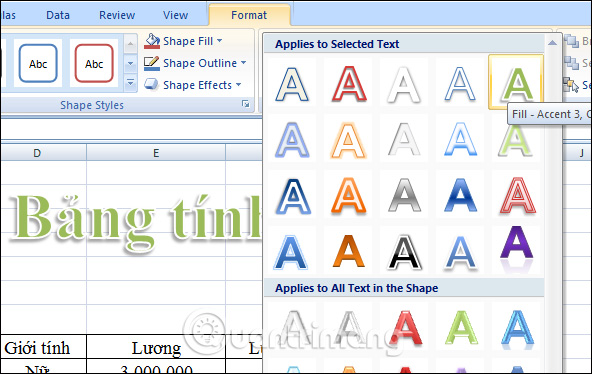
In case the user wants to change the art font, black out the text and click on Format, in the WordArt Styles section, click on the arrow to expand.

Click on the new artistic font to re-apply to the datasheet. When we hover over any new typeface, it will be applied immediately to preview the font.

Step 4:
Continuing to edit the text in the Shape Styles section will have 3 different text formatting editing items.
- Shape Fill: Select the color for the text.
- Shape Outline: Select the border color for the text.
- Shape Effect: Create text effects.

For example, when changing the background color for text, there will be colors like below. When hovering over colors, you can preview how colors are applied on text boxes to choose the right color.

Step 5:
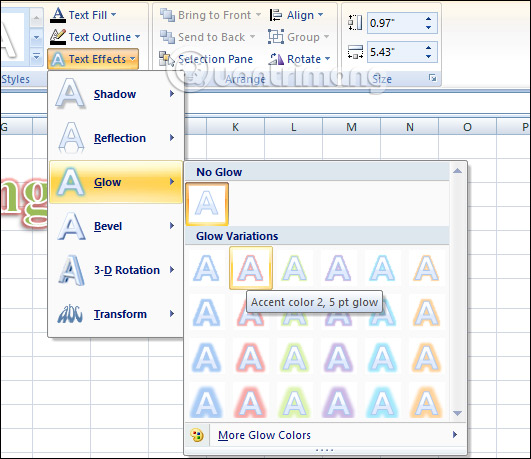
To edit Word Art content select Word Art Styles with different editing options.
- Text Fill: Color for text.
- Text Outline: Border color for text.
- Text Effect: Create text effects.
Which effect do you use, click on that effect to apply to WordArt text content.

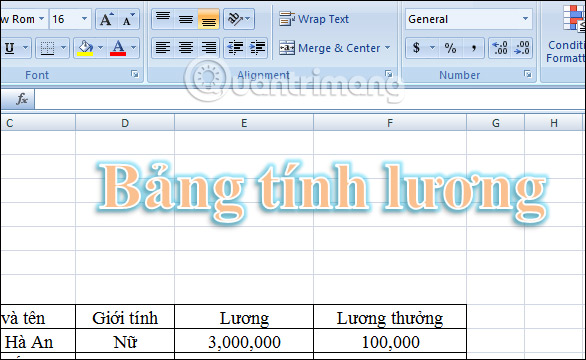
The final result after applying the effects is that WordArt will look like the image below.

In general, the operation to insert WordArt into Excel is not different when we insert other editing tools. You still have items to change the font or adjust the text color, text border color, . When adding WordArt text in the content, the document will definitely be more prominent.
I wish you all success!