Table of Contents
Understanding Excel requires more than a headline. The overview below breaks down the key facts, changes, and user impact.
1. Working with Lines in Excel
If You Want to Add a LINE:
- With the insert LINE, the new LINE will be inserted above the current LINE.
- Method 1: Place the cursor at the LINE to insert, go to Insert> Rows.
- Method 2: Click the right mouse button to enter the name of the LINE to insert, select Insert

- Method 3: Right-click on the cell at the LINE to insert, select Insert > select Entire rows > Ok

To Delete the LINE:
- Place the cursor at the LINE to delete, go to Edit > Delete. > select Entire row > Ok.
- Right-click on the LINE name to delete, select Delete

If You Want to Hide or Show the LINE:
Sometimes with spreadsheets that are too long you need to hide some unfamiliar lines that are easy to control, you do the following:
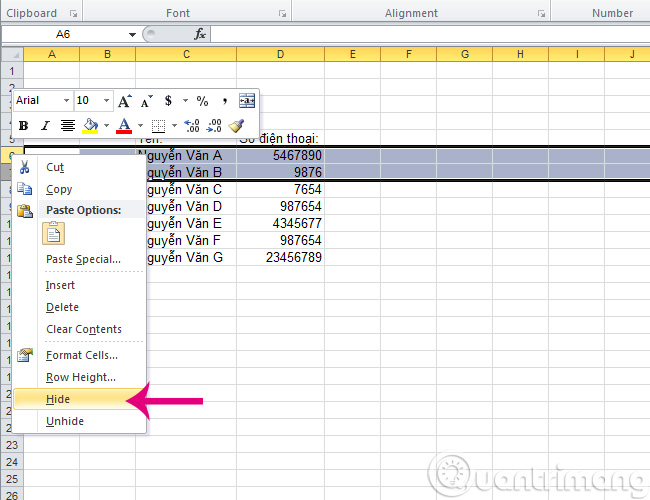
- Black out the lines to hide, go to Format > Row > Hide or right-click and choose Hide:
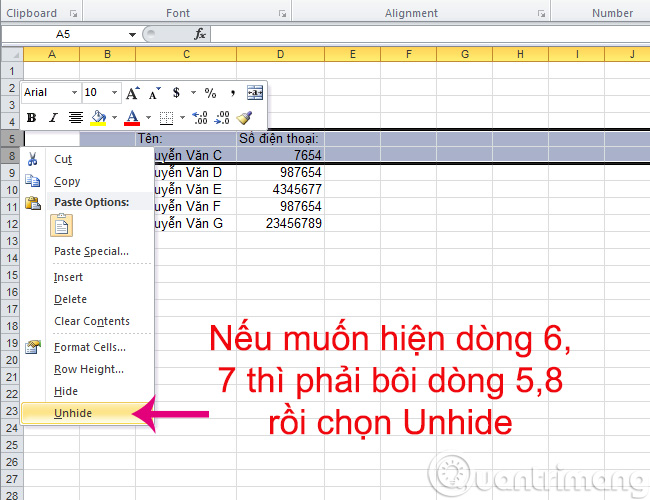
- When you need to review the hidden lines, blacken the two lines adjacent to the hidden area (if hiding lines 3 and 4, you must highlight lines 2 - 5) -> go to Format > Row > Unhide. ( Another way is to right-click and choose Unhide):
LINE Height:
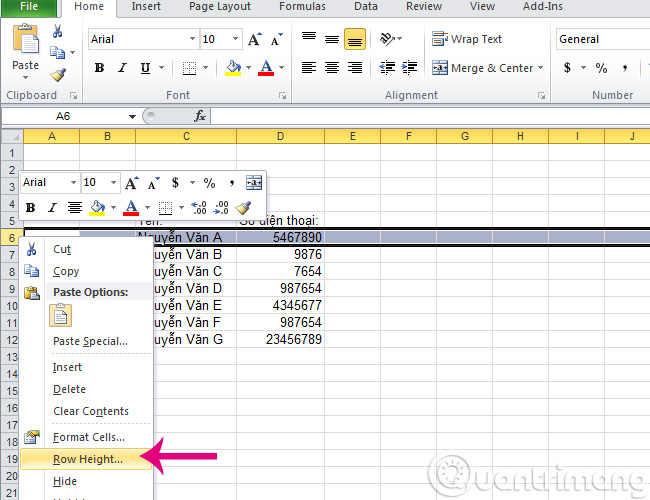
If you want to change the height of the LINE, you can use the mouse pointer to enter the LINE separating the two LINE names and drag it or you can do the following:
- Go to Format > Row > Height, type the height of the LINE> Ok, or right-click and select Row Height as shown below:
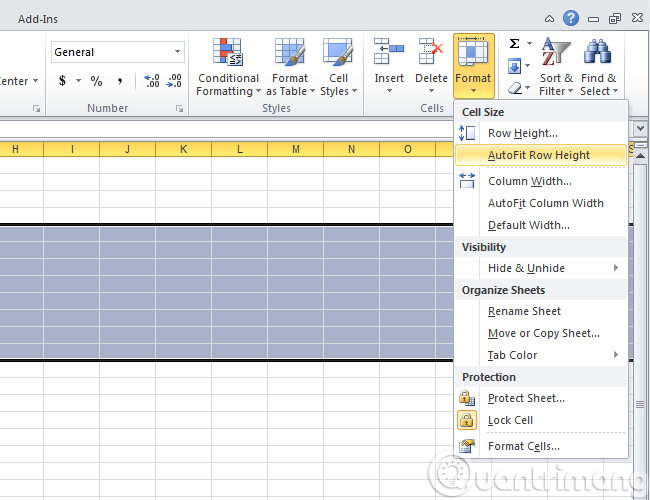
- You can fix the height of the cell corresponding to the data in the cell by going to Format > Row > AutoFit or double-clicking on the LINE between two LINE names. With Excel 2010 and above, select the Home> Format> AutoFit Row Height tab as shown:
2. Manipulate Columns in Excel
To Add a Column:
With column insertion, the new column will be inserted to the left of the current column:
- Method 1: Place the cursor at the column to insert, go to Insert > Columns.
- Method 2: Click the right mouse button to enter the column name to insert, select Insert.
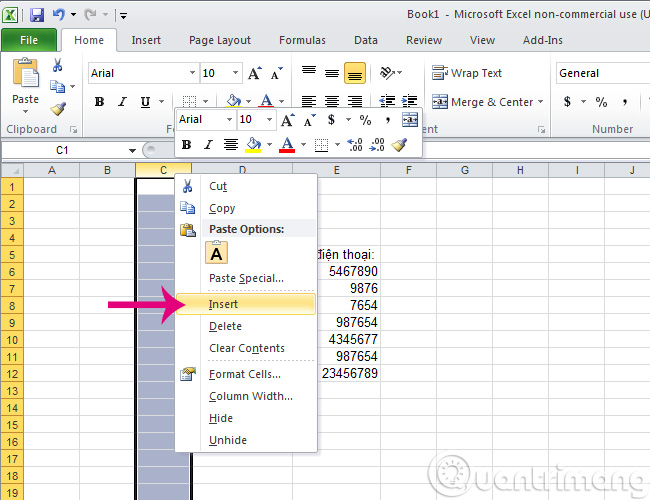
- Method 3: Right-click the cell in the column to insert, select Insert > tick Entire columns > Ok.
To Delete a Column:
Place the cursor at the column to delete, go to Edit > Delete. > select Entire column > Ok.
Right-click on the column name to delete, select Delete.
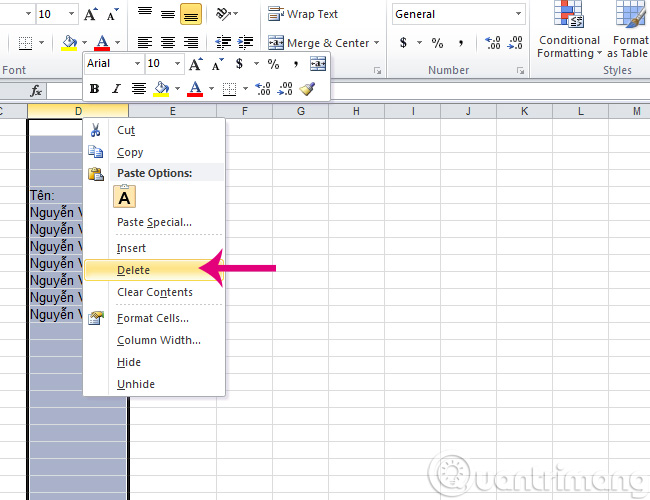
To Hide, Show the Column:
Sometimes with spreadsheets that are too wide you need to hide some unnecessary columns for easy control, you do the following:
- Black out the columns to hide, go to Format > Column > Hide
- When you need to review the hidden columns, you blacken the two columns adjacent to the hidden area (if hiding columns C, D and E, you must highlight the column BF) -> go to Format > Column > Unhide.
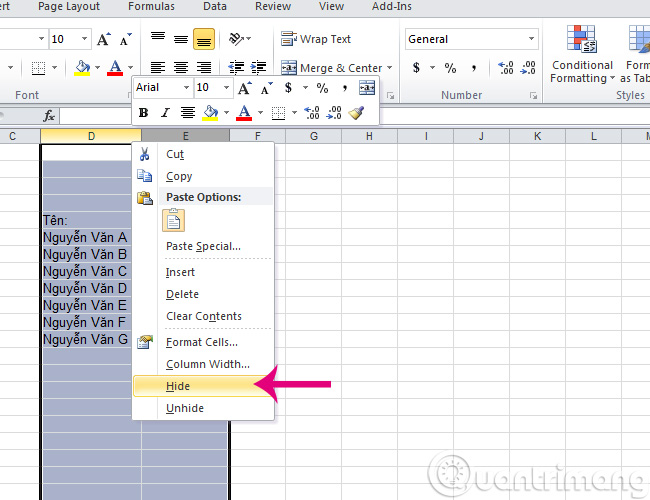
Adjust the Width of the Column:
If you want to change the width of the column, you can use the mouse pointer to enter the LINE separating the two column names and dragging, or you can do the following:
Go to Format > Column > Width., type width> Ok:
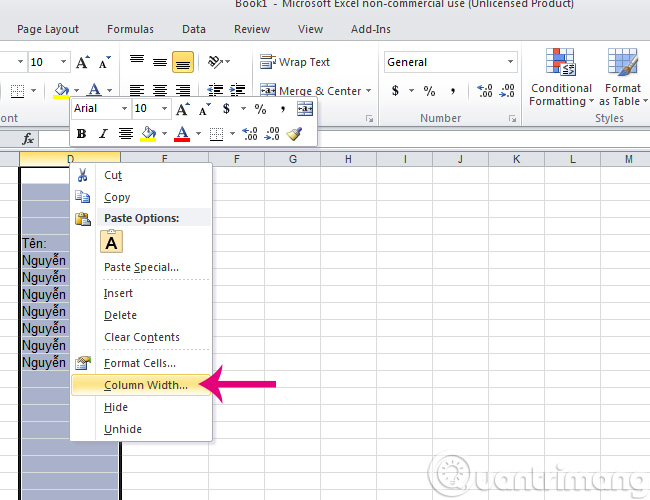
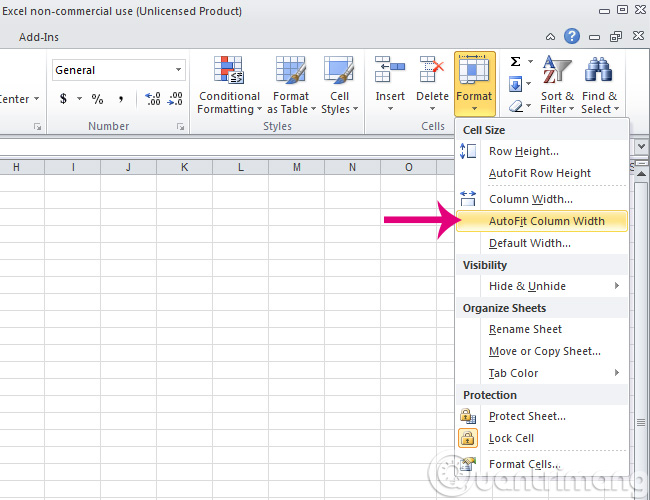
You can fix the width of the column corresponding to the data in the column by going to Format > Column > AutoFit Selection or double-clicking the divider between the two column names. From Excel 2010 and above, go to Home> Format> AutoFit Column Width tab as shown below:
3. Working with Cells:
To Insert a Cell:
Place the cursor in the cell to be added, go to Insert > Cells. Or right-click the cell to add select Insert
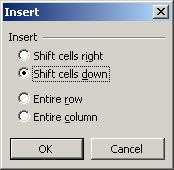
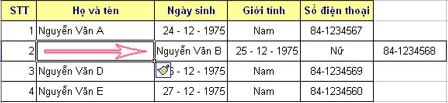
- Shift right cells: inserting cells and pushing data to the right
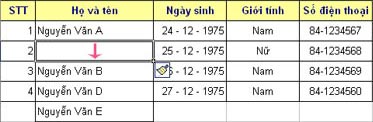
- Shift cells: Insert cell and data will be pushed down
To Remove Cells:
Place the cursor in the cell to be deleted, go to Edit > Delete. Or right-click the box to delete Delete.
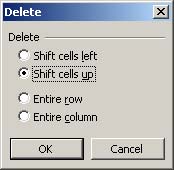
- Shift cells left: Delete a cell and the data will be left to the left
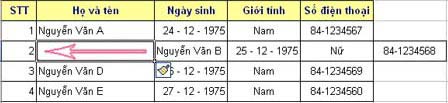
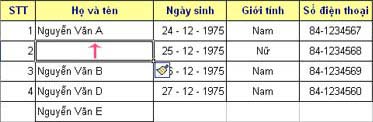
- Shift cells up: delete cells and drag data from the bottom up
4. Manipulating Sheet (Worksheet):
If You Want to Add a New Sheet:
- The new Worksheet will be added to the left of the current Sheet.
- Method 1: Go to Insert > Worksheet.
- Method 2: Right-click the sheet name, select Insert. > select Worksheet > Ok:

So What If You Want to Add a Sheet as a Copy from Another Sheet?
In essence, this work is that you create a new sheet whose contents are exactly the same as the existing sheet, manipulating the following:
- Right-click on the sheet name you want to copy and choose Move or Copy.
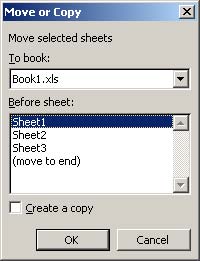
- To book: is the file name containing the original Sheet.
- Before sheet: is the new Sheet location in the previous sheet (in this example, either Sheet1 or Sheet2 or Sheet3 or last placed.
- Create a copy: Is it possible to create a copy, if you do not select this option, the work you do only has the effect of moving the Sheet.
To Move and Rename Sheet:
- You can follow the above method to move the sheet or simply use the mouse to drag a certain sheet to the required location.
- If you want to rename a sheet, double-click the sheet name or right-click the sheet name to change it to Rename.
To Delete the Sheet:
Note that when you delete a sheet, you cannot redo it, so before deleting the sheet you must be sure.
- Method 1: Double-click on the sheet to delete, select Delete.
- Method 2: Select the Sheet to delete, go to Edit > Delete Sheet
So with the content of this article, if you read each item carefully, it is only a matter of practice to completely master the spreadsheet. You can use the previous exercise to do some basic operations with your spreadsheet.
Good luck!
FAQ
What is the main topic of MS Excel - Lesson 4: Working with Lines, Columns, Sheets?
Understanding Excel requires more than a headline.
Why is Excel important?
The overview below breaks down the key facts, changes, and user impact.
What should readers remember about Excel?
Working with Lines in Excel If You Want to Add a LINE: With the insert LINE, the new LINE will be inserted above the current LINE.
Related Articles
 How to Convert Columns into Rows and Rows into Columns in Excel3 minutes read
 MS Excel 2003 - Lesson 1: Get Familiar with Microsoft Excel6 minutes read
 How to Quickly Delete Multiple Sheets in Excel3 minutes read
 How to Fix Columns and Headlines in Excel: Step-by-Step4 minutes read
 How to Link Data Between Spreadsheets in Google Sheets4 minutes read
 Instructions for Deleting Empty Lines and Columns in Excel 20163 minutes read
Reader Comments 0
Sign in with email or Google to join the discussion.