Quickly insert multiple images at once in Excel
Excel is useful and easy to use software for all users. The software meets most of the statistical reporting needs of analyzing and synthesizing data, but there are many developers of additional software for Excel to improve the usefulness. Today Dexterity Software will guide you how to quickly insert rows of images at once in Excel with the tool Ablebit for Excel.

Excel also has the Insert Picture tool for inserting images, so why did Software Tips choose Ablebits to recommend readers? Dexterity Software will perform the insertion of multiple images at once with two ways for you to read and compare!
Insert multiple images with the Insert Picture tool
First, the Software Tips show you how to insert multiple images using the Insert Picture tool available in Excel.
Step 1: Select the cell you want to insert the image => Click the Insert tab (1) => Click the arrow below the Illustration icon (2) => Select the Pictures (3) section .

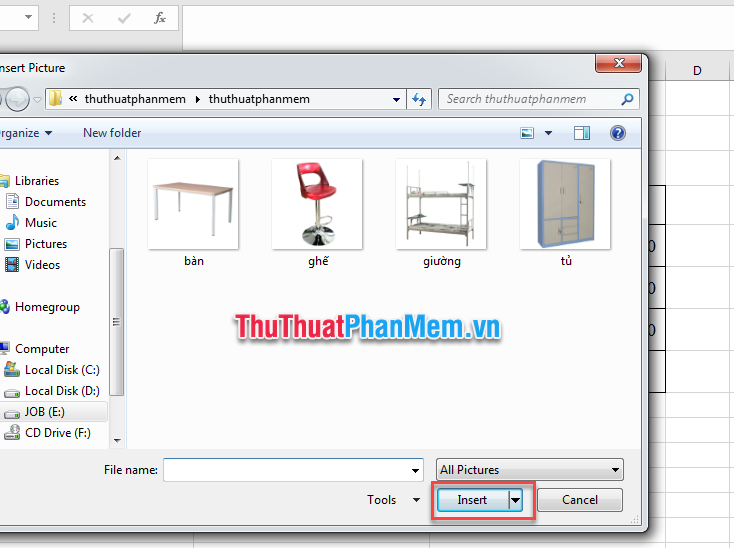
Step 2: Insert Picture window appears. You choose the path to where to save the image you want to insert. Select the images to insert and press the Insert button .

Step 3: The selected images have been added in Excel. However, the position and size of the images are not automatically adjusted to the right cell.

Step 4: You have to adjust the images one by one to match the cells in the worksheet.

Insert multiple images with Ablebits Tools
How to download and install Ablebit for Excel
You can download the software here: https://www.ablebits.com/
After installing the Add-in Ablebits for Excel , turn off the Excel software (if opened before) and turn it back on. On the Ribbon of Excel will display an additional tab for Ablebits Tools .

Use Ablebits Tool to batch insert images at once
Step 1: Select the first cell you want to insert the image. On the Ablebits Tool tab (1) => Click the arrow under the Illustration icon (2) => Select the Insert Pictures icon (3) => If you want to add the image vertically select Vertical ; if you want to insert the image horizontally select Hozirontally (4) => Select Specify Height (5) to adjust the width of the cell and the size of the image to suit the presentation of the report.

Step 2: The Specify Height window appears. You type the height of the line you want to adjust and then press the Next button . (1cm is equivalent to 37.7 pixels).

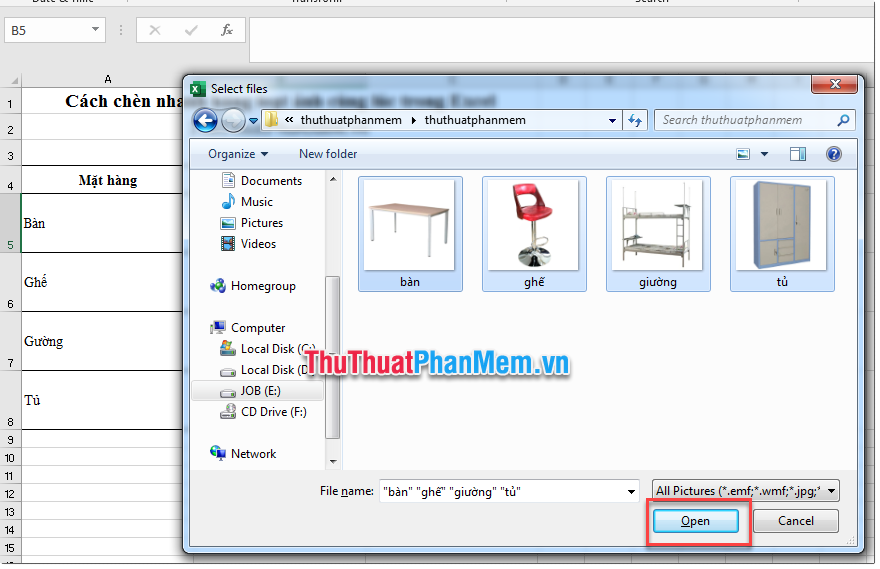
Step 3: Select file window appears. You choose the path to where to save the image you want to insert. Select the images to insert and click the Open button .

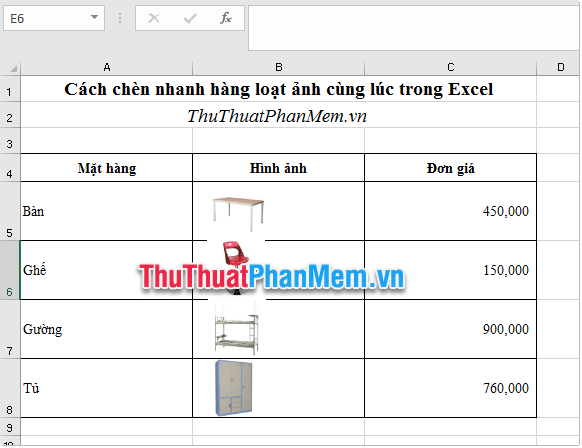
Step 4: The images to be inserted automatically are aligned to the height of the cell you have installed.

Comparing the steps and results of the above two methods, you can see that using the Ablebits Tool is simpler, faster and more useful than inserting images using the usual Insert Picture tool in Excel. Hope this article is helpful for you to read. Good luck!