How to insert a batch image into Excel box
To insert images into cells in Excel, you have many different ways to perform them, manually or using formulas.
Table of Contents
Inserting images on Excel is not a complicated operation, is a very simple operation on Excel. We can also insert images into cells with the usual way. For those who often have to synthesize employees, goods statistics, it is very good to have to insert the attached photo.
If the data file is short, we can do it manually, click the Insert button. But if it is a long table of information, it will take a lot of time to do it in this way. The following article will guide you how to insert images into cells in Excel.
- How to insert text into images in Excel
- Instructions for inserting a PDF file into Excel spreadsheet
- How to insert watermark, logo sink into Excel
Instructions for inserting images into cells in Excel
Method 1: Insert images into Excel manually
Step 1:
In the box to insert the image click the Insert button and then select Picture .

Step 2:
Click on the image to insert into the box. In Format look down the Size item, select the arrow icon on the square .

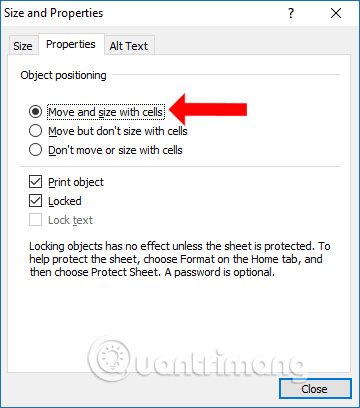
Display the interface Size and Properties dialog box, click on Properties , continue to click the Move and size with cells option to adjust the image size to the cell size.
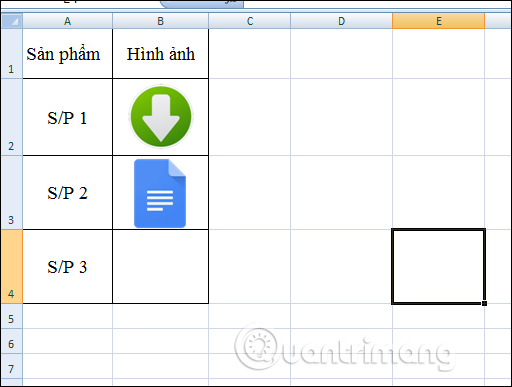
Now edit the image in the box and it will look like the image below.
Method 2: Insert bulk photos into Excel box
As mentioned, doing this method will only apply to a small table of data, insert and edit fewer images. If the long data needs to be inserted at the same time, you should follow the procedure below.
Step 1:
First you put all the images you need to insert into Excel in the same folder. Then copy the image folder path to Notepad to use.
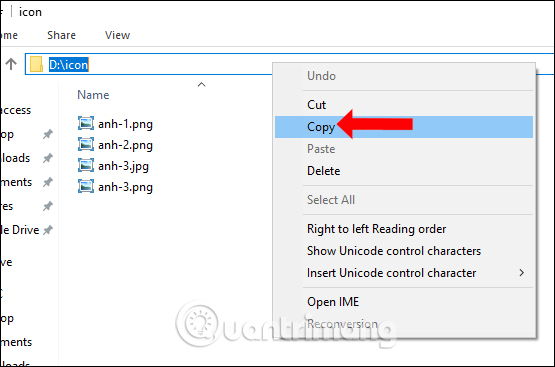
Note that the user should display the image format for ease of implementation. How to display the image of the reference reader in How to hide files, show hidden files, view hidden folders and file extensions on Windows 7/8/10?
Step 2:
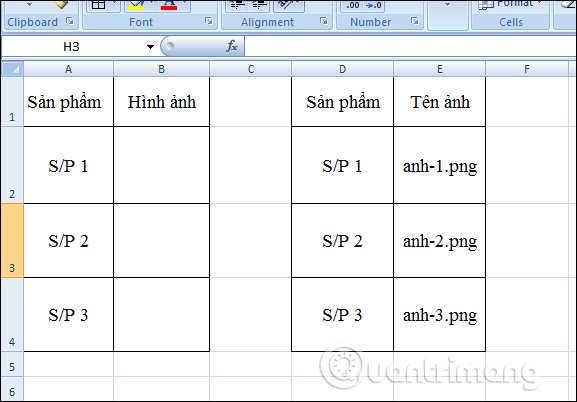
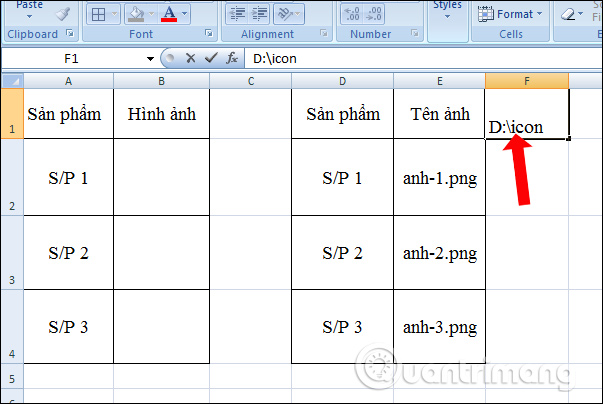
In the Excel file, we need to create a column with the product name corresponding to the name of the image. The image name column must be entered correctly with the image name you need to insert into Excel, including the image format as shown below.
Next paste the path of the image folder into any cell in the Excel file.
Step 3:
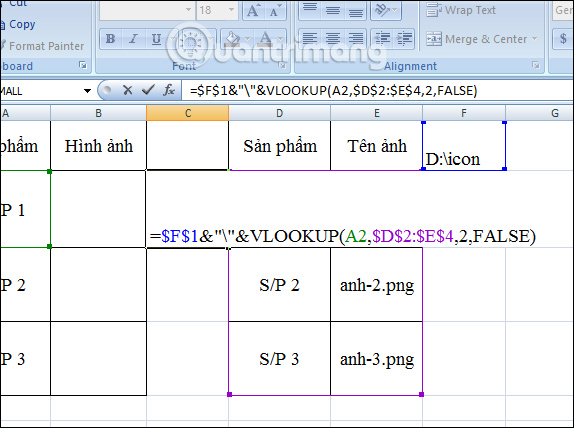
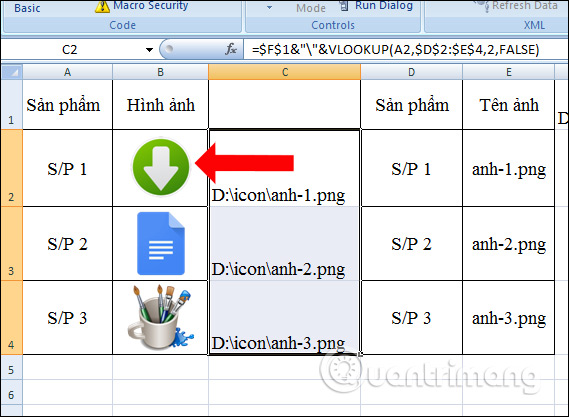
In the column between the 2 user tables enter the formula = & '' & VLOOKUP (product name; product name value corresponding to the image; 2; FALSE) and press Enter. Image path values, product names corresponding to images, you need to use the F4 key to fix the formula.
With the data table below, there will be the formula = = F $ 1 & '' '' & VLOOKUP (A2, $ D $ 2: $ E $ 4.2, FALSE).
Step 4:
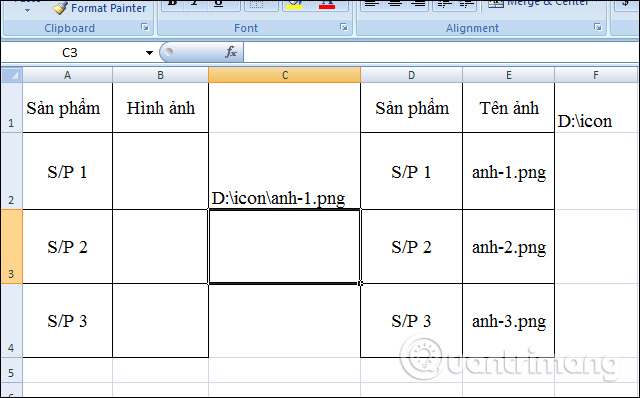
The result displayed will be the path of the photo folder with the image name.
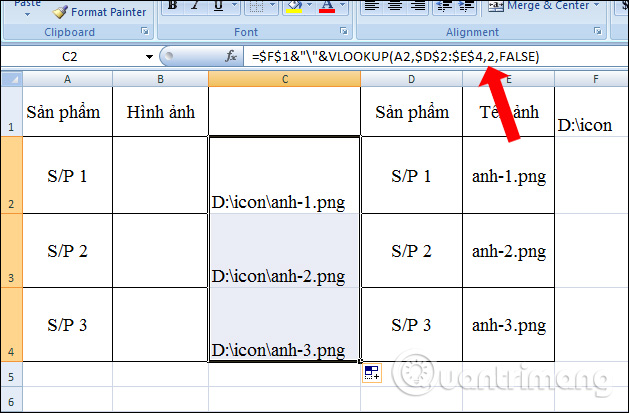
Continue dragging the first cell below to copy the formula and get the complete image path column as shown below.
Step 5:
Users access the link below to download the xlsm Macros file to their computer and open the file in Excel.
https://mega.nz/#!9MZRwCBT !x7wWj1NUjEE57f3sb6bGKy5K3HOVwHKwatBblwcwJ3M
Step 6:
At the Excel data file interface, click the Developer tab and select Macros .
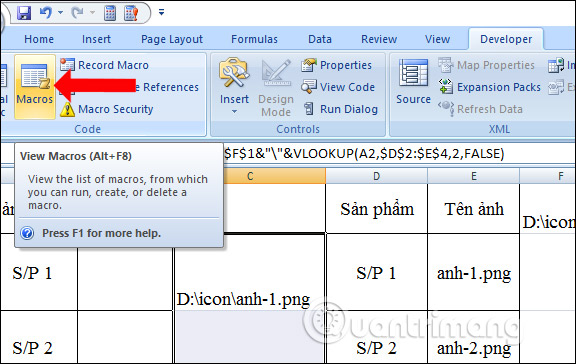
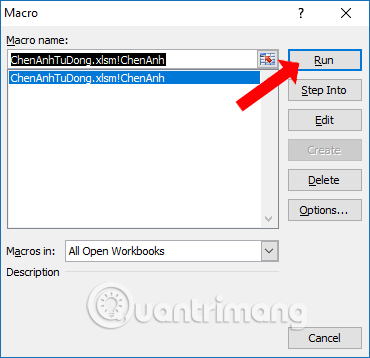
Display the Macros dialog box, click on the file name ChenAnhTuDong.xlsm! ChenAnh and click the Run button to run the file.
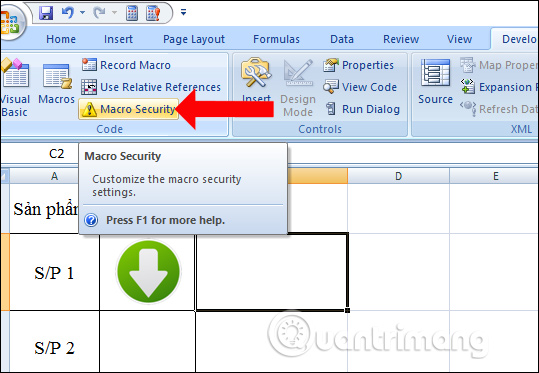
Note in case of error, you need to enable Macro running on Excel . Click Macro Security on the tool section.
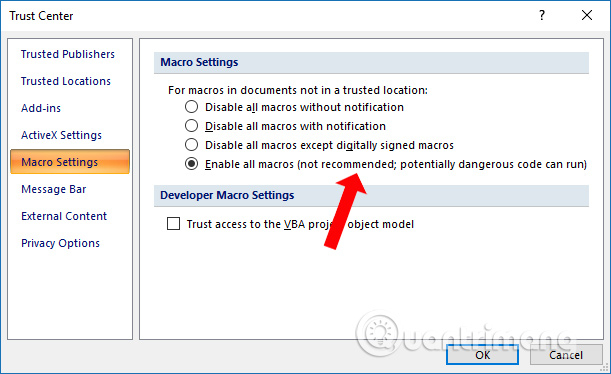
In the Macro Settings section, select Enable all macros to run macro files on Excel. You only enable this option when used, it should be turned off immediately after it is done.
Step 7:
Display the Input box to scan all cells with the image path with the image name as shown.
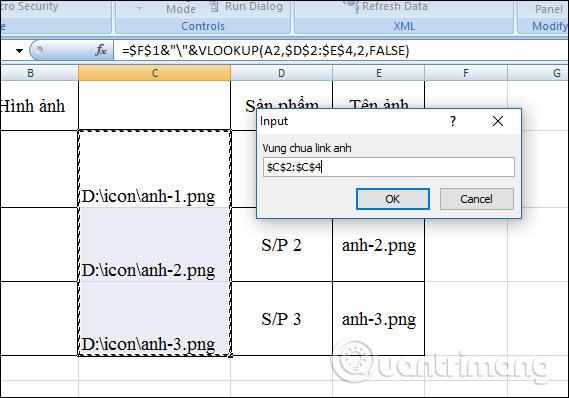
Next scan the image selection for the Picture section and click OK.

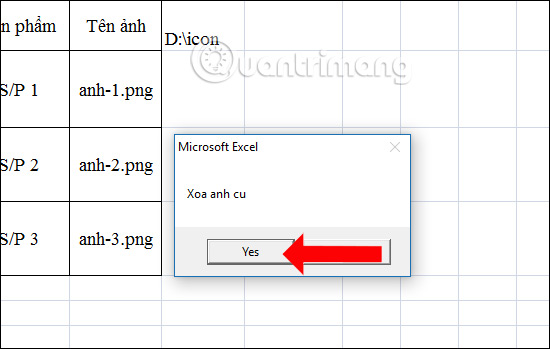
Display the dialog box asking to delete the old image, click Yes to agree to enter the image into the box.
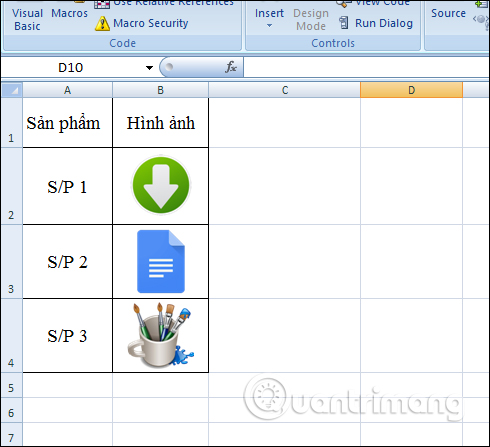
The image results will be displayed in the Excel cell at the same time as the image below.
Step 8:
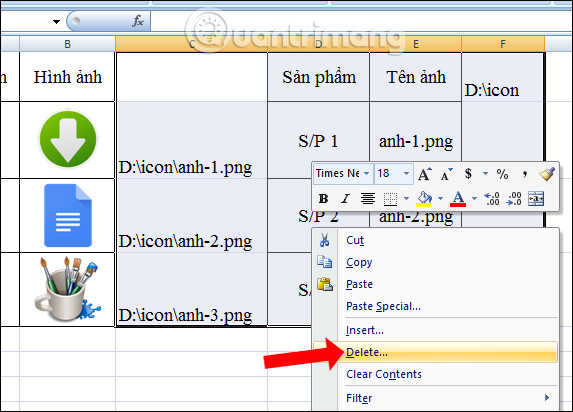
Finally, you only need to delete unnecessary columns in the data file in Excel, or hide columns and cells in Excel.
Complete results for image insertion statistics table as below. The image will automatically be resized to fit into the cell and aligned correctly between cells.
These are two different ways to insert images into cells in Excel. Ideally, users should follow the way of inserting a series of images in Excel to perform quickly and save time instead of adjusting each image one by one.
See more:
- MS Excel - Lesson 4: Working with lines, columns, sheets
- How to temporarily hide rows and columns in Excel 2013
- Change color between different lines in Microsoft Excel
I wish you all success!
Was this article helpful?
Your feedback helps us improve.
Related Articles
 How to delete photos in bulk in Excel3 minutes read
 Instructions for inserting an image into an Excel spreadsheet3 minutes read
 How to batch delete photos in Excel - No need to delete them manually3 minutes read
 Insert image object in Excel2 minutes read
 How to insert pictures into an Excel comment box2 minutes read
 How to batch edit photos with Faststone Photo Resizer7 minutes read
Reader Comments 0
Sign in with email or Google to join the discussion.