Instructions for inserting a PDF file into Excel spreadsheet
If you're having trouble inserting a PDF file into an Excel spreadsheet and you don't know how to do it. Inserting PDF files into Excel spreadsheets is not as simple as you think. In the article below, Network Administrator will guide you through the steps to insert a PDF file into Excel spreadsheet.
1. Insert PDF file into Excel spreadsheet
To insert a PDF file into an Excel spreadsheet, first on the Excel worksheet, find the Insert tab, in the Text section, click Object . Now the Object dialog box appears.

On the Object dialog box, at the Create New tab, click the option Adobe Acrobat Document from the Menu Object type. You must install Adobe Acrobat on the system to display Adobe Acrobat on the list.

In addition, you will see all other software installed on the system can support you to open and read PDF files. Make sure you have checked the Display as icon option .
Click on OK and a dialog box will appear on the screen. Select the PDF file you want to insert into the Excel spreadsheet, then click Open.
Now the PDF file has been successfully inserted into the Excel spreadsheet. You can drag or resize the PDF file if you want. Repeat the same steps to insert more PDF files into the spreadsheet.
2. Adjust the PDF file inserted in the spreadsheet
Changing the size of the PDF file inserted in the worksheet makes the worksheet look more eye-catching and suitable for the size of the cell.
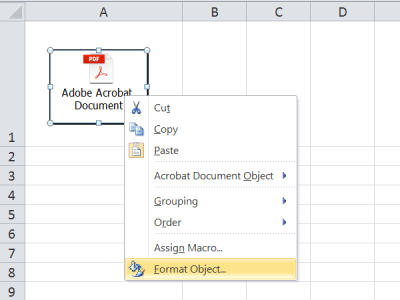
Right-click the inserted PDF file, then select Format Object. If you insert multiple PDF files, select all the inserted PDF files in the spreadsheet, right-click it and choose Format Object .

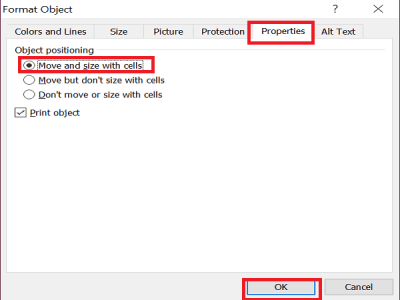
The Format Object dialog box appears. Here you click the Properties tab and then click the option Move and size with cells , then click OK .

If you filter or hide the cell, the PDF file will also be hidden, .
3. Rename the inserted PDF file
By default, the PDF file you inserted is named Adobe Acrobat Document. However, if you want, you can rename the PDF file.
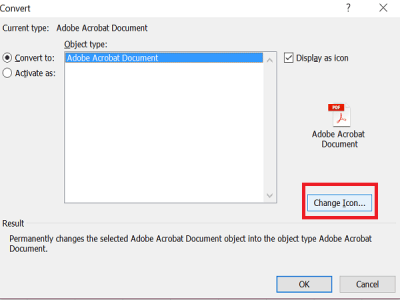
To rename the inserted PDF file, first right-click on the PDF file and select Convert option.

On the Convert dialog box, click Change icon .

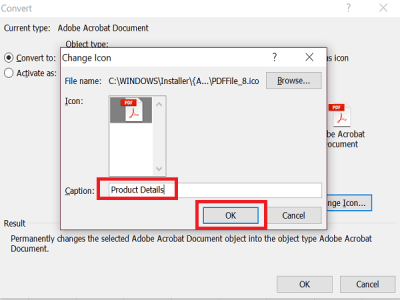
Next on the Change icon window, in the Caption section, put any name you want to use for the PDF file and click OK.

At this time on the Excel spreadsheet you will see the renamed PDF file.

Refer to some of the following articles:
- Summary of expensive shortcuts in Microsoft Excel
- These are the most basic functions in Excel that you need to understand
- You want to print text, data in Microsoft Excel. Not as simple as Word or PDF! Read the following article!
Good luck!