How to create tables, draw tables in Word
Working with Word, there will be times when you have to use tables to store data. Microsoft Word gives you many ways to create tables, draw tables as well as provide you with a lot of tools to help you have a beautiful and easy-to-see data table.
Here's how to create tables, draw tables in Word 2013, with Word 2010 and 2007 you do the same.
1. Create a table
Method 1: Create a quick table in Word.
On Word interface, select Insert -> Table -> move the mouse cursor to select the number of rows and columns for the table, then left click to create the table.
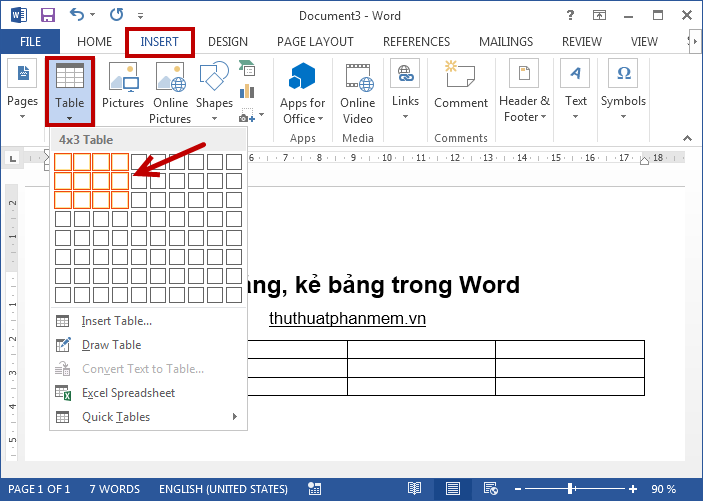
The table will be created with the number of rows and columns you have selected:

Method 2: Create a table with options.
Select Insert -> Table -> Insert Table .

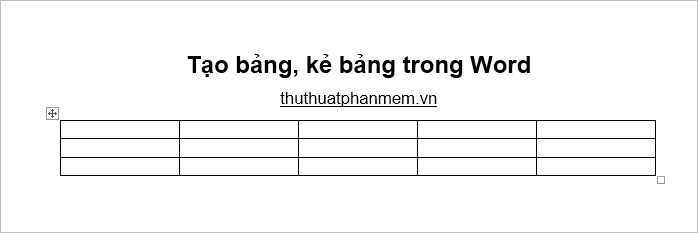
The Insert Table dialog box appears, enter the column number of the table in the Number of columns section , enter the number of table rows in the Number of rows section . Click OK to create the table.

Your results will be as follows:
Method 3: Draw a table in Word.
If the table you want to create is more complicated then you can use the Draw table to draw the table. Select Insert -> Table -> Draw Table .
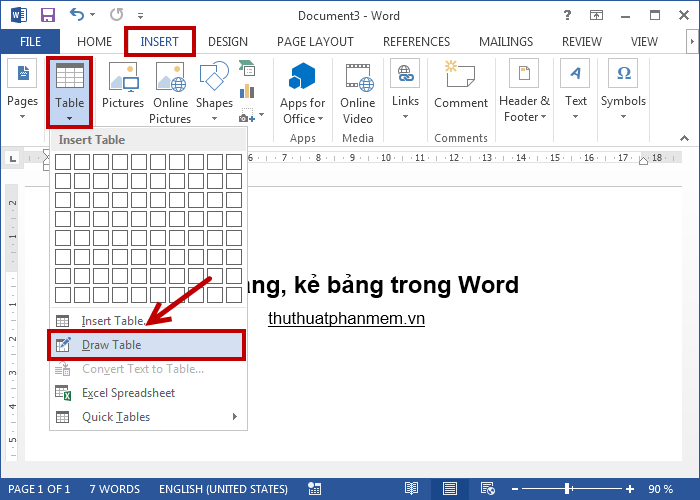
The mouse pointer changes to a pen, you start drawing the table as you want.

2. Edit the table
After you have created the table, the next you need to edit the table to fit the content that you need to enter the table.
Resize the table
To change the size of the table you put the mouse pointer on the corners of the table, when the mouse pointer appears a two-dimensional arrow icon, you press and hold and expand or narrow the size of the table.

Align text position in table cells
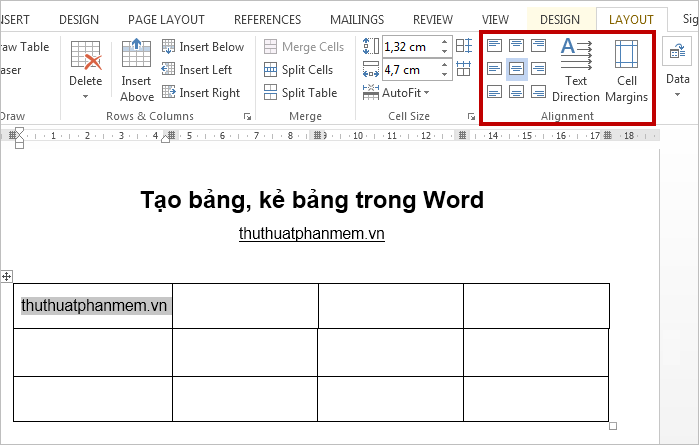
When selecting the table, there are two tabs on the Ribbon called Design and Layout , you can align the text position, rotate the text in the Alignment section of the Layout tab .
Change the type of the table
Select the table -> Design -> select the table style in the Table Styles section , you can click the down arrow icon ( More ) to select more table styles.

For example, choose a table style as shown above, you will get a table:
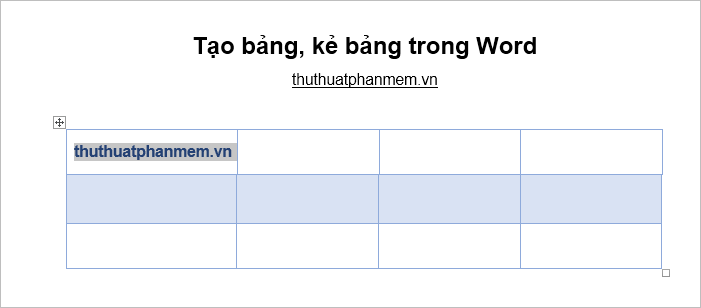
Merging box
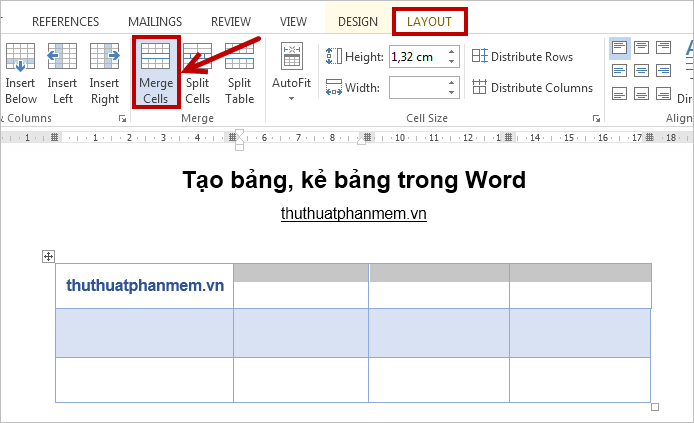
Highlight the cells to combine, then choose Layout -> Merge Cells (or right-click and choose Merge Cells ).
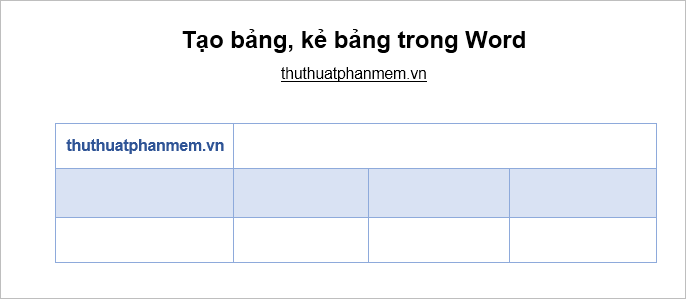
The cells you select will be merged into one cell.
Split cells
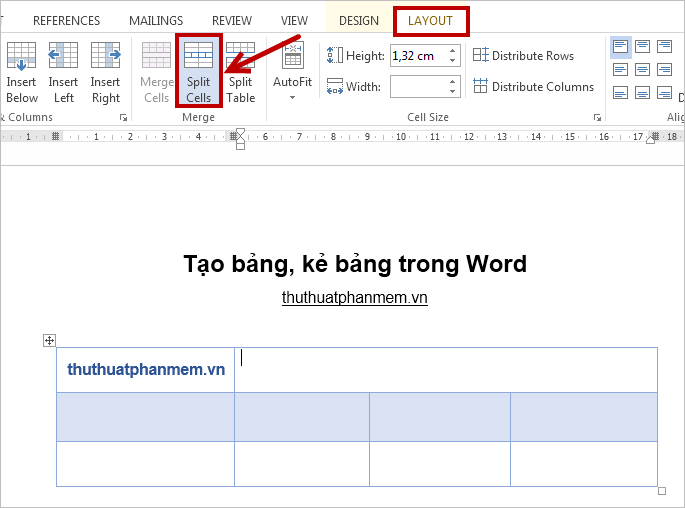
Place your cursor in the cell you want to split and choose Layout -> Split Cells (or right-click and choose Split Cells ).
The Split Cells dialog box appears , enter the number of rows to split in Number of rows , the number of columns to split in Number of columns and click OK to split cells.
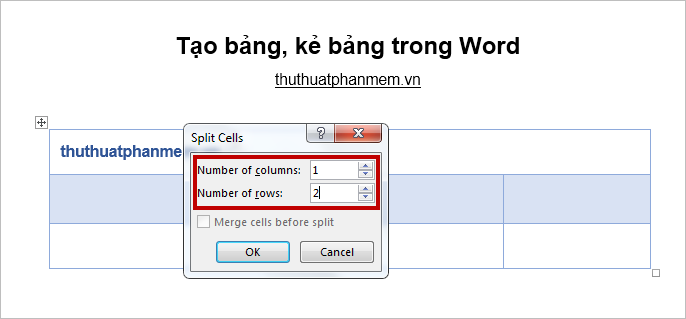
So the cell you select will be split as you like:

So, after the article you already know the ways to create tables, draw tables as well as edit tables in accordance with the content. Good luck!