Table of Contents
This updated guide examines Word Tables: How to Create a Table Border in Word and organizes the essential facts, background, and practical takeaways in clear American English.
By creating a border for a table, the user has a lot of options to apply to the table, such as using a bold border, a double border, a dashed border or a dot, or using a color for the outline of the table. These types of borders can also be used to create borders for Word files, or to create a beautiful Word border frame. The following article will show you how to change the table border on Word.
- How to separate tables and join Word tables
- How to repeat the title bar in the Word list table
- How to delete spaces in a table on Word
- Instructions for deleting table paths in Word
1. How to draw the Word 2007 table or below
Step 1:
We create tables in Word as usual, then enter the data in the table.
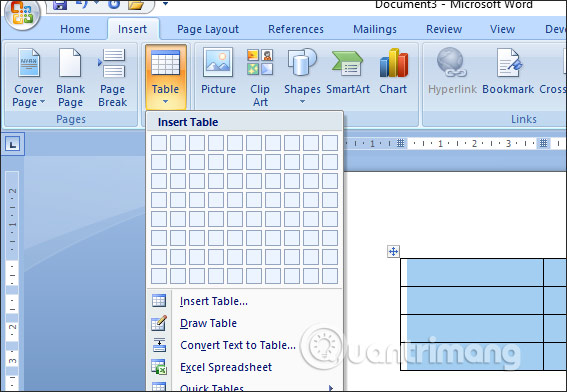
Step 2:
After creating the table, we black out the entire table and then right-click on the menu to select Borders and Shading in the displayed list.
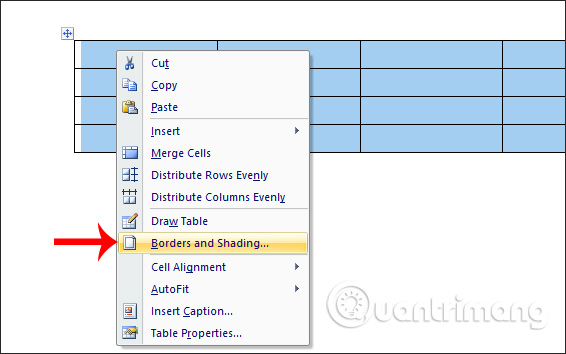
Step 3:
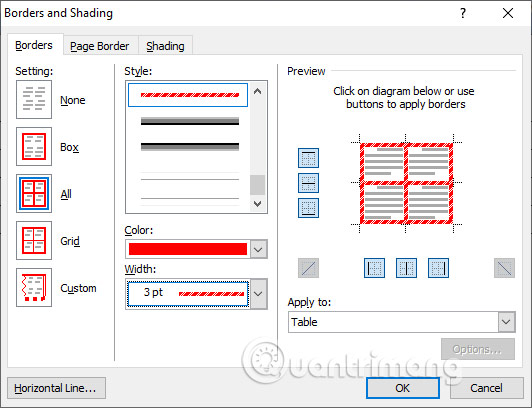
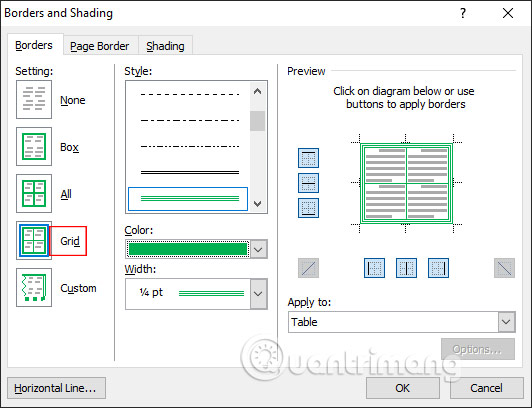
Displays the interface for users to select the border type for the table. Here the user has many ways to select a border for the table.
If you want to change the border for all the lines in the table, including the lines between the cells and the border around the table, in the Settings section click All .
Next, select the type of line you want to use in Style , with the type of dashed lines, double strokes, and three strokes. Choose the color for the line at Color . We can preview how the table border appears in the Preview section. Click OK to apply the new border type.
As a result, we will have a Word table with a border style as shown below.
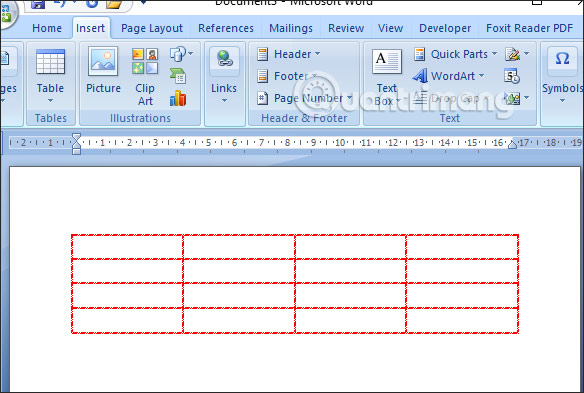
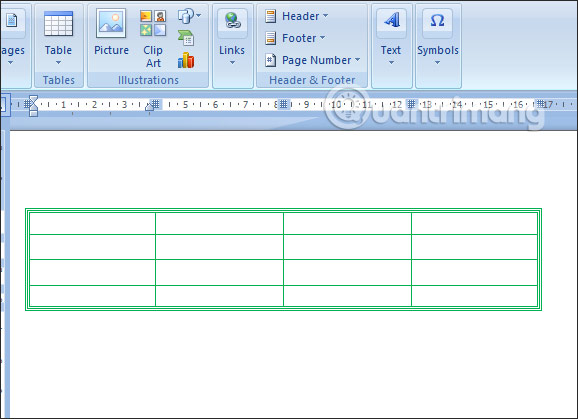
In case you just want to style the border around the table , but the line in the cells remains the same, then we choose the Grid item . Continue to select the style and choose the color for the border. Click OK to apply.
Your results are tabulated with the border as shown below.
2. Create contour table Word 2010 or higher
Step 1:
We also draw tables on Word by clicking Insert. Then black out the whole table and right-click. In this list, there will be the Border Styles option.

Step 2:
This will display simple tabular contour types.
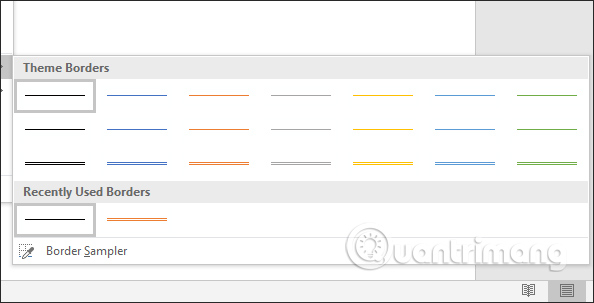
After selecting the border type, we will enter the table automatically . You just need to mouse over the horizontal or vertical lines of the board to draw the outline.
Immediately the table border will change to the style shown below.
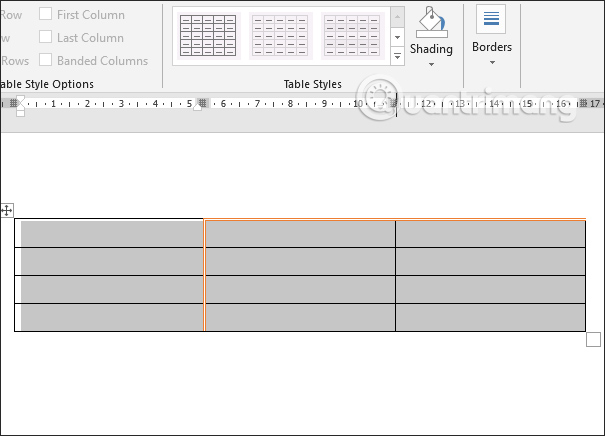
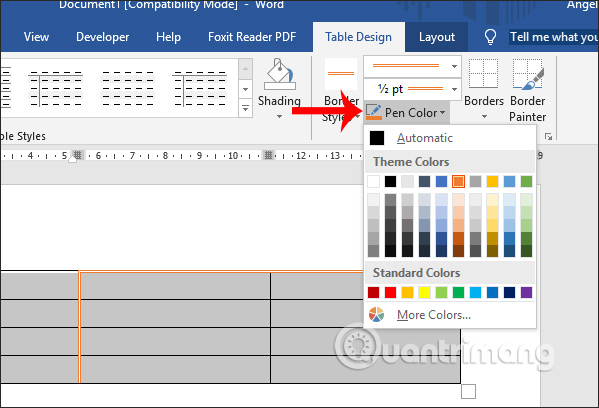
In case you want to change to another color , click Pen Color and then select the color for the border.
Step 3:
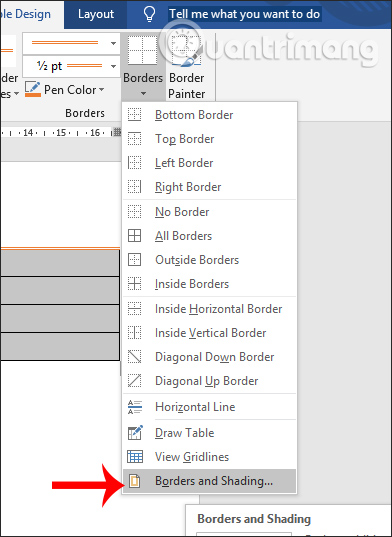
To display the panel alignment interface as in Word 2007, clicking Borders and looking down at the list will see the Borders and Shading option.
You then proceed to select the border for the table as in Word 2007.
With just a few simple steps, tables on Word have been changed with novel color borders. Depending on the different requirements we choose to use the new border for the whole table, or just border around the table.
I wish you all success!
FAQ
What is Word Tables: How to Create a Table Border in Word about?
It provides a structured overview of word tables, explains the main context, and highlights practical takeaways for readers.
Why does this topic matter?
Understanding the main concepts helps readers evaluate the issue, avoid common mistakes, and make better-informed decisions.
How should readers use this information?
Use the guidance as a practical starting point, confirm details that may have changed, and follow current product, safety, or security recommendations.
Related Articles
 How to Create a Table in Word 20077 minutes read
 Table in HTML5 minutes read
 Create Automatic Table of Contents in Word 20039 minutes read
 How to Create Spaces Between Letters and Cell Borders in Excel3 minutes read
 Beautiful Border Frames on Word: Word Border Frame3 minutes read
 How to Adjust the Size of Word Table Cells Equally4 minutes read
Reader Comments 0
Sign in with email or Google to join the discussion.