Set up the working environment in Word
Just one set of parameters that apply to your entire Word document will save you a lot of time. I will introduce you to set some key parameters important in the drafting process.
Table of Contents
Sometimes you often work with a lot of documents with the same format. Just one setting of parameters that apply to your entire document will save you a lot of time. I will introduce you to set some key parameters important in the drafting process.
1. Convert units from inches to cm
- Normally in Vietnam use the unit of centimeters but Word set the default to inches so you should convert to centimeters to facilitate the alignment, .
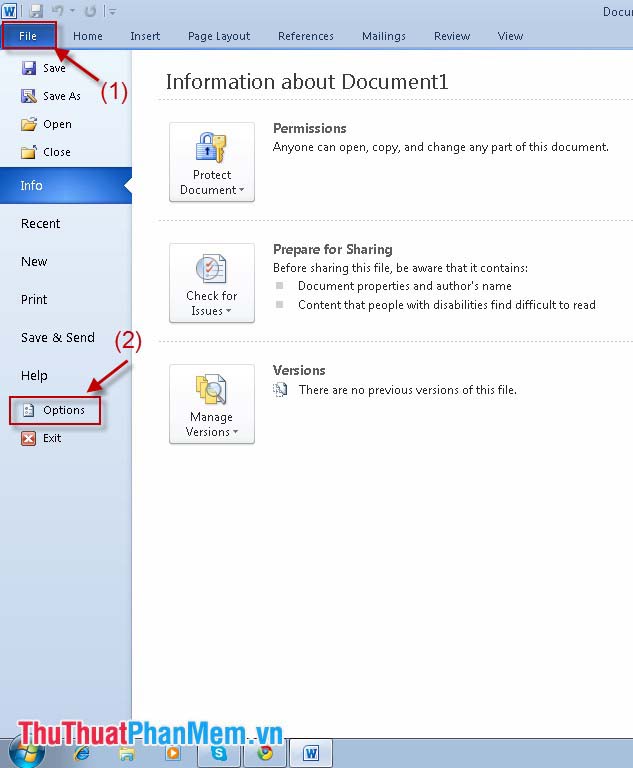
- Click the File tab and select Option .
- The dialog box appears, click the Advanced tab , move to the Display tab , at the Show measurements in Unit of section, click Centimeters . Finally, click OK to finish.

2. Select the default folder to save the file after editing.
- Depending on your work you can save .doc, docx file format for your documents. You can set the default saving folder.
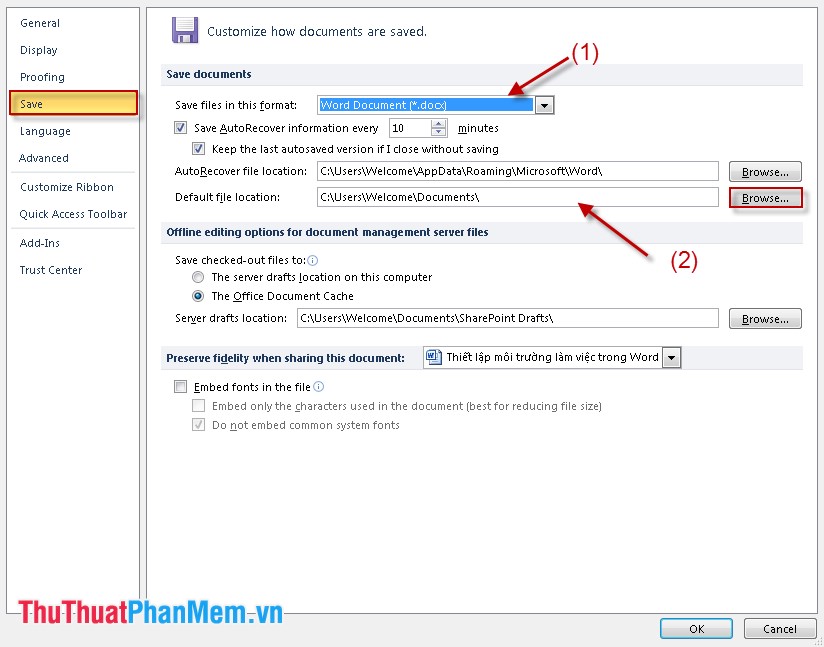
- Click File and select Options, but choose Save tab .
+ In the Save file in this format section, select the file saving format that applies to all documents. Depending on your work, you can save .doc or docx.
+ At Default file location: The directory to save the default file. You create a separate folder for your work when editing is finished, you just need to click the Save button without spending time choosing where to save the file. Very time-saving and convenient for your work.
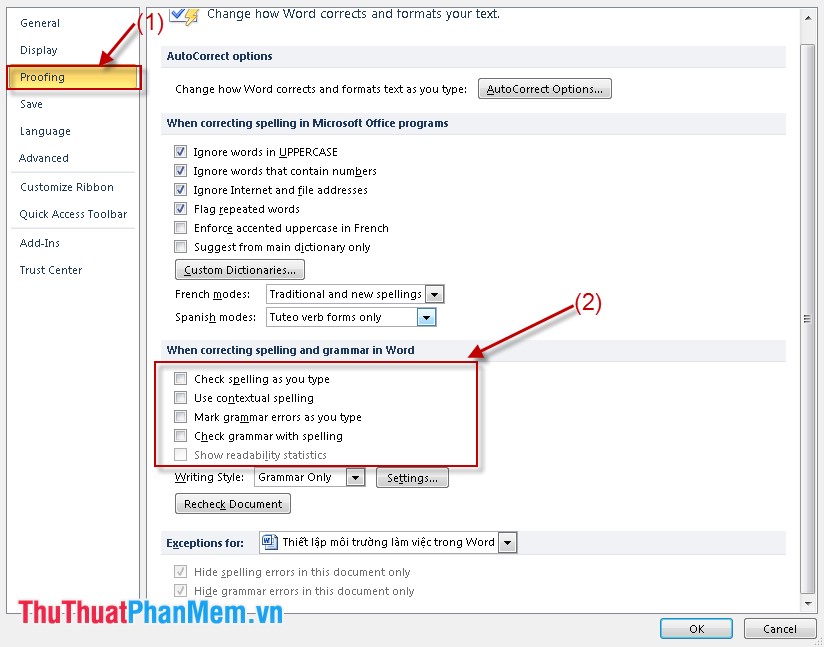
3. Remove the warning feature (underline) of Word.
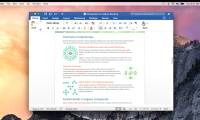
- You find it very confusing when the handwriting is underlined by unambiguous red lines. Assert your text has nothing wrong. Because Word does not yet support Vietnamese, this warning is required. You just need to leave all the traces in the When correcting spelling and grammar in Word section (as shown).
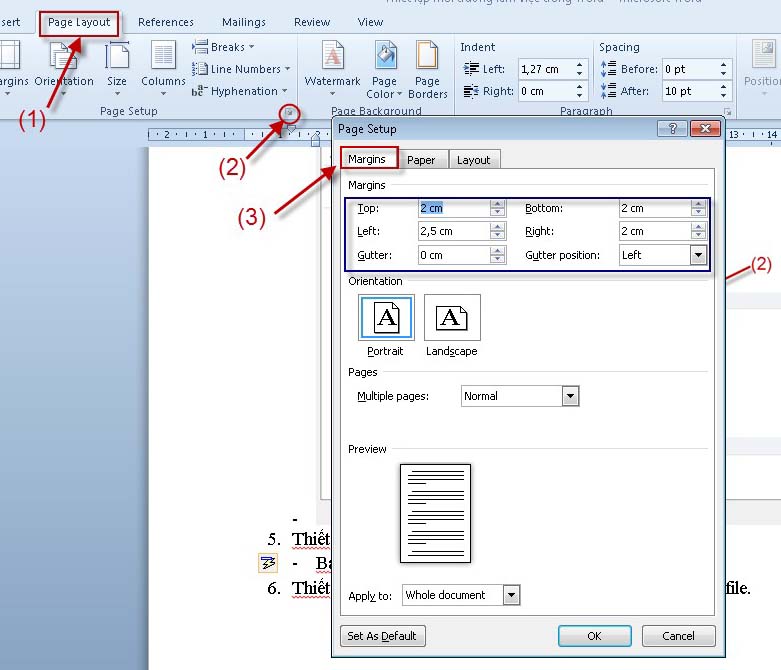
4. Set default alignment for all files
- Click the Page Layout tab, click Page Setup, the page setup dialog box appears. At the Margins tab you set the margins for the text:
Top: top margin
Bottom: Bottom margin
Left: Left margin
Right: Right margin
Portrait: Portrait paper orientation
Landscape: horizontal paper orientation.
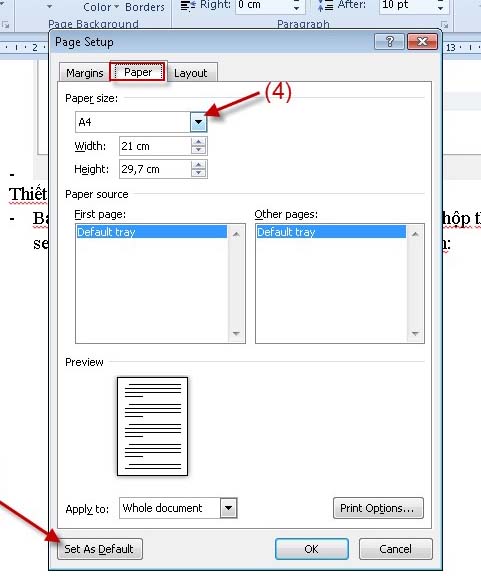
- To select paper size, click Tab Paper. In paper size, select A4. You can also choose the Width or Height option. Finally, clicking Set As Default will apply this setting to the entire document.
5. Set font default, font size applies to all files
- Only need one set of settings you can apply to all other documents without having to reset. - Click the Font tab. A dialog box appears that you choose:
Font item: You choose Font
Item Font Style: You choose the display style
Item size: Select the font size.
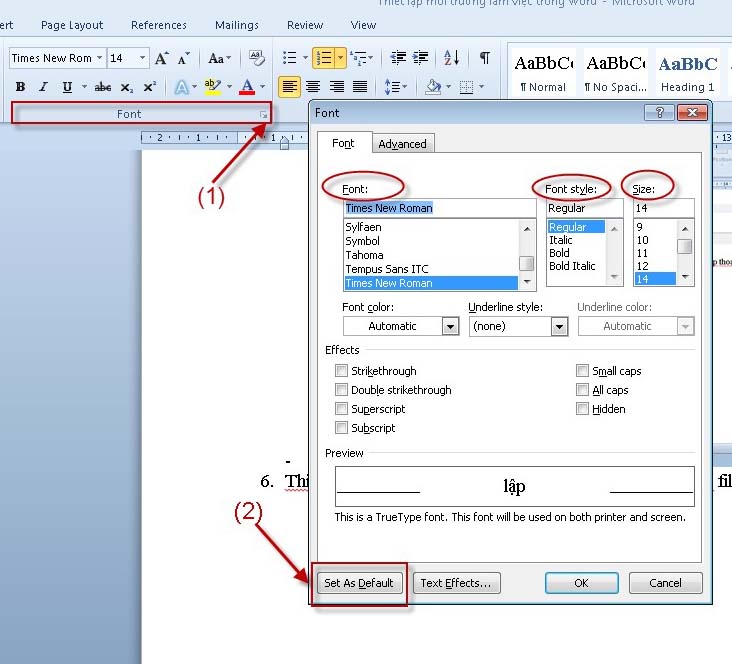
- Please note that you have to click on Set As Default to set the default for all other files. So from now on you will not have to set the font, font size when drafting a new document.
Above are some notes to help you save time and effort when drafting. Good luck.
Was this article helpful?
Your feedback helps us improve.
Related Articles
 Environment and 'dreamy' working regime of Google, including all-day, on-site massage, providing salary for relatives if employees die5 minutes read
 MS Word - Lesson 3: Customize the Word environment4 minutes read
 How to enable Focus Mode in Word - A feature that helps you concentrate better while working.3 minutes read
 How to Become an IT Consultant13 minutes read
 MS Access 2003 - Lesson 2: Using an Access environment8 minutes read
 Explore the MS Word toolbar7 minutes read
Reader Comments 0
Sign in with email or Google to join the discussion.