Table of Contents
This updated guide explains how to Create a Template for PowerPoint through clear steps, practical examples, and important checks that help prevent common errors.
this guide shows you how to create a template for PowerPoint.
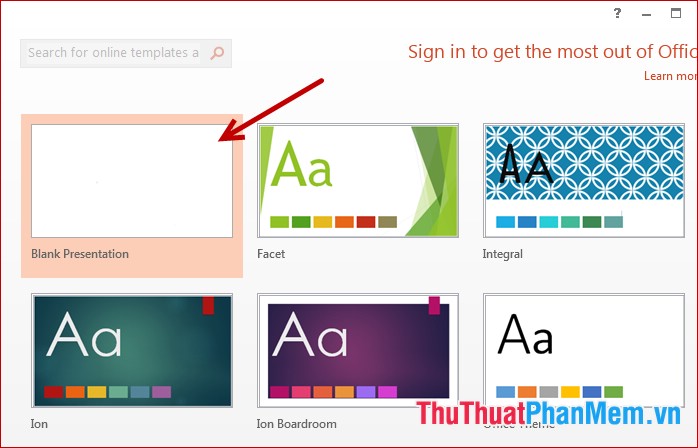
Step 1: Start a blank PowerPoint page, with versions prior to 2010, the default PowerPoint startup will be a blank page. As for PowerPoint 2013, when starting, select Blank Presentation to create a blank page.
Step 2: Click the View -> Slide Master tab ( Slide Master is a tool to help you create a common format for all slides in a PowerPoint file).

Step 3: General format for slides in Template.
Select the first slide in the list of miniature slides on the left, where you can format the slide: Font color, font size, font style, alignment. in the Home tab. When formatting the first slide, all other slides are changed as such.
Note: In Slide Master you are not allowed to enter the content but only to change the format.

Step 4: Insert the background image for the Template.
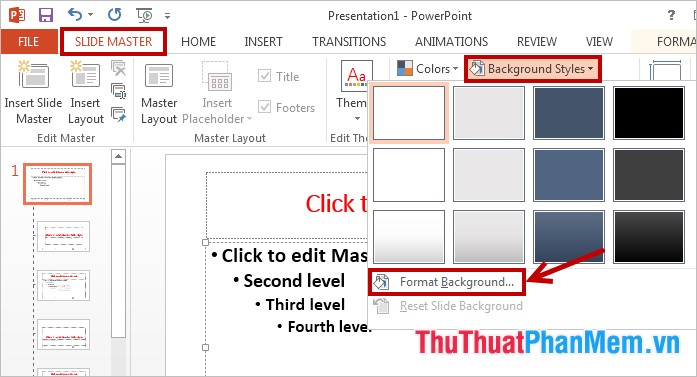
You choose the background style in the Background Styles section, otherwise you can also choose the wallpaper you created by selecting the Slide Master tab -> Background Styles -> Format Background .
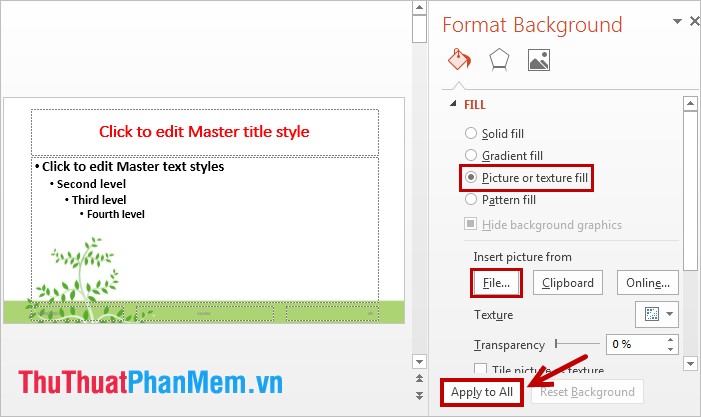
Format Background window appears on the right, select Picture or texture fill , then choose File and navigate to the background image to insert for the Template . To apply a background image to all existing or new slides, select Apply to All .
Step 5: Create a cover page for a PowerPoint template.
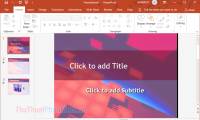
The second slide in Slide Master is the cover of PowerPoint (the first page in the PowerPoint file). This page will usually be different design, different background (wallpaper should be similar to the background of the other slides) than the following slides. To add a background image for the cover, you do the same, select slide -> Slide Master tab -> Background Styles -> Format Background .
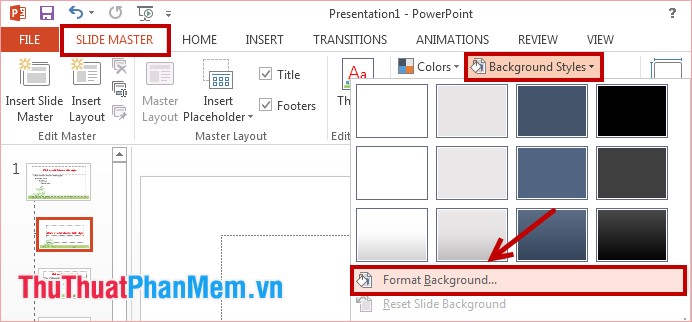
Format Format window appears, select Picture or texture fill -> File -> select the background to insert. Because this background image only applies to the cover, you do not need to select Apply to All .
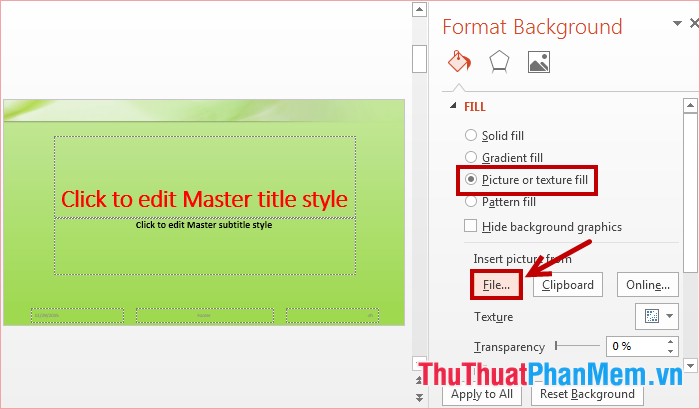
You can also format the cover, with the size of the title larger than the size of the titles of the other slides and you can move the content as you like.
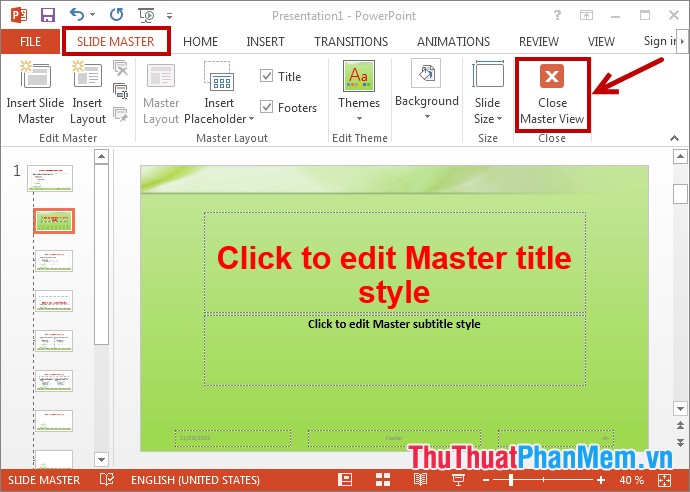
Step 6: After creating, select Slide Master -> Close Master View to close the Slide Master design window.
Step 7: Save the newly created Template.
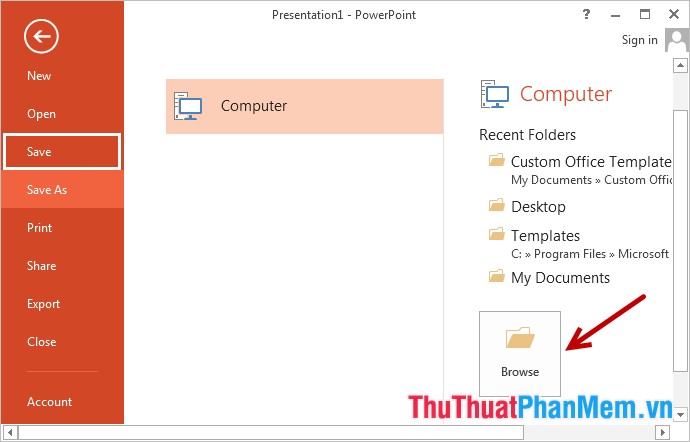
Choose File -> Save ( Ctrl + S key combination ), with PowerPoint 2013 select File -> Save -> Computer -> Browse .
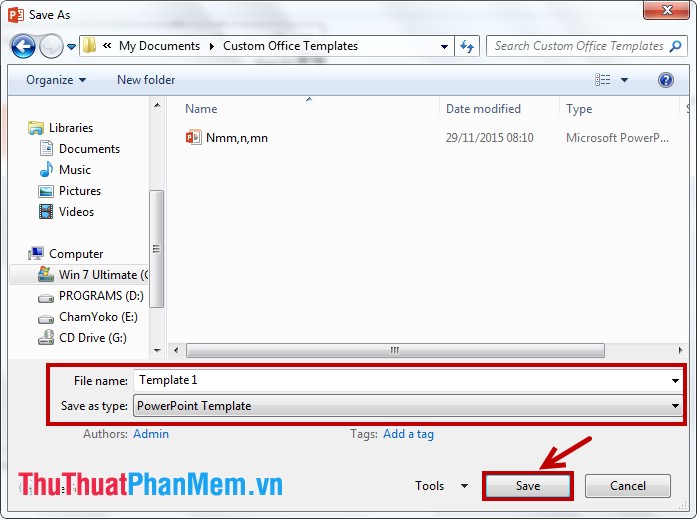
The Save As dialog box appears, find the path to save the file and enter the name for the Template in the File name box, in the Save as type box, select PowerPoint Template and select Save to save.
Note: Template should be saved to the folder at C: Program FilesMicrosoft OfficeTemplates for easy searching.
So you know how to create a PowerPoint Template. To use your Template, you just need to Open to the path to save the Template. Good luck!
FAQ
What is the easiest way to Create a Template for PowerPoint?
Start with the requirements in this guide, then follow each step in order. Check the result after every major change so problems are easier to identify.
Can beginners follow these instructions?
Yes. The process is organized into practical steps, and you can repeat any step before moving forward.
What should I check if the method does not work?
Confirm your software or device version, permissions, settings, file format, and internet connection when the task depends on online services.
Related Articles
 10 Awesome PowerPoint Templates Make the Presentation 'Shine'8 minutes read
 Create Slides from a Template Available in PowerPoint2 minutes read
 MS PowerPoint - Lesson 7: PowerPoint Design Template: Click3 minutes read
 4 Effective PowerPoint Slide Templates for Meetings8 minutes read
 How to Create a Template for PowerPoint Presentation Slides5 minutes read
 Download the Most Beautiful Slide PowerPoint Template 20213 minutes read
Reader Comments 0
Sign in with email or Google to join the discussion.