How to create Restore Point on Windows 10 with just 1 double click
Restore Point is one of the unique and best features of Windows operating system, which helps users quickly restore system files to a previous state without changing saved data. In the following article, Network Administrator will guide you how to create Restore Point on Windows 10 'super fast' and 'extremely simple', with just a few taps.
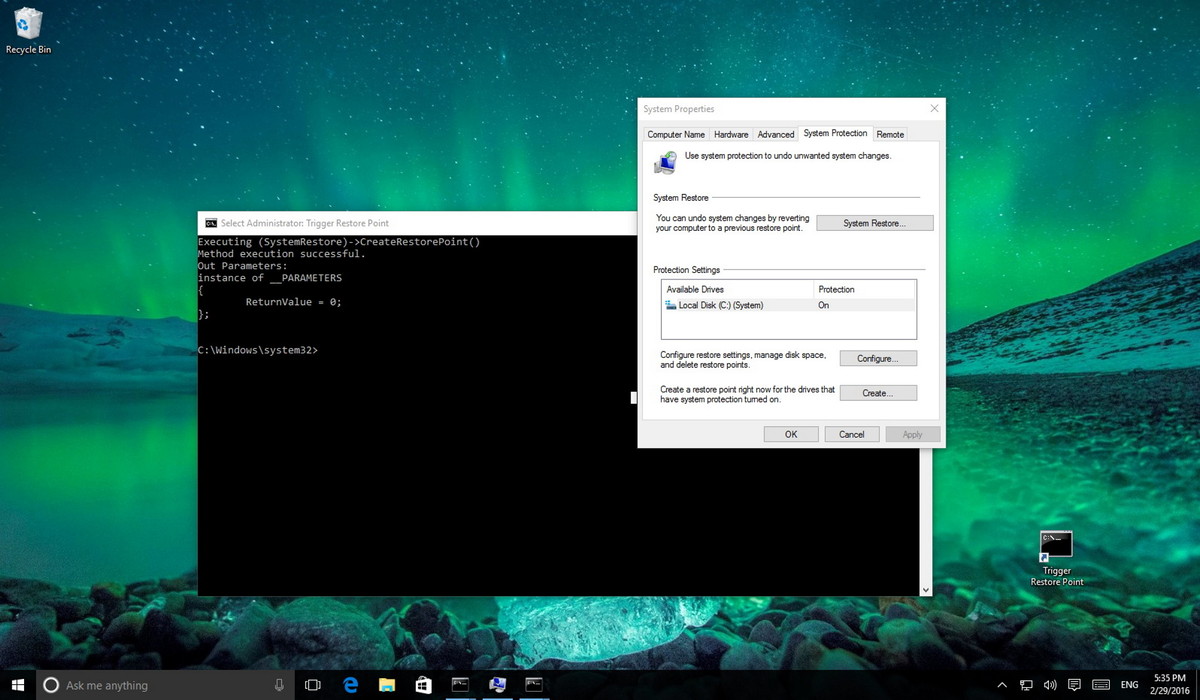
1. Check if System Restore Point is enabled
The first step you need to do is to check if System Restore Point on your computer is enabled. To do this, follow the steps below:
1. Open Start Menu, then enter Create a restore point in the Search frame and press Enter.
2. On the System Protection window, in the Protections Settings section, check if the setting is ON or OFF. If setting the option to ON, follow the steps below to create a System Restore Point script shortcut.

If the option is set to OFF, select the system drive on your computer, then click the Configure button .
3. Select the Turn on system protection option.
4. Click Apply .
5. Click OK.

2. Create the System Restore Point script shortcut
To create Restore Point on Windows 10 with just 1 double click, follow the steps below:
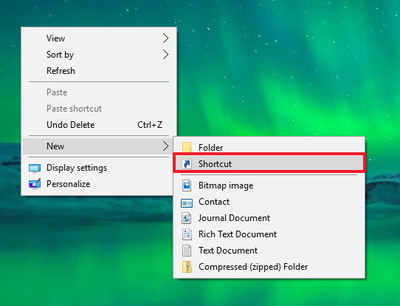
1. Right-click any space on the Desktop, select New => Shortcut.
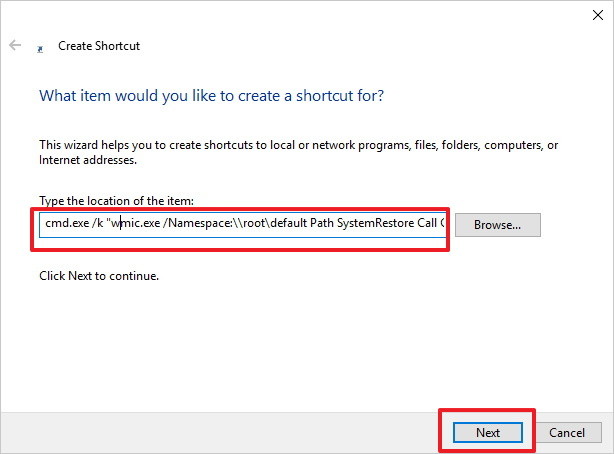
2. On the Create Shortcut wizard window, enter the following command into the box Type the location of the item and click Next :
cmd.exe / k "wmic.exe / Namespace: rootdefault Path SystemRestore Call CreateRestorePoint" My Shortcut Restore Point ", 100, 7"
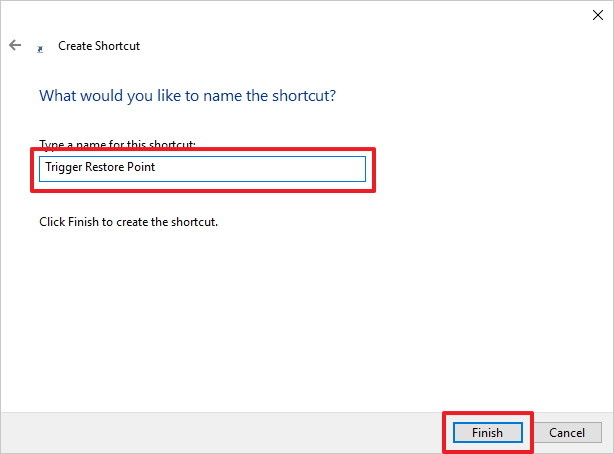
3. Put any name for the shortcut you want, then click Finish .
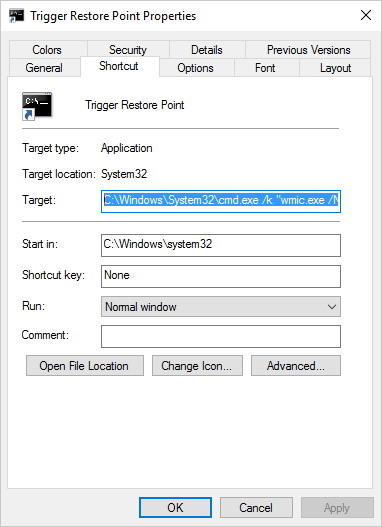
4. Right-click the shortcut you just created, then click Properties.
5. If you want to add a certain icon to the shortcut, click Change icon .
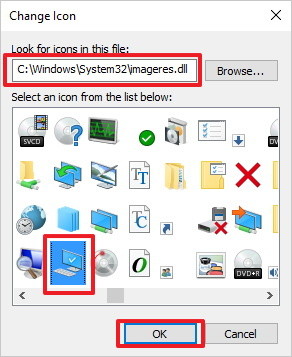
6. In the Look for icons in this file frame, enter the path below and press Enter:
C: WindowsSystem32imageres.dll
7. Select any icon you want to use and click OK .
8. Click on the Advanced button .
9. Next check the Run as administrator option.
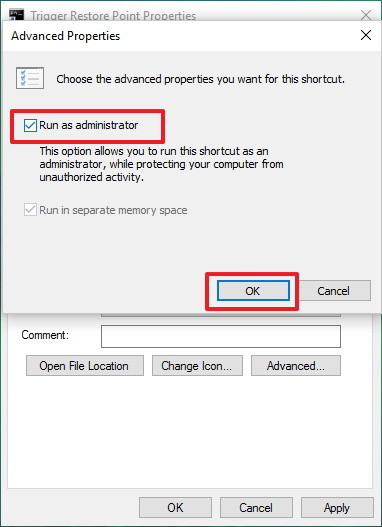
10. Click OK.
11. Click Apply.
12. Click OK to complete the process.
13. Finally double click on the shortcut icon you just created on the Desktop screen to check. If the Command Prompt window appears as shown below, it means that everything you do is correct.
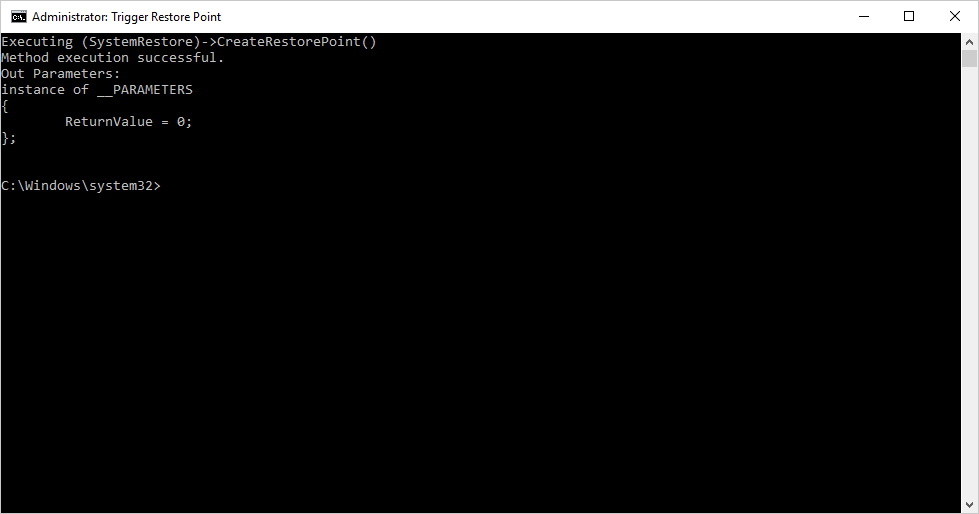
From now on when installing a new application or driver or changing some settings on your computer, just double click on the new Restore Point you just created instead of having to do many other steps.
Note:
On Windows 8.1 and later versions, the script will run but will not create a new Restore Point if you created a Restore Point earlier 24 hours.
In this case, you must delete the Restore points that you created earlier for the Activity Script, to do this, follow the steps below:
1. Open Start Menu, then enter Create a restore point in the Search frame and press Enter.
2. Select the hard drive you want to create a new Restore point.
3. Click Configure.
4. Click the Delete button .
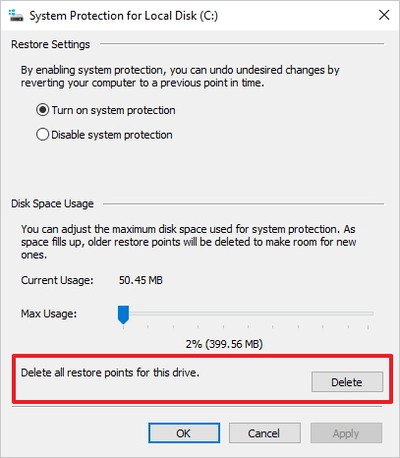
5. Click Continue to confirm deletion.
Refer to some of the following articles:
- How to root out old Windows 10 drivers?
- Free memory space after updating Windows 10 Anniversary
- On Windows 10 you should disable these features
Good luck!