Table of Contents
This practical guide walks through how to delete system restore points in Windows 10, explains the main requirements, and highlights common issues that may appear along the way.
So you need to delete them when not needed.
1. Use Disk Cleanup
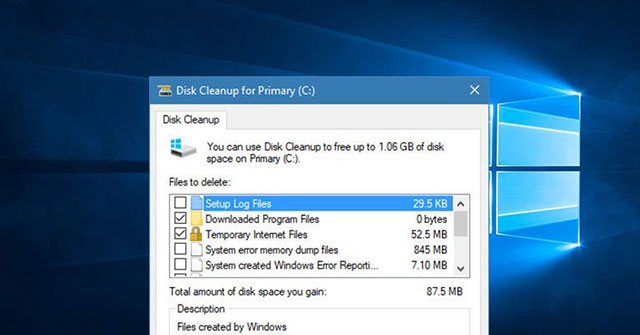
To erase all points (except the most recent system restore point), then use the Disk Cleanup tool in Windows.
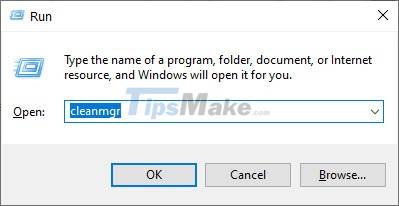
Step 1: Press Windows + R to open the Run dialog box, then type cleanmgr and Enter.
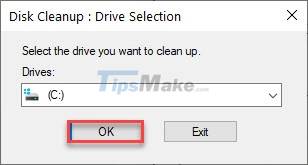
Step 2: Select the drive to save Windows (usually C drive) and click OK.
Step 3: In the next window, click the button Clean up system files.

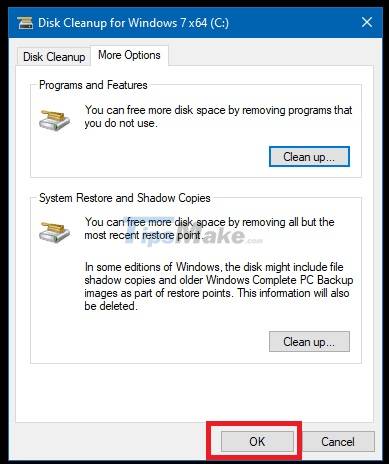
Step 4: You switch to the More Options tab, then click Cleanup… in the System Restore and Shadow Copies section.

Step 5: When the question appears, press Delete.

Step 6: Back to the Disk Cleanup window, click OK >> Delete Files and restart the computer.
2. Use SystemPropertiesProtection
To delete all restore points at once, use System Properties Protection. Note, however, that you will not be able to restore your PC to its previous state.
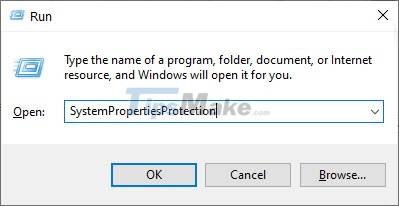
Step 1: Press Windows + R key combination, type SystemPropertiesProtection and press Enter.
Step 2: Switch to the System Protection tab, then select the drive where you want to delete the system restore points.
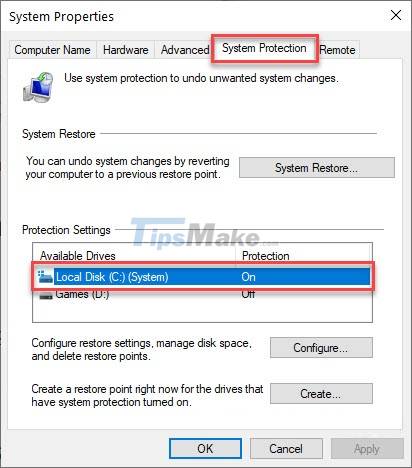
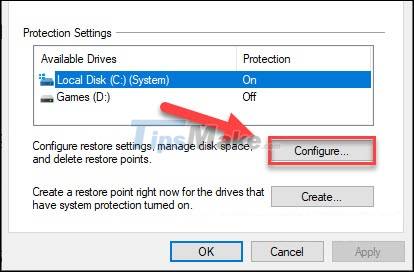
Step 3: Click the Configure.
Step 4: Click Delete in the Delete all restore points for this drive section.
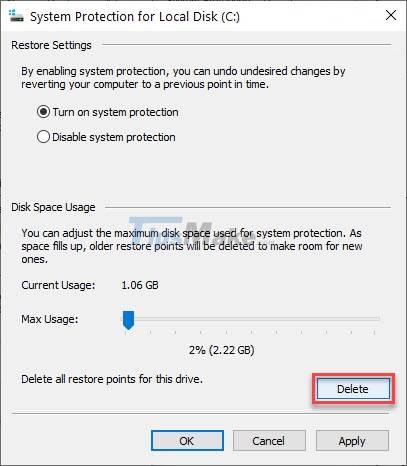
Step 5: Click Apply to apply the changes, then OK.

3. Delete specific restore points with Restore Point Creator
To delete each specific restore point, using Restore Point Creator is necessary. It is a free, lightweight and fully compatible application with Windows 10.
Step 1: Download and install the Restore Point Creator application.
Step 2: When running the application, a message will appear that the application is no longer supported by the developer. Don't worry because you can still use Restore Point Creator normally.
Check the box Stop bugging me. then Close.

Step 3: At the main screen of the software, you will see the restore points displayed here. You just need to select the restore point you want to delete and click Delete Selected Restore Point.

Step 4: Click Yes when receiving the confirmation question.

Step 5: To delete multiple restore points, hold Ctrl and select all of them, then press Delete Selected Restore Point to delete.

Step 6: Click Confirm Deletes to delete multiple restore points at the same time.

The three simple ways above helps you delete system restore points to free up more disk space. Make sure you have at least one restore point left, in case your computer crashes. Good luck!
Key Takeaways
Use the information above as a practical reference for how to delete system restore points in Windows 10. Review each step carefully, confirm any requirements, and choose the option that best fits your situation.
FAQ
What does this guide explain about Delete System Restore Points in Windows 10?
It explains the main concepts, practical considerations, and useful steps related to delete system restore points in Windows 10 without requiring advanced knowledge.
Who can benefit from learning about Delete System Restore Points in Windows 10?
This information is useful for readers who want a clear overview, practical guidance, and reliable steps related to delete system restore points in Windows 10.
What should I check before applying this information?
Review the requirements, confirm that your device, software, or situation matches the instructions, and back up important data before making major changes.
Related Articles
 How to Delete Individual System Restore Points in Windows6 minutes read
 How to Delete a System Restore Point in Windows 108 minutes read
 How to Delete Old Windows Restore Points to Free up Space8 minutes read
 Configure the System Restore Feature in Windows 109 minutes read
 Instructions for Creating Backup and Restore Points (Restore4 minutes read
 Instructions on How to Use System Restore on Windows8 minutes read
Reader Comments 0
Sign in with email or Google to join the discussion.