Table of Contents
This updated guide examines How to Create a System Restore Point and organizes the essential facts, background, and practical takeaways in clear American English.
Method 1
On Windows
 Open Start
 . Click the Windows logo in the bottom-left corner of the screen.
 Type increate a restore point. Doing so will search your computer for the System Restore menu.
- On Windows 7, you must first click the text box at the bottom of the Start menu.
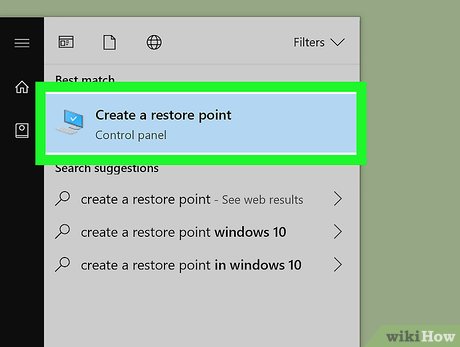 ClickCreate a restore point. It's a computer-shaped icon at the top of the list of search results. Doing so opens the System Protection window.
- You may have to click the computer-shaped Control Panel icon in your computer's taskbar to show the System Protection window before proceeding.
 ClickCreate…. You'll find this on the lower-right side of the window. Clicking it prompts a pop-up window.
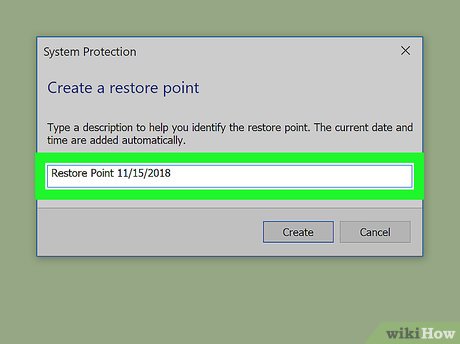 Enter a name. Type a name for your System Restore point into the text box on the pop-up prompt.
- Windows will automatically add the time and date to the System Restore point's name.
 ClickCreate. It's at the bottom of the prompt window. Doing so allows Windows to begin creating your System Restore point.
 ClickClosewhen prompted. This confirms that your System Restore point has been created.
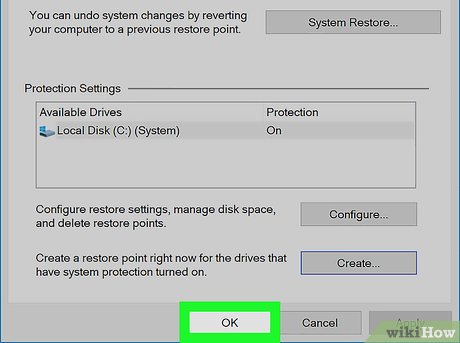 ClickOK. It's in the bottom-left corner of the window. Doing so saves your System Restore point.
Method 2
On Mac
- Attach an external hard drive to your Mac. Plug one end of the hard drive's cable into your Mac, then plug the other end into the external hard drive if it isn't already connected.[1]
- While Mac computers don't have System Restore points in the same way that Windows computers do, you can still create a restore point by using Time Machine.
- Your external hard drive must be at least as large as the amount of space that's taken up on your Mac's hard drive.
 Open Spotlight
 . Click the magnifying glass-shaped Spotlight icon in the top-right corner of the screen. A text box will appear in the middle of the screen.
 Search for Time Machine. Typetime machineinto the text box. Doing so will bring up a list of matching results below the text box.
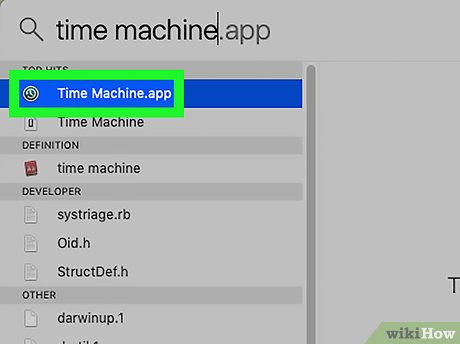 Double-clickTime Machine. It's below the text box. The Time Machine menu will open.
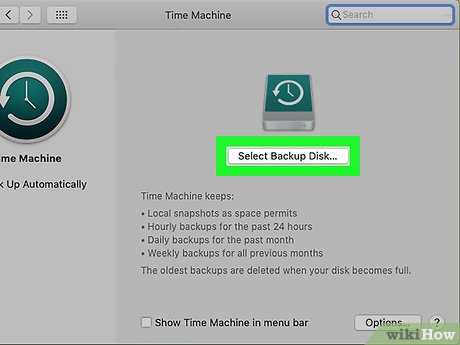 ClickSelect Backup Disk…. This is in the middle of the Time Machine menu. Doing so opens a pop-up window with different hard drives listed.
 Select your external hard drive. Click the name of the external hard drive you connected to your Mac.
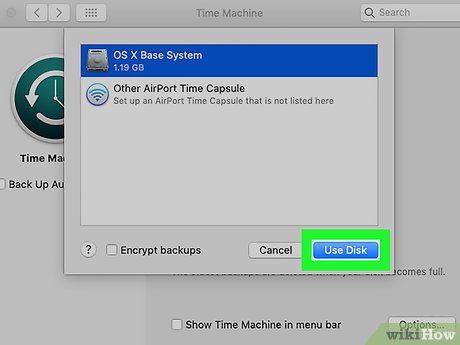 ClickUse Disk. It's a blue button in the lower-right corner of the menu. Doing so will select the hard drive as your backup point.
- If the external hard drive has files on it or it hasn't been formatted for use with your Mac, you'll be prompted to erase it before proceeding. Click Erase to do so.
 Click the Time Machine menu icon. This circular arrow icon is near the far-right side of the menu bar that's at the top of your Mac's screen. A drop-down menu will appear.
 ClickBack Up Now. It's in the drop-down menu. Doing so prompts your Mac to begin backing up to your connected external hard drive.
FAQ
What is How to Create a System Restore Point about?
It provides a structured overview of click, explains the main context, and highlights practical takeaways for readers.
Why does this topic matter?
Understanding the main concepts helps readers evaluate the issue, avoid common mistakes, and make better-informed decisions.
How should readers use this information?
Use the guidance as a practical starting point, confirm details that may have changed, and follow current product, safety, or security recommendations.
Related Articles
 How to Create Restore Point on Windows 10 with Just 1 Double5 minutes read
 Instructions for Creating Backup and Restore Points (Restore4 minutes read
 Configure the System Restore Feature in Windows 109 minutes read
 Instructions for Restoring the System on Windows6 minutes read
 Click: How to Do a System Restore6 minutes read
 How to Delete a System Restore Point in Windows 108 minutes read
Reader Comments 0
Sign in with email or Google to join the discussion.