Table of Contents
This updated guide examines Click: How to Do a System Restore and organizes the essential facts, background, and practical takeaways in clear American English.
Part 1of 3:
Creating a Restore Point
 Open Start
 . Click the Windows logo in the bottom-left corner of the screen.
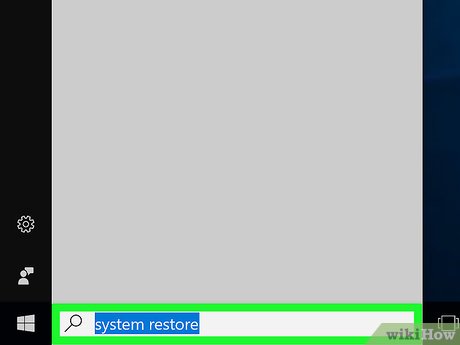 Typesystem restoreinto Start. Doing so searches your computer for the restore point menu.
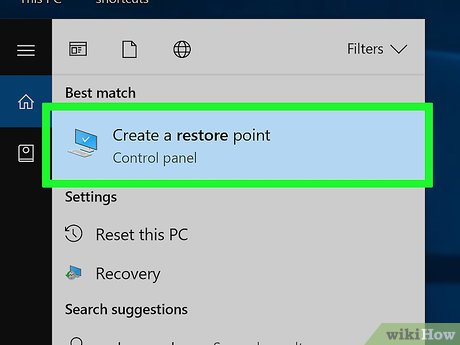 ClickCreate a restore point. It's the monitor-shaped icon at the top of the window.
 ClickCreate…. This option is in the lower-right side of the System Restore window. A new window will open.
 Enter a restore point name. Click the text box in the middle of the window, then type in your restore point's name.
- You don't have to enter a date or time, as System Restore will note the date and time at which the point is created.
 ClickCreate. It's below the text box. This will create your restore point, though the restore point may take a couple of minutes to create.
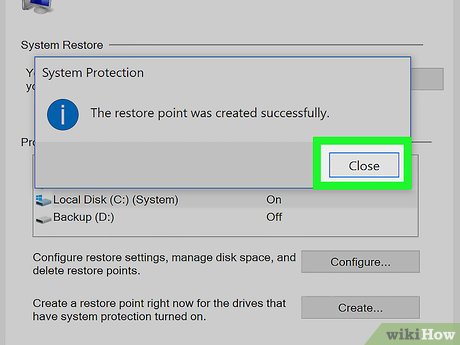 ClickClosewhen prompted. This is at the bottom of the window.
 ClickOK. It's at the bottom of the System Restore window. Doing so will close the System Restore window. You can now proceed with restoring your computer whenever need be.
Part 2of 3:
Restoring from the Desktop
 Open Start
 . Click the Windows logo in the bottom-left corner of the screen.
 Typerecoveryinto Start. Doing so will search your computer for the "Recovery" program.
 ClickRecovery. It's a blue computer monitor-shaped icon at the top of the Start window. This will open the Recovery window.
 ClickOpen System Restore. This link is near the top of the Recovery window. Doing so opens the System Restore window.
 ClickNext. It's at the bottom of the window.
 Select a restore point. Click your restore point's name in the middle of the page. Make sure that the date to the left of this point is correct before continuing.
 ClickNext. This is at the bottom of the page.
 ClickFinish. It's at the bottom of the System Restore window. Doing so will prompt your computer to begin restoring. This process may take several minutes to over an hour, and your computer will restart at least once during the process.
Part 3of 3:
Restoring from the Advanced Settings Menu
 Open the Advanced Settings menu. This is helpful if your computer is trapped in a restart cycle. Simply wait for the "Press [key] for advanced options" (or a similar phrase) prompt to appear when your computer is starting up, then press the key listed in the "[key]" section.
- If you're here because of a blue screen of death, just wait for the "Choose an option" screen to appear after a few minutes.
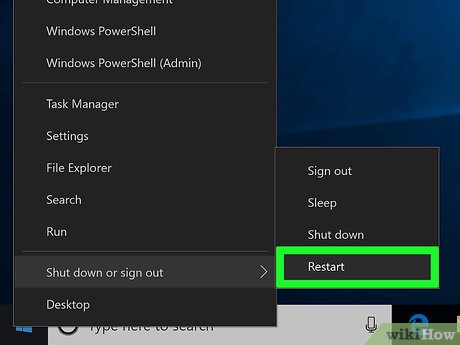
- To access the Advanced Settings menu from the desktop, open Start , click the Power icon in the lower-left side, hold down⇧Shiftwhile clicking Restart , and release⇧Shiftwhen the Advanced Options screen appears.
 ClickTroubleshoot. It's a symbol of a screwdriver and a wrench on this page.
 ClickAdvanced options. You'll find this on the "Troubleshoot" page.
 ClickSystem Restore. It's the top option on the "Advanced options" page. Doing so will take you to the System Restore sign-in page.
 Select your account. Click you account's name. If you only have one account on your computer, there should only be one name here.
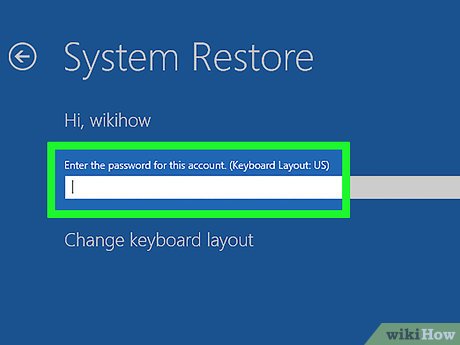 Enter your account password. This password may be different than the password that you use to log into your Microsoft account depending on your settings.
 ClickContinue. Doing so will submit your password and log you into your account.
 ClickNext. It's at the bottom of the System Restore window.
 Select a restore point. Click the point that you want to restore. Make sure that the date to the left of the restore point's name is accurate.
 ClickNext. It's at the bottom of the window.
 ClickFinish. This option is at the bottom of the window. Doing so will prompt your computer to begin restoring. This process may take several minutes to over an hour, and your computer will restart at least once during the process.
FAQ
What is Click: How to Do a System Restore about?
It provides a structured overview of click, explains the main context, and highlights practical takeaways for readers.
Why does this topic matter?
Understanding the main concepts helps readers evaluate the issue, avoid common mistakes, and make better-informed decisions.
How should readers use this information?
Use the guidance as a practical starting point, confirm details that may have changed, and follow current product, safety, or security recommendations.
Related Articles
 Instructions on How to Use System Restore on Windows8 minutes read
 How to Use System Restore in Windows: Turn Off, Turn on, Create, Restore3 minutes read
 Configure the System Restore Feature in Windows 109 minutes read
 How to Use System Restore on Windows 7: Practical Guide11 minutes read
 Instructions for Restoring the System on Windows6 minutes read
 Instructions for Creating Backup and Restore Points (Restore4 minutes read
Reader Comments 0
Sign in with email or Google to join the discussion.