Table of Contents
How to Use Backup and Restore on Windows 7? is easier to understand when the core ideas are paired with practical examples. The sections below explain the topic clearly, highlight useful steps, and point out details that can prevent common errors.
The backup and restore utility integrated on previous Windows versions is less user-friendly than using third-party applications. In the following article, Network Administrator will guide you how to use Backup and Restore on Windows 7 - one of the best backup tools today.
1. Set up backup (Backup)
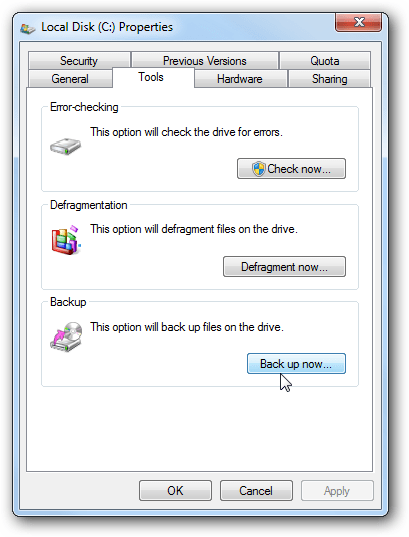
To set up backup (Backup) on Windows 7, open Computer, right-click your drive and select Properties . On the Propreties window, click the Tools tab and then click the Back up now button .
On the Backup or restore your files window, click the link Set up backup .

Windows will search for suitable drives to store backups or you can select a location on the network to backup. If you choose to backup to a network location (Save on a network.) you will need a password to share.

You can set Windows to choose what to back up or you can select specific files and folders to backup, which is entirely up to you.
Note : If you set Windows to choose, Windows will not back up Program Files, and anything that is formatted with the FAT system file, files on the Recycle Bin or any temporary files there are. 1 GB capacity or more.
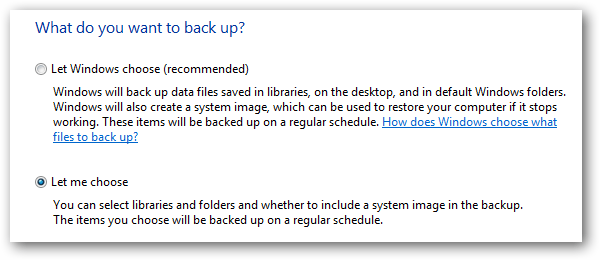
Select files and folders to backup. In addition, you can check the option Include a system image of drives: (C:) to create an image of your drive.

After selecting, click Next. Now proceed to review the backup jobs that are correct and make sure everything is complete.
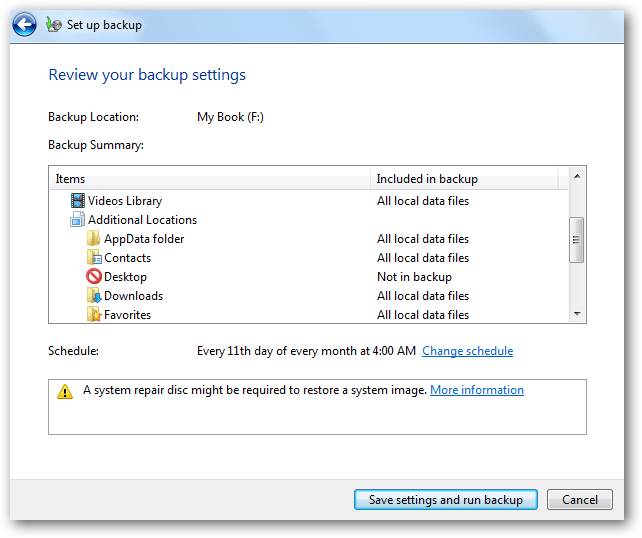
Here you can also schedule backups by date and time.

Save backup settings and Backup process will be done according to your request.

Click on the View Details button to see exactly what is backed up during the process.

When the backup process finishes, you will see 2 backup files and image folders if you choose to backup both. If you back up data about 20 GB, it takes about 15 minutes including the image system to 11GB.

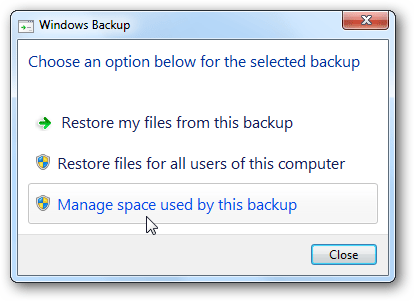
Double click on the backup file and you can restore files or manage the size of backup folders.
2. Restore files from backup
If you need to restore a file from a previously backed up package, click the Restore my file option on the Backup and Restore Center window.

You can now browse or search for the most recent backups for a lost file or folder by clicking Browse for folders.

Next you can restore files, folders to their original location or choose another location and click Restore.

The recovery process depends on the data size and the location to restore the data you selected.

3. Manage backup size
In some cases you need to restore the space of the drive and Windows 7 allows you to manage the size of the backups. In the Backup and Restore section, click the link Manage space .

Now a new window appears, where you will see a summary of the list of backup locations and parts of your disk space usage from previous backups.

Click the View backups button to check the different backup times, where you can delete the folders, the backup file is not important by clicking Delete.

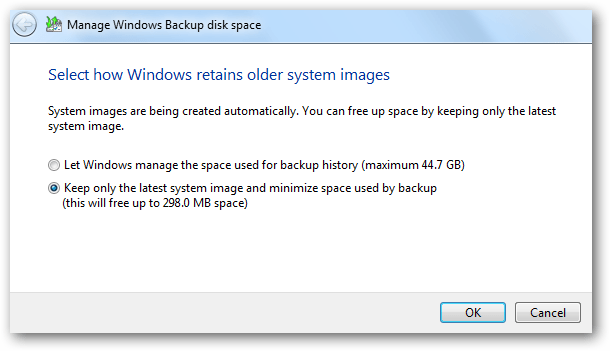
You can also change the system image retention from previous backups.
Refer to some of the following articles:
- 4 simple ways to backup phone numbers in Android phone contacts
- Complete how to use all backup and restore tools on Windows 10
- This is how to backup, restore Windows 7/8 / 8.1 and Windows Vista licenses
Good luck!
FAQ
What should you know about 1. Set up backup (Backup)?
To set up backup (Backup) on Windows 7, open Computer, right-click your drive and select Properties. On the Propreties window, click the Tools tab and then click the Back up now button.
What should you know about 2. Restore files from backup?
If you need to restore a file from a previously backed up package, click the Restore my file option on the Backup and Restore Center window.
What should you know about 3. Manage backup size?
In some cases you need to restore the space of the drive and Windows 7 allows you to manage the size of the backups. In the Backup and Restore section, click the link Manage space.
Related Articles
 Complete How to Use All Backup and Restore Tools on Windows 1012 minutes read
 Instructions to Backup and Restore Windows 103 minutes read
 Windows Operating System: Backup and Restore Registry on Windows5 minutes read
 How to Use Iperius Backup Free to Back up Windows Data4 minutes read
 Instructions: Delete Log Information in Windows Server Backup2 minutes read
 Configure the System Restore Feature in Windows 109 minutes read
Reader Comments 0
Sign in with email or Google to join the discussion.