Complete Word 2016 tutorial (Part 20): Align, align, and group objects
When using Word, sometimes you need to use multiple objects such as images, shapes, Text Box, graphics. You can organize these objects by aligning, grouping, organizing and rotating them in different ways. This will make your document look more creative, beautiful and special. Please follow the article below for details!
Table of Contents
When using Word, sometimes you need to use multiple objects such as images, shapes, Text Box, graphics. You can organize these objects by aligning, grouping, organizing and rotating them in different ways. This will make your document look more creative, beautiful and special. Please follow the article below for details!
Align two or more objects
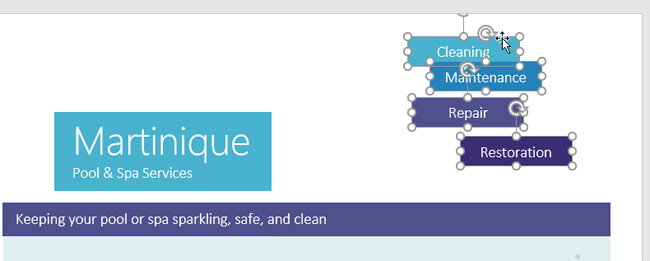
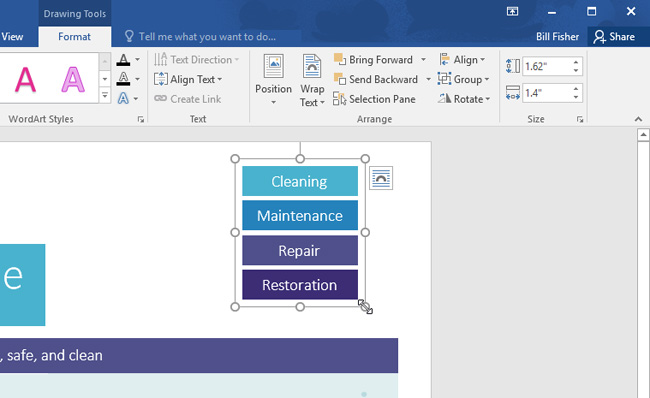
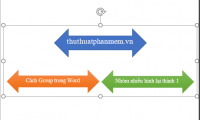
Step 1: Hold down Shift (or Ctrl) and click on the objects you want to align. In the example, we will select four shapes on the right.
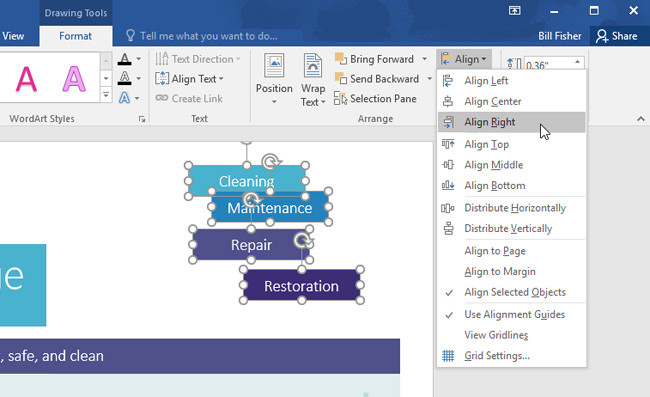
Step 2: From the Format tab, click the Align command, then select one of the alignment options. Here, we will use Align Right.
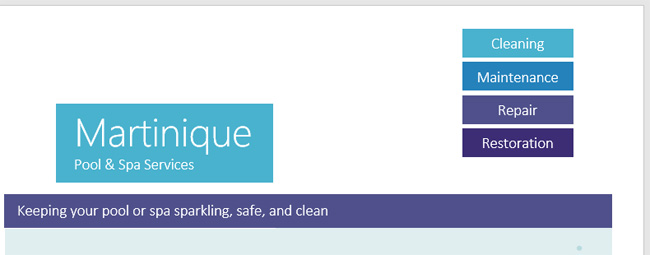
Step 3: The objects will be aligned based on the options that are enabled. The result will be as shown below.

If you want to move objects to the top or bottom of the page, select Align to Page or Align to Margin before selecting the alignment options.
Distribute objects
If you have arranged objects in rows or columns, you can distribute them horizontally or vertically in a even distance so that they are compact.
Step 1: Hold down Shift (or Ctrl) and click on the object you want to distribute.
Step 2: On the Format tab, click the Align command, then select Distribute Horizontally or Distribute Vertically.

Step 3: Result we will get the shapes evenly as shown below.
Group of objects
Grouping objects together will allow you to resize and move all objects at once.
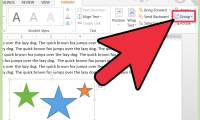
Step 1: Hold Shift (or Ctrl) and click on the object you want to group.
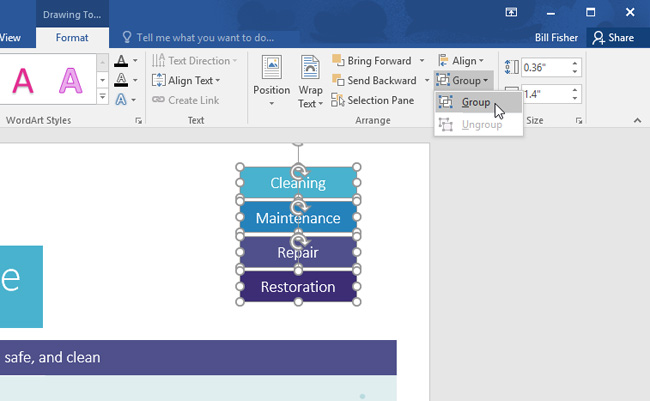
Step 2: Click on the Group item on the Format tab and select the Group command.
Step 3: The selected objects are grouped and the results are as follows.
Cancel group of objects
Similar to the grouping task, to cancel the group, you just need to access Format> Group> Ungroup.
Arrange the objects
In addition to alignment, Word 2016 also provides the ability to sort objects in a specific order to determine which objects are ahead, which objects are behind when they overlap.
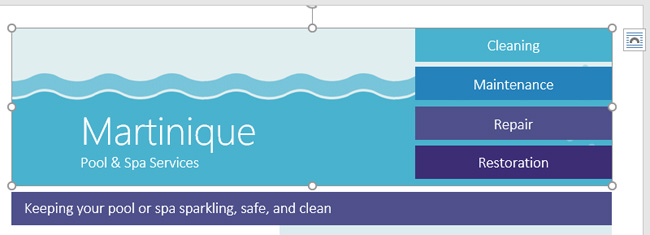
Step 1: Select the object you want to move. In this example, we will select the image of the wave.
Step 2: From the Format tab, click the Bring Forward or Send Backward command to change the order of the objects according to each level. In this example, we will select Send Backward.

Step 3: The objects will be rearranged. In this example, the image is behind the text on the left but still covers the shapes on the right.
Step 4: If you want to move the object behind or in front of other objects, use Bring Forward or Send Backward instead of clicking on the other sort command multiple times.
Step 5: In this example, the wave image is moved behind the other objects, by clicking the Send to Back command in the Send Backward section. Therefore, all text and shapes are displayed in front of the wave image.
If you want to change the layout of a specific object, you can use Selection Pane on the Format tab.
Rotate or flip the object
If you need to rotate an object to another direction, click the Rotate command on the Format tab, then click the option you want. In this example, we will select Flip Horizontal.
As a result, we will get the bubbles on the left that were previously hidden behind the right Text Box.

Good luck!
You can see more:
- Guide to Word Word 2016 (Part 19): Inserting Text Box
- Tutorial for Word 2016 (Part 18): How to add Shape shapes
Was this article helpful?
Your feedback helps us improve.
Related Articles
 How to Group Objects on Microsoft Word3 minutes read
 How to group in Word, group multiple shapes into 1 in Word3 minutes read
 How to align correctly in Word3 minutes read
 How to align text in a cell in Excel3 minutes read
 How to align in Word extremely accurately5 minutes read
 How to align in Word - Instructions on how to align in Word 2007, 2010, 2013, 20163 minutes read
Reader Comments 0
Sign in with email or Google to join the discussion.