Backup for Exchange Server with DPM 2007 - Part 2: Configure DPM 2007
Although we can still use earlier versions of DPM (DPM 2006) to back up Exchange Server, it does include a two-step method. With the new version, DPM 2007 is used to support online Exchange backup, so you won't need any other backup utilities.
 Backup for Exchange Server with DPM 2007 (Part 1)
Rui Silva
Configuring DPM 2007
After completing the DPM installation process, there are some necessary configuration tasks that we need to accomplish:
-
Add one or more disks to the storage system
-
Install protection agents for each computer you want to protect
-
Create one or more protection groups
The following procedures will describe in detail how to perform the above tasks.
1. Log in to DPM server with a domain user account and have local administrator rights. On Start , point to All Programs , Microsoft System Center Data Protection Manager 2007 , and then click Microsoft System Center Data Protection Manager 2007 .
2. DPM 2007 requires a dedicated disk for storage (the disk you installed DPM cannot be used for storage). Although the pre-existing drive in the storage disk may have free space, DPM can only use it in the drives it creates. To create all available disk space for storage, you need to delete existing disks on this disk, then add the disk to the storage system.
In DPM Administrator Console , in the Management section, the Disk tab, panel Actions , click Add . As introduced in Part 1, the example DPM server has all the disks used to use DPM 2007, so we will add the entire drive to the storage area. When we do that, we get a warning that the disk will be moved to dynamic state (Figure 1). After clicking Yes, the disk will appear in the DPM storage section (Figure 2).

Figure 1: Warning
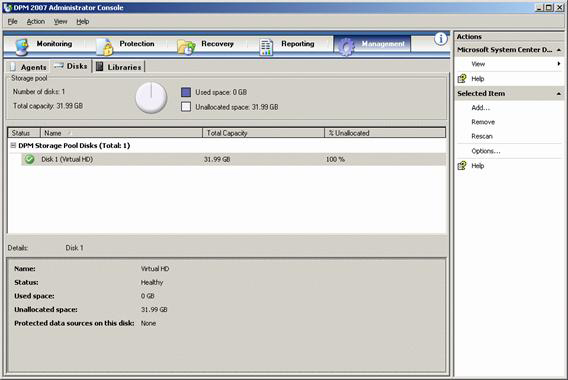
Figure 2: DPM storage disks
3. To install the protection agent (Protection Agent), in DPM Administrator Console , in the Management area, Agents tab, panel Actions , click Install . The Protection Agent installation window will appear and guide you through the process of creating the protection agent. In the Select Computers window (Figure 3), select one or several computers from the Computer name list, click Add , and then click Next .
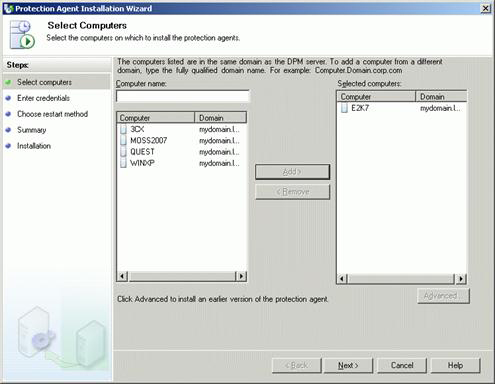
Figure 3: Select computers
4. In the Enter Credentials window (Figure 4), you need to enter the information such as the username and the corresponding password for the domain account that is a member of the local administrator group with all the selected servers. , and then click Next . In the Choose Restart Method screen (Figure 5), select the method you will use to restart the computers after the protection agent is installed. The computer must be restarted before starting data protection. Click Next .
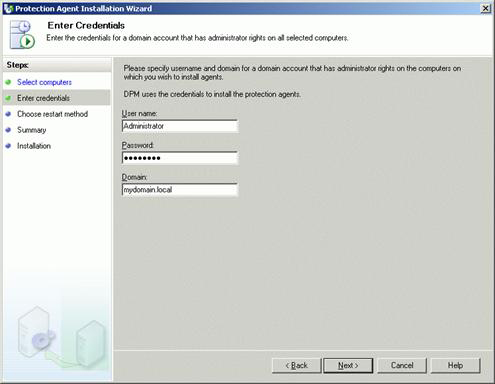
Figure 4: Import information window
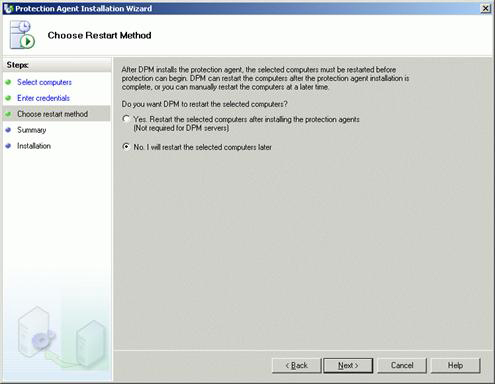
Figure 5: Select reboot
5. In the Summary screen (Figure 6), click Install to begin the installation. On the Installation screen, the results will appear on the Task tab to indicate whether the installation was successful (Figure 7). Click Close .
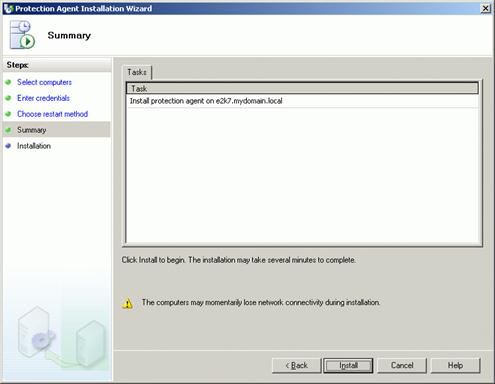
Figure 6: Summary window
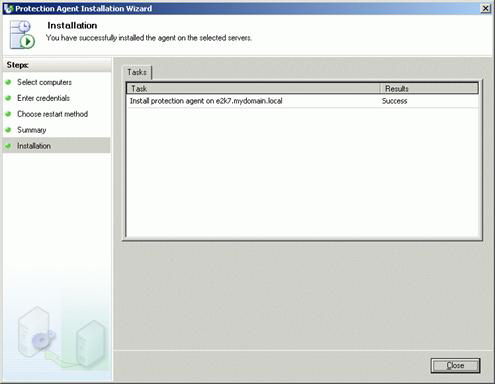
Figure 7: Installing Agent
6. After the server is rebooted, it will appear as Unprotected computers with protection agent (Figure 8). If the server does not have enough prerequisites, the installation process will fail and you will see an error message window pop up (Figure 9). In other words, if the agent is installed, it will appear in Add / Remove Programs (Figure 10) and there is a new service running on that machine (Figure 11).

Figure 8: DPM Agent
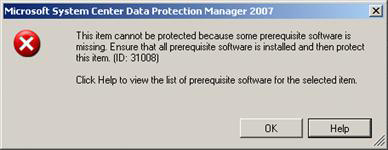
Figure 9: Installation error message for DPM Agent
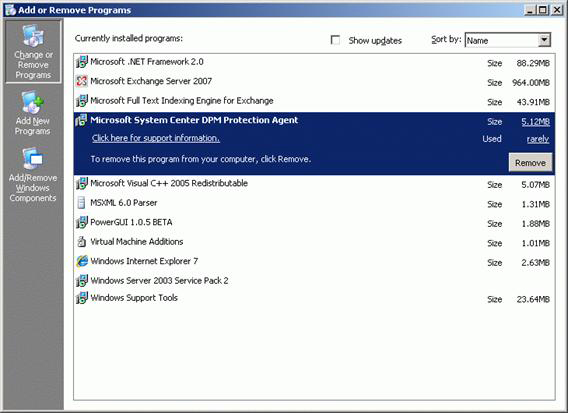
Figure 10: Add / Remove Programs
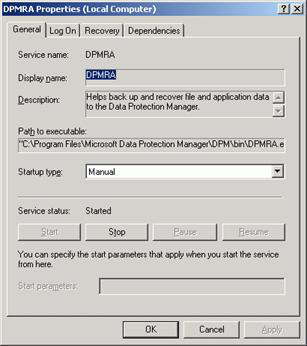
Figure 11: DPM Agent service
7. Before creating the Protection Group, since we protect Exchange Server, we have to copy the ese and eseutil files (usually located in the folder C: Program FilesMicrosoftExchange ServerBin) to the DPM server. Versions of the two files eseutil.exe and ese.dll installed on the computer running the most recent Exchange Server version must be the same version installed on the DPM server. The following table shows all possible scenarios to indicate the correct version of the eseutil.exe and ese.dll files that you must install on the DPM server. These files should be copied to the DPMbin directory with the path where you installed DPM 2007 (Figure 12).
Protect DPM server
DPM processor
Copy Exchange Server version of Eseutil.exe and Ese.dll files from:
- Exchange Server 2007 (64-bit)
32-bit
Exchange Server 2007
- Exchange Server 2007 (64-bit)
And - Exchange Server 2007 (64-bit) and Exchange Server 2003
32-bit
Exchange Server 2007 (version 32-bit). Exchange Server 2007 version binaries can work with both Exchange Server 2007 and Exchange Server 2003 database versions.
You can obtain this version from Exchange Server 2007 Setup DVD or on Exchange Server TechCenter.
- Exchange Server 2007 (64-bit)
Or - Exchange Server 2007 (64-bit) and Exchange Server 2003
64-bit
Exchange Server 2007
- Exchange Server 2003
32-bit
Exchange Server 2003
- Exchange Server 2003
64-bit
Exchange Server 2003
Table 1 : The script defines the versions of the files eseutil.exe and ese.dll
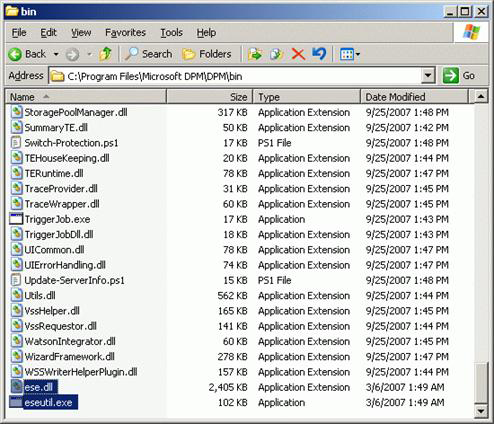
Figure 12: ese and eseutil files on DPM server
8. To create a Protection Group, in DPM Administrator Console , in the Protection area, in the panel Actions , click Create protection group . The New Protection Group Wizard will appear and guide the process of creating a protection group (Figure 13). Click Next .
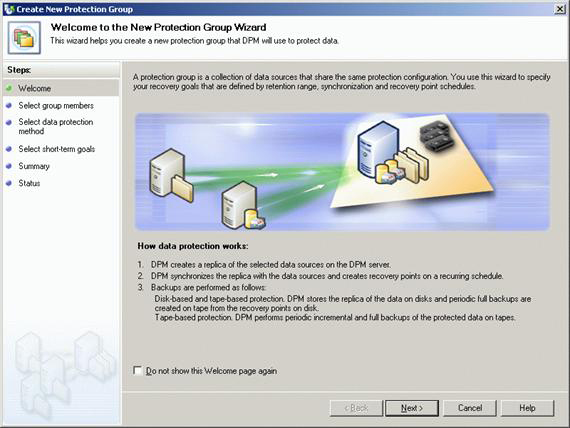
Figure 13: Group protection utility
9. In the Select Group Members window, verify that all computers that store the data you want to protect are displayed in the Available members box. In the Available members box, expand the server nodes to display the available data source on each server and to see available Exchange storage groups. Check the checkbox next to each storage group you want to include. When selecting the data source, your selections will appear in the Selected members box (Figure 14). Click Next .
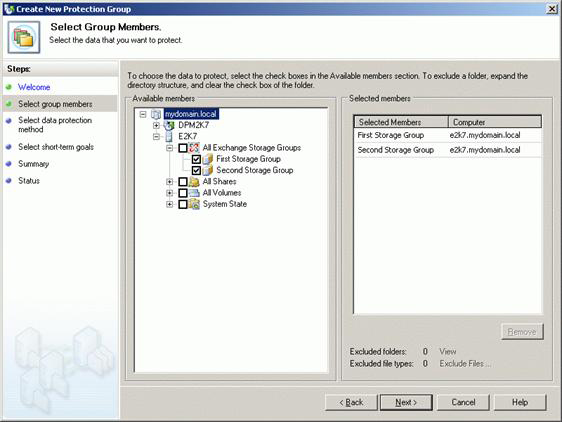
Figure 14: Select group members
10. In the Select Data Protection Method window, select the I want short-term protection using check box for short-term protection and then select the environment you want to use from the list in the select box. Since we do not have a tape storage library for DPM server, Disk is short-term protection (Figure 15). Click Next .

Figure 15: Choose a data protection method
11. On the Specify Exchange Protection Options page , check the Run Eseutil checkbox to check data integrity (Figure 16). This option uploads a consistent check of the backup issue from Exchange Server to DPM server. If you did not copy the eseutil files as mentioned in step 7, an error will appear here (Figure 17). Click Next .
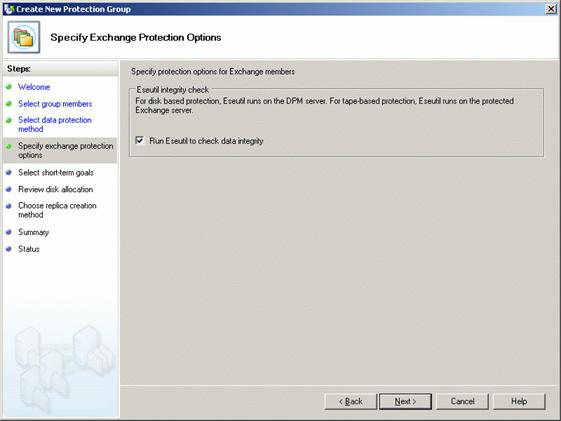
Figure 16: Exchange protection options
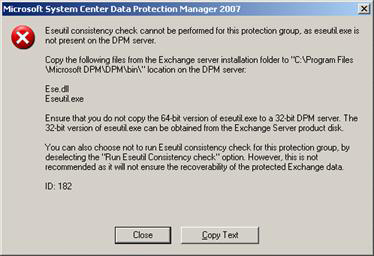
Figure 17: Error
12. On the Specify Short-Term Goals page (Figure 18), select the retention period for data recovery in the Retention range box. In the Synchronization frequency section, select the frequency of the backups or to configure DPM to perform a quick backup before each restore point is scheduled. To change the work schedule schedule for the data source, click Modify next to the desired data source. Select the desired number and the days of the week (Figure 19) then click OK . Click Next .
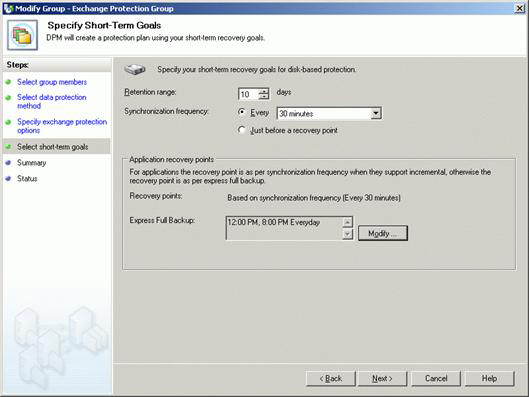
Figure 18: Short-Term Goals
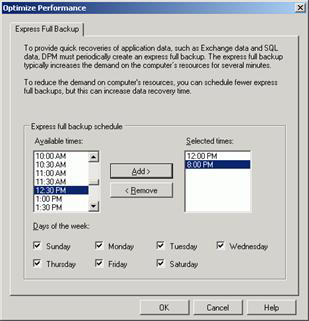
Figure 19: Quick backup schema
13. DPM will display recommended disk locations (see Figure 20). This step allows you to determine how many storage disks will be used to protect that data source. You should specify the drive to copy DPM larger than the expected amount in each data source may increase in the short term. To determine the storage space, do one of the following: To accept the recommended locations, click Next . To change the recommended location, click Modify , adjust the location (Figure 21), click OK and then click Next .
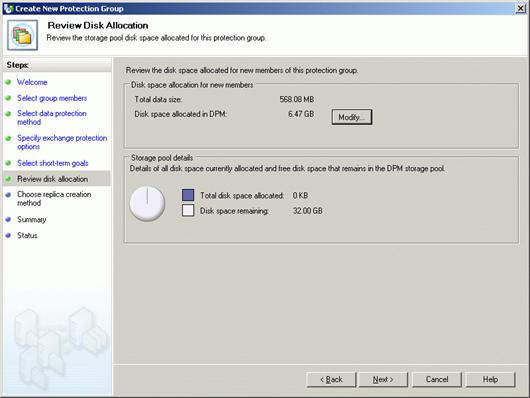
Figure 20: Disk location
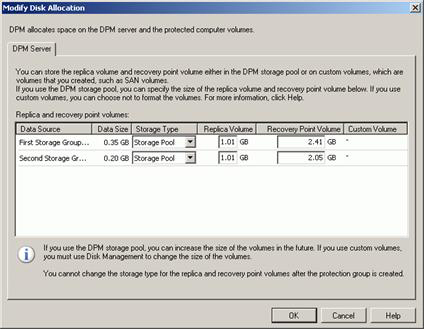
Figure 21: Changing the disk location
14. On the Choose Replica Creation Method page (Figure 22), select the time when you want the DPM to perform the initial data backup and click Next .
• Select the Automatically option for DPM to recreate data throughout the network. Select Now so that DPM can immediately start copying data from the computers you are protecting to the DPM server, select Later to start the original copy at a later time if you want to schedule only run at times when network traffic is low.
• Select Manually to use for tape, USB, or mobile device storage to transfer data to DPM server.
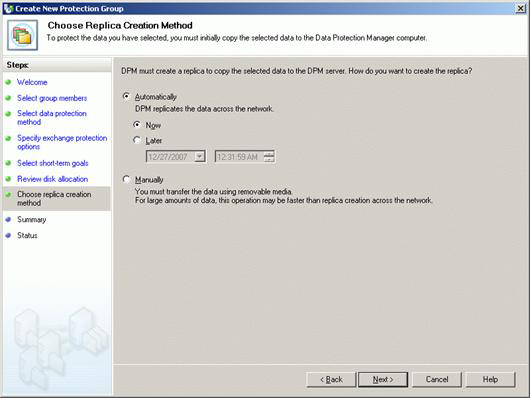
Figure 22: Copy method
15. In the Summary window (Figure 23), review the tasks that DPM is set to perform security group creation and then click Create Group . Review the confirmation page (Figure 24) and click Close .

Figure 23: Summary
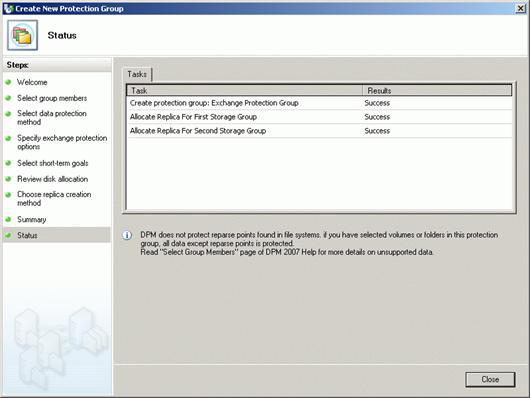
Figure 24: Protection group status
DPM will immediately create the first copy of the storage groups (Figure 25) and will show the protection status as OK if it succeeds (Figure 26).
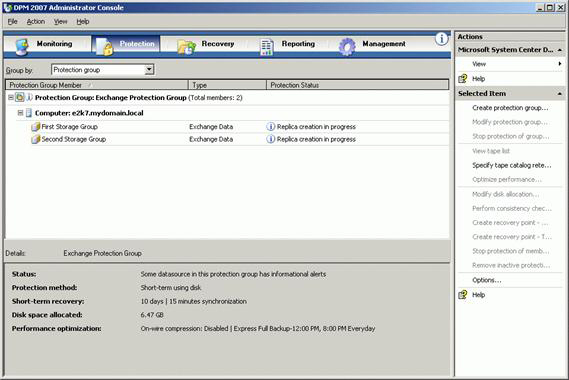
Figure 25: Copy of Exchange in progress
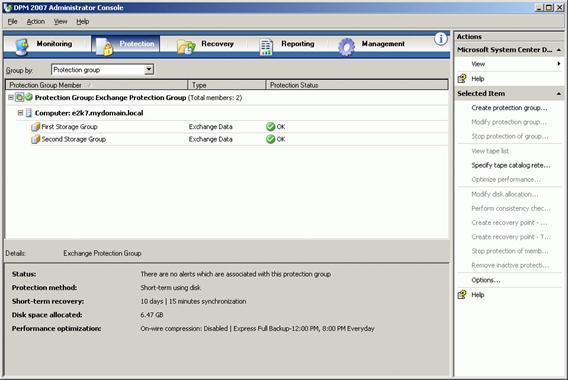
Figure 26: Exchange protection group
Conclude
Although configuring Data Protection Manager 2007 and creating the Exchange Protection Group is not difficult, the agent installation requires you to restart your production servers, so it needs to have a good plan in advance.
In the next part of this series, we will take a closer look at configuration options and introduce the backup process in more detail.
 Backup for Exchange Server with DPM 2007 (Part 3)
Was this article helpful?
Your feedback helps us improve.
Related Articles
 Backup for Exchange Server with DPM 2007 (Part 1)12 minutes read
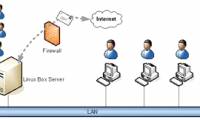 Transfer from Linux Mail Server to Exchange Server 2007 (Part 1)10 minutes read
 Discover EMC in Exchange Server 2010 (Part 2)4 minutes read
 Installing, configuring, and testing Exchange 2007 CCR on Mailbox Server (Part 2)8 minutes read
 Mobile messaging in Exchange 2003 - Part 4: Access group GALs from mobile devices with GAL Lookup11 minutes read
 Backup for Exchange Server with DPM 2007 - Part 3: Backup process12 minutes read
Reader Comments 0
Sign in with email or Google to join the discussion.