Installing, configuring, and testing Exchange 2007 CCR on Mailbox Server (Part 3)
 Installing, configuring and testing Exchange 2007 CCR on Mailbox Server (Part 1)
 Installing, configuring, and testing Exchange 2007 CCR on Mailbox Server (Part 2)
Henrik Walther
In the second part of this series, we installed the necessary components, enabled and configured the File Share Witness for Majority Node Set (MNS) Quorum as well as the transport dumpster on the Hub Transport Server. In this section we will install Windows Server 2007 for both nodes in the Windows 2003 cluster. The article will then finish by verifying that the CCR function has worked as expected.
Install Active Clustered Mailbox Role on E2K7Node1
Now it is time to install Windows Server 2007 Beta 2 on both nodes, we will start with the button E2K7Node1 . First, if you have not done so already, we recommend that you copy Exchange Server 2007 Beta 2 to a local drive on each node. When you're done, double-click Setup.com .

Figure 36: Launch Exchange Setup
The Exchange Server 2007 Installation Wizard will appear and you can see Step 1: Install .NET Framework 2.0 and Step 2: Install Microsoft Management Console (MMC) has been completed.
Note :
If you have Windows Server 2003 Service Pack 1 installed on each node, you need to download Microsoft Management Console (MMC) 3.0 and install it manually (follow the link in step 2). However, since we are using Windows 2003 R2 Servers in the test environment, this MMC 3.0 has been installed by default.

Figure 37: Installation menu of Exchange Server 2007
As you can see in the picture, we still need to complete step 3 ( Step 3: Install Microsoft Command Shell (MSH) ) before starting Exchange installation. So, click download MSH, then open the archive and install it.
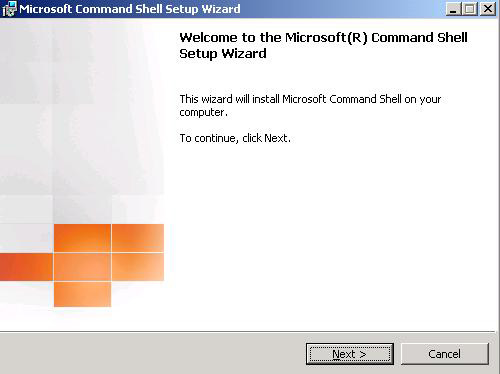
Figure 38: Installing Microsoft Command Shell (MSH)
The Exchange Server 2007 Installation Wizard needs to be refreshed automatically, so click Install Microsoft Exchange . Click Next then accept the License Agreement and click Next again. You have to decide whether you want to enable Error Reporting (the good idea is to enable this feature) and then click Next .
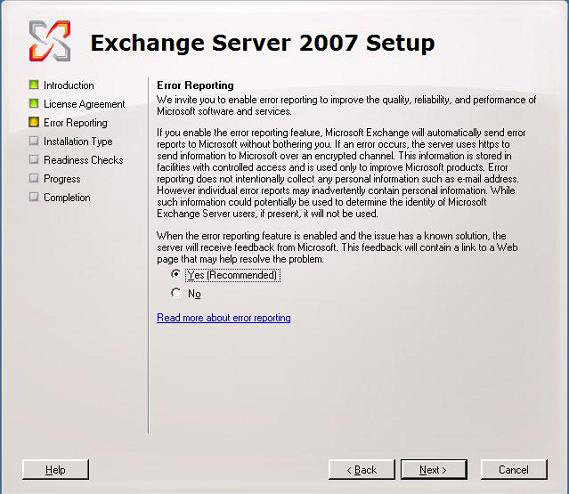
Figure 39: Activate error report (Error Reporting)
Now select Custom Exchange Server Installation then click Next .
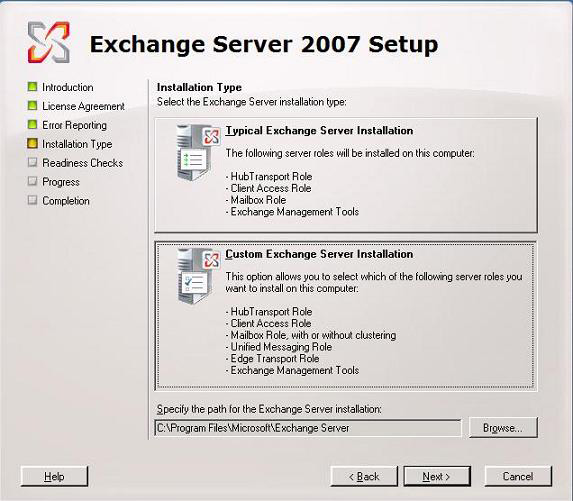
Figure 40: Select the Exchange Server option settings
Check Active Clustered Mailbox Role and click Next .
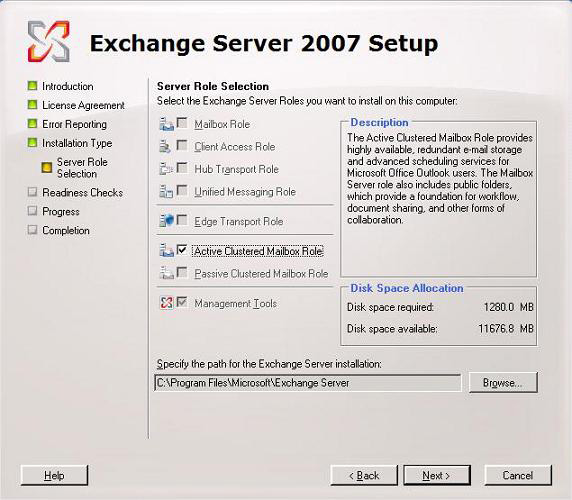
Figure 41: Select to install Active Clustered Mailbox Role
Now select Cluster Continuous Replication and then specify the name for the mailbox server (the name you want to set when Outlook clients connect) and a unique IP address in the public network. Finally, specify the path for the clustered mailbox server database files or use the default, then click Next .

Figure 42: Select to install Cluster Continuous Replication cluster,
Specify the name and IP address for the mailbox server.
Check the whole checkout, if there is no problem here you can click Next to begin the installation process.
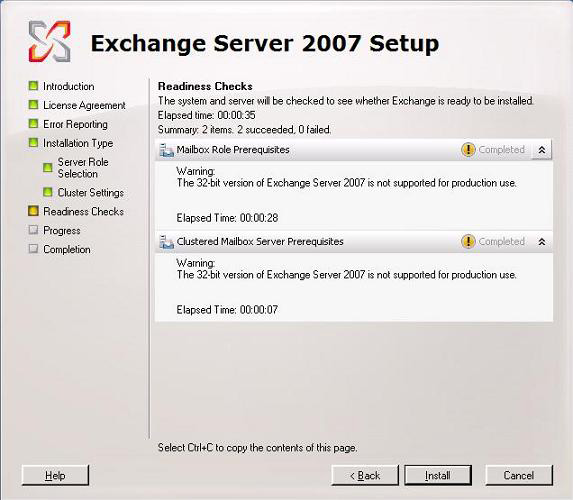
Figure 43: Examine the entire Exchange Server 2007 Clustered Mailbox Role before installing
The Exchange Server 2007 Installation Wizard will copy the necessary Exchange files, install and configure the Mailbox Role, and eventually create and configure the clustered mailbox server resources internally and create objects in Active Directory. When each step is completed, uncheck Exit Setup and open Exchange System Manager then click Finish . We do not want to open Exchange Management Console at this time, so we will install Exchange on the second node first.
Install the Passive Clustered Mailbox Role on E2K7Node2
Log into E2K7Node2 with the domain administrator account and do the exact same steps as you did when installing on E2K7Node1 . The only difference is that you should choose Passive Clustered Mailbox Role instead of Active Clustered Mailbox Role as shown in Figure 44 below.
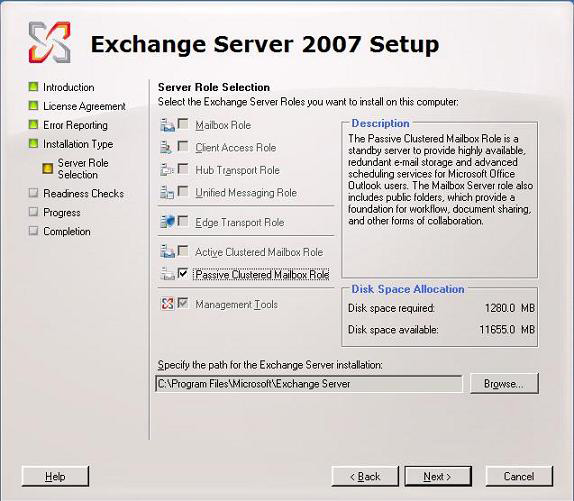
Figure 44: Clustered mailbox role passive installation on the second node
Verify the function of CCR on Mailbox Server
Now we're going to verify whether the Exchange 2007 clustered mailbox server works as expected. First open the Cluster Administrator and add the corresponding Exchange Resources . If you look at a bit in Figure 45 below, it will be much better, we have both buttons listed in the left pane with all Exchange resources created and currently owned by E2K7Node2 .
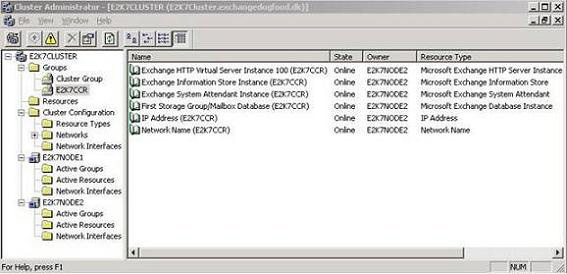
Figure 45: List all Exchange group resources in Cluster Administrator
Try opening the Exchange Management Shell by clicking Start > All Programs > Microsoft Exchange Server 2007 > Exchange Management Shell on one of the buttons, then typing Get-ClusteredMailboxServerStatus –Identity E2K7CCR . As you can see in Figure 46 below, the grouped mailbox server's status is Online, and E2K7Node2 is currently in active status.
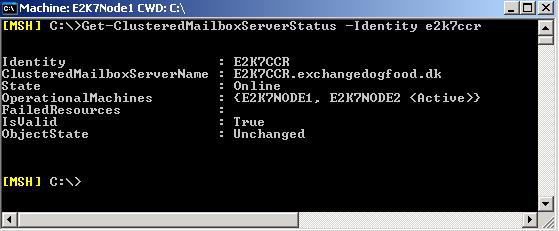
Figure 46: Requesting the online status of the clustered mailbox server
Now let us verify if the mailbox server is online, move the Exchange resources from node one to node two using the Move-ClusteredMailboxServer CMDlet. In the test environment used in this article, we do so using the CMDlet below:
Move-ClusteredMailboxServer -Identity: E2K7CCR -TargetMachine: E2K7Node1 -MoveComment: "This is a test!"
You will then be asked to confirm this action, type Yes and then press Enter . Then the clustered mailbox resources will be moved to the first node.

Figure 47: Transfer clustered mailbox resources into the first node
Note :
Although it is possible to switch group resource groups between nodes using the Cluster Administrator interface, you should do so using the Move-ClusteredMailboxServer CMDlet because the Move Group task in the Cluster Administrator management interface does not understand anything about Exchange 2007.
Let's take a look at the clustered mailbox server in the Exchange Management Console. To do so, click Start > All Programs > Microsoft Exchange Server 2007 > Exchange Management Console , then select Server Configuration > Mailbox . Note that the clustered mailbox server named E2K7CCR will be listed in the results pane and it will be considered a cluster server.
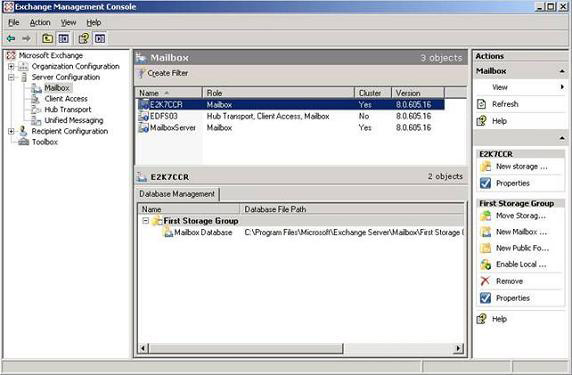
Figure 48: Viewing the clustered mailbox server in the Exchange Management Console
Let's look at the file that records the conversion record from one node to the other. The easiest way to do that is to create a log file by sending some test messages with one or two attachments.
Note :
Because the size of the conversion log file in Exchange Server 2007 is 1MB instead of 5MB already in previous Exchange versions, you cannot attach files larger than 1MB to create the log file.
As you can see in Figure 49 below, the log files here are reviewed in E2K7Node2 around the time they were created on E2K7Node1 .
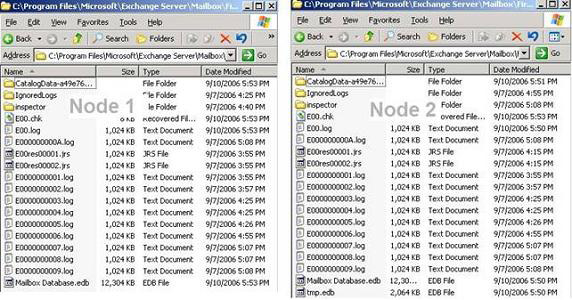
Figure 49: Review the log file
Simulate a failover from E2K7Node1 to E2K7Node2
Let's simulate a failover from E2K7Node1 (currently active) to E2K7Node2 , so we can see what happens from the Outlook client perspective. To move from one node to another we will put in the CMDlet below, CMDlet is also used in the upper part of this article:
Move-ClusteredMailboxServer -Identity: E2K7CCR -TargetMachine: E2K7Node2 -MoveComment: "This is a test!"
When manual transfer or a failover occurs, the bulge shown in Figure 50 will appear when all services need to be stopped on the E2K7Node1 node before they are activated online on E2K7Node2 .
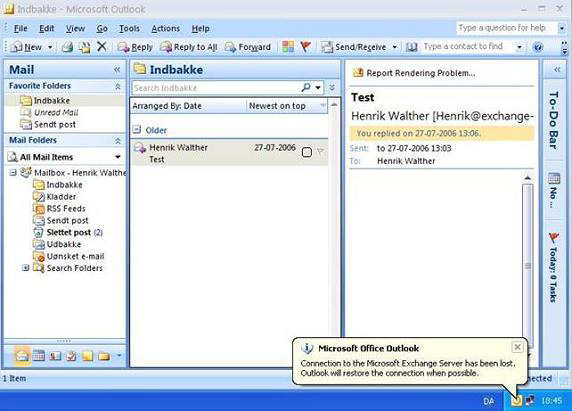
Figure 50: Connection to Exchange Server has been lost
Depending on the quantity and size of the database in the Cluster Continuous Replication setup, it will take about 10s to 1 minute, this will not cause discomfort to the user. When E2K7Node2 is resumed (passed), the user will receive a message that the connection to Exchange Server has been restored (Figure 51).
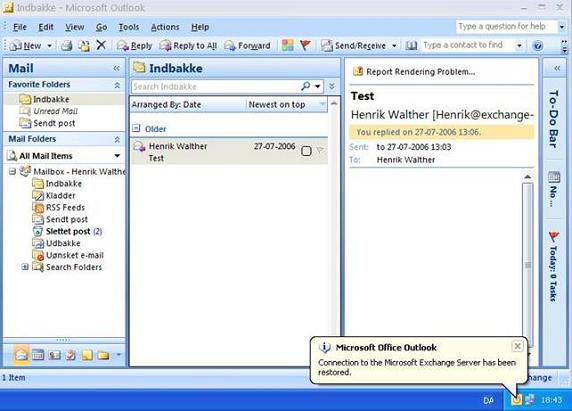
Figure 51: Connection to the restored Exchange Server
Conclude
There are many advantages to installing the Exchange 2007 Mailbox Server role in the Cluster Continuous Replication setup in your environment. The main reason here is that you will have a failover point with the Mailbox / Public Folder database. When each database on a node has a problem, the possibility of failover will automatically make the switch to another node also has a secondary database. This means that you do not need to use shared storage in CCR settings, as Exchange 2007 Single Copy Clusters as well as cluster setup in previous versions of Exchange. Adding two nodes in the CCR setup can be placed in two other locations as long as they are in the same subnet. Not only that, the installation of the Exchange 2007 cluster is much simpler than in previous versions. CCR setup is changing the use of log files and reviewing the secondary database, you do not need to perform full online backup as in previous versions.
You should read it
- ★ Transfer mailboxes in Exchange 2007 through the Exchange Management Console
- ★ 6 leading Exchange Server monitoring software
- ★ Learn about Mailbox Recovery Exchange 2010
- ★ Managing mailboxes in Exchange Server 2007 (Part 2)
- ★ Installing, configuring and testing Exchange 2007 CCR on Mailbox Server (Part 1)