Table of Contents
This updated guide examines Forward from Exchange 2000/2003 to Exchange Server 2007 (Part 2) and organizes the essential facts, background, and practical takeaways in clear American English.
Review part I
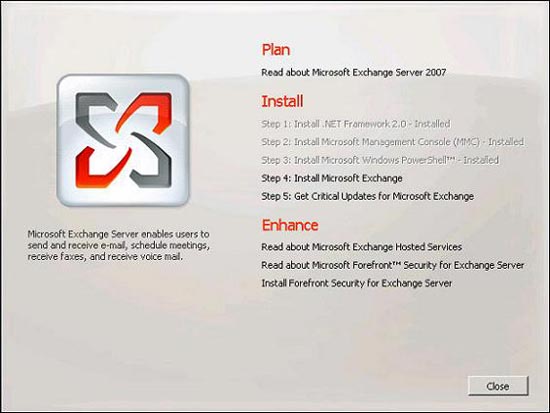 Figure 2.1 : Large installation screen of Exchange 2007
The installer will copy the necessary files and quickly start the initialization value. The initial value is completed, the first step in the Installation Wizard appears: the Introduction page. You should click Next . The provisions in the end user copyright agreement (EULA) are given. If anyone has an English language background, check out some of their terms, even if the License Agreement is always a very interesting thing. If not, check the box I accept the terms in the license agreement (I agree to the terms of the license agreement ), then click Next . The Error Reporting page appears. You choose whether to allow this to be used, then click Next . As you can see in Figure 2.2 , now is the time to choose the type of installation you want to perform. From the beginning we talked about Typical (standard) installation, check this option and click Next .
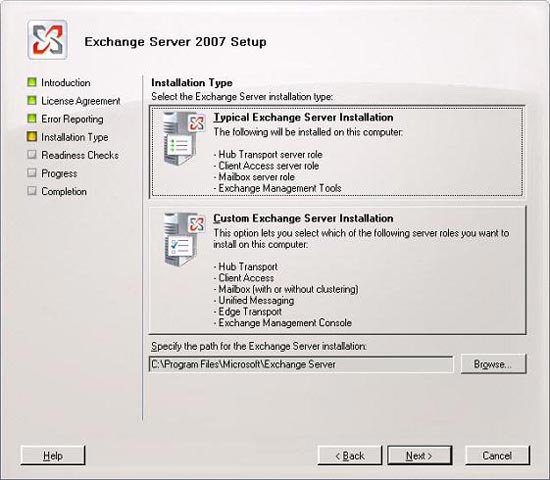 Figure 2.2 : Select Typical installation type for Exchange Server
To set up the main mail flow between Exchange 2000 or 2003 and Exchange 2007 routing groups, we need to create a routing group connector ( Figure 2.3 ). Click on Browser , select the Exchange 2000 or 2003 header server as you wish to connect to Exchange 2007, and then click Next .
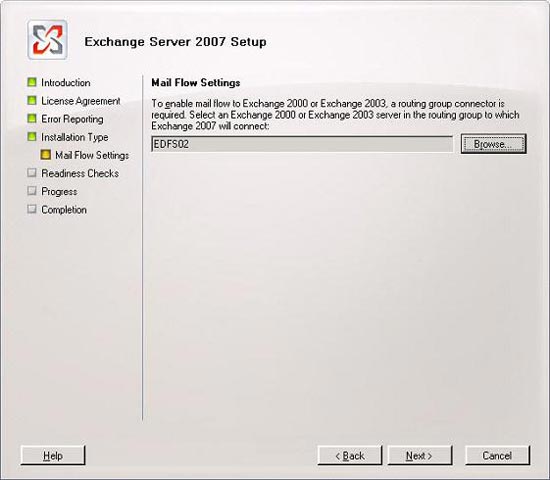 Figure 2.3 : Description of Exchange 2000 or 2003 routing group
Now Exchange 2007 Setup will check a series of prerequisites to see if Exchange is ready to install. If you have installed all necessary software, windows components, and hotfixes, the program will be complete without giving any warning or error messages. If there is a lack of a request, you should review the issue and click the Recommended Action link to see an explanation or a solution to the situation being stopped. When all problems are resolved, click the Install button to Exchange Setup copy the necessary Exchange files and install and configure each component on the server. Attention If you do not run any preparatory changes as mentioned in Part 1, the Exchange 2007 Setup Wizard will prepare the Active Directory before starting to install each of the main components on the server in turn. When Setup finishes installing completely, click Finish ( Figure 2.4 ).
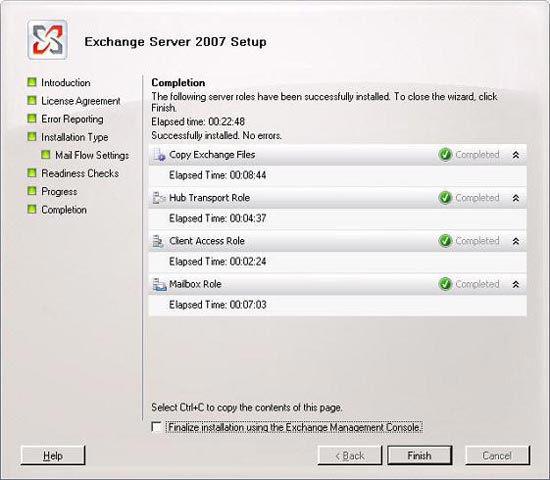 Figure 2.4: Complete the Exchange 2007 installation.
Through final implementation After installing and correctly Exchange 2007 Server, we start the Exchange Management Console (EMC). Note that the first time EMC is started it will show you the Finalize Deployment tab (via final deployment) under the Microsoft Exchange node as shown in Figure 2.5 . You should check each task deployment in the list below and implement the deployments to suit your environment.
 Figure 2.5 : Finalize Deployment Tab in the Exchange Management Console
Every deployment task is explained step by step so we don't go into details about them here. End-to-End Scenario activities Next to the Deployment Tasks tab above there is an End-to-End Scenario tab ( Figure 2.6 ), providing a list of optional activities to configure the component. You should skim through each component and consider whether these activities are appropriate for your Exchange environment.
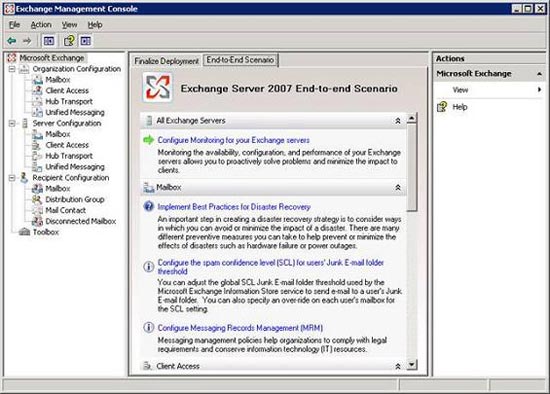 Figure 2.6 : End-to-End Scenario tab in the Exchange Management Console
Each activity under this tab has quite a few self-explanatory sections. Detailed introduction of their content is beyond the scope of this series. Global Settings Global Settings configured on the Exchange 2000 or 2003 server will be automatically transferred to the Exchange 2007 server because these settings are stored and read from Active Directory. This means that the recipient policy, Internet Message Format, SMTP connector, and Exchange delegate rights are also applied to the mailbox of each user stored on Exchange 2007. Figure 2.7 below shows the main Default policy (Default Policy) is created from the beginning on the Exchange 2003 server.
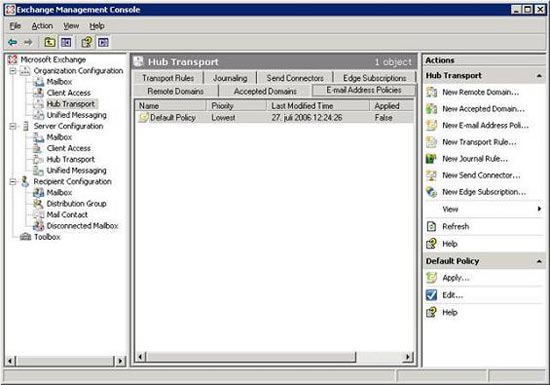 Figure 2.7 : Default Policy in the Exchange 2007 Management Console
Also note that, when the Exchange 2007 Server is deployed in a legitimate Exchange organization, any organization level setting will be managed using Exchange 2007 Management tools (such as EMC or EMS) in time. coexistence. The second part ends here, the third part will quickly come to you in the next few days. In Part 3 we will replace the public folders, move mailbox mailboxes and a few other things before we completely shut down the Exchange 2003 server. Welcome to invite you to read!
FAQ
What is Forward from Exchange 2000/2003 to Exchange Server 2007 (Part 2) about?
It provides a structured overview of exchange, explains the main context, and highlights practical takeaways for readers.
Why does this topic matter?
Understanding the main concepts helps readers evaluate the issue, avoid common mistakes, and make better-informed decisions.
How should readers use this information?
Use the guidance as a practical starting point, confirm details that may have changed, and follow current product, safety, or security recommendations.
Related Articles
 Transfer from Linux Mail Server to Exchange Server 2007 (Part 1)11 minutes read
 Discover Emc in Exchange Server 2010 (Part 2)5 minutes read
 Exchange Server: Transfer Exchange 2003 to Exchange 2007 (Part 2)9 minutes read
 Switch from Exchange 2000/2003 to Exchange Server 2007 (Part 1)12 minutes read
 Removing the First Exchange 2003 Server (Part I)12 minutes read
 Mobile Communications with Exchange Server 2007 - Part 1: New11 minutes read
Reader Comments 0
Sign in with email or Google to join the discussion.