Remote Exchange 2003 administration
You already know about Exchange 2005, Exchange 2007, but the most basic concepts are provided in hand? In the following article, we will discuss how to remotely access the Exchange Management Console anywhere, at any time.
Introduce
The Exchange software package provides you with a single administrative tool: Exchange System Manager . However, you still have to use the Active Directory function to solve some problems. Sometimes you also need to mobilize IIS management services because Exchange is built on the basis of web components.
 Currently, it is required to access and use these tools anywhere, anytime, which is increasingly urgent. Exchange has a very important role and system administrators are usually not limited to operating only at the office. Knowing how to handle and solve problems remotely will save you a lot of time. Because sometimes you have to work at midnight, at that time instead of snatching to the office, you simply need to sit in front of the laptop or computer screen at home. Remote access also allows you to conduct small business operations, saving you travel expenses or traditional technician hire.
Local administration
Before expanding on the overall scope, let us first consider how to access the local Exchange. Many Exchange issues are resolved using the Active Directory Users and Computers management program. But the easiest is to go to Start -> Run , type " dsa.msc " and press Enter .
Microsoft Exchange engineers also provide the " Exchange System Manager.msc " tool for the Exchange System Manager management system. But they forgot the Exchange " bin " directory for the system path. So even if you type in the full name, Windows will still not be able to allocate storage space for it.
We have some other options. You can go to Start -> Programs -> Microsoft Exchange -> System Manager or drag and drop the icon to the desktop and access it or drag and drop it into the Quick Launch section of the Toolbar. If you don't see this Toolbar, just right-click on an empty spot in Taskbar and select Toolbar -> Quick Launch .
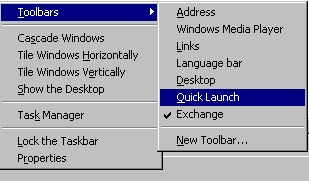
Figure 1
In addition to the shortcut of Exchange System Manager, you can provide all other tools if necessary.

Figure 2
You can create a single management program by going to Start -> Run , typing " mmc " and pressing Enter . A blank management interface will be opened. Then select File -> Add / Remove Snap-in to add the menu management snap-in components to the program.
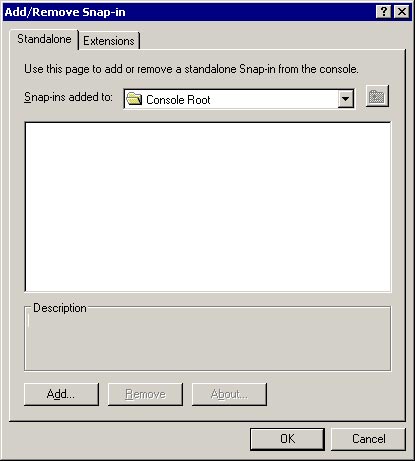
Figure 3
Click the Add button, the list of snap-ins will be displayed and allow you to add new components.

Figure 4
When adding a management program (console), you may be asked to choose a domain controller. Sometimes creating a management console that connects to many different domain drivers can help you judge duplication and duplication issues. If used daily, the best option is " Any Writable Domain Controller ".
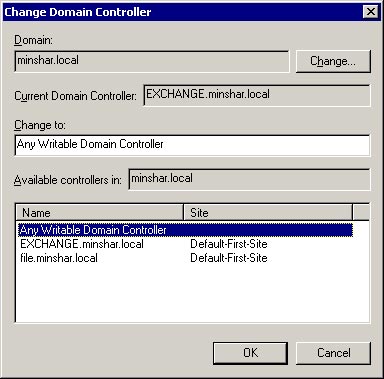
Figure 5
After adding a few snap-ins, you get the useful Exchange server administration tool "all in one".
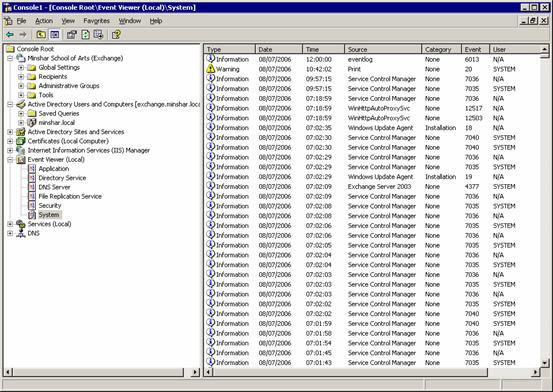
Figure 6
Now we can record on the desktop or any folder by selecting File -> Save as .
Writing a console to a Windows folder or a folder in the search path will allow you to use the Start command -> Run to start. You just need to type the console name in the Run window.
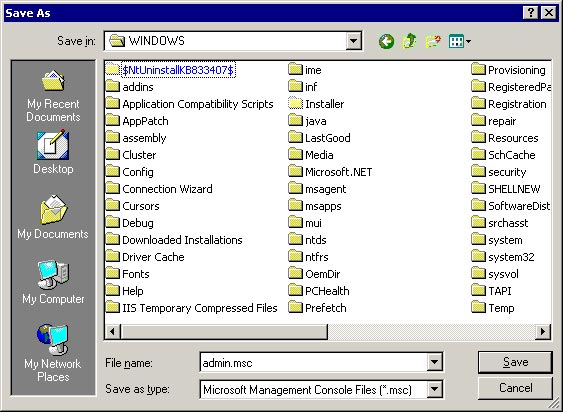
Figure 7
You should use abbreviations without white characters in this case.
Install Exchange Management Console on the Workstation
As mentioned earlier, to limit unnecessary visits or server rooms, you can install Exchange Management in Windows XP Professional.
The first is to install Windows XP Service Packet 2 (or later versions). You should also update the latest patches from the Windows Update website.
Then install Windows 2003 Administration Tools. This package is named " adminpak.msi ", can be placed on any server in the " WindowsSystem32 " folder of the system drive. You can use UNC to access it over the network by typing the path, such as: dc1c $ windowssystemsadminpak.msi .
You cannot install Exchange System Manager without the Windows 2003 Administration Tools.
If you want to install Exchange System Manager independently, you must first have the core IIS components. For Windows versions before XP SP2, SMTP service is required. To install, go to Start -> Settings -> Control Panel , select Add / Remove Programs> Add / Remove Windows Components (in the gray box on the left).
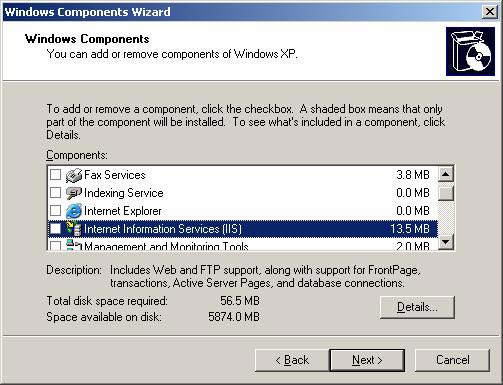
Figure 8
Set the " Internet Information Services (IIS) " service to the list and press the " Details " button. Then select " Common Files " and " Internet Information Services Snap-In ".
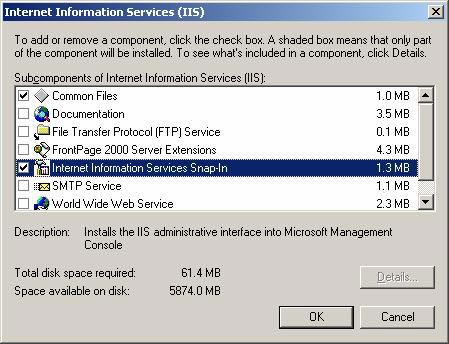
Figure 9
This will create a website or mail server in your workstation. It allows to manage them. You should use a Windows XP Professional SP2 CD for this process or you can allocate it on a network device.
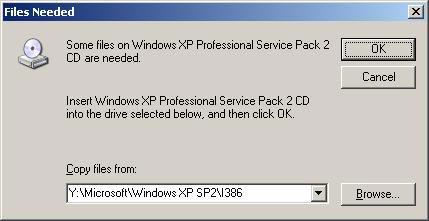
Figure 10
Now your workstation is ready to install Exchange System Manager (ESM). Also note that installing ESM is like installing an Exchange 2003 server. First you have to install on the original Exchange device (or a copy of it), then install Exchange 2003 SP2 on the first part.
When you start the installation, run the Exchange 2003 Media CD or its copy. The " setup.exe " file is located in the " ExchangeSetupI386 " folder. For these reasons, the installation program between Windows 2003 and Windows XP is not much different, allowing you to install Exchange services. If you don't like the default mode, you can choose " Custom " for " Microsoft Exchange " and " Install " for " Microsoft Exchange System Management Tools ".
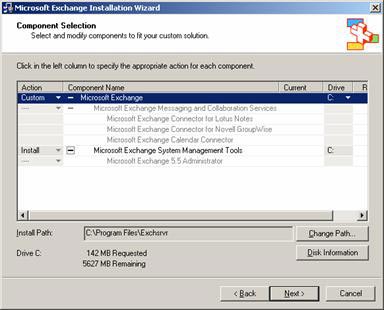
Figure 11
This process is like implementing Exchange 2003 SP2 update via the " update.exe " file instead of " setup.exe ", the Actions section is updated (no need to change the default value). Once the installation program is done, you can create a local management console as shown in the above section.
If the Outlook program is already installed in the workstation, you may experience some MAPI related problems because Outlook and Exchange use different MAPI versions.
Remote desktop
Often the question: " Why does the general installation program always have many annoying points? " Always mentioned. There are a number of utilities that allow you to remotely connect to the Exchange server service. The most popular is Remote Desktop (formerly known as Terminal Services). To run it go to Start -> Run , type " mstsc ", then press Enter . You can find the shortcut for it when you go to Start -> Run -> Programs -> Accessories -> Communications .
On a typical server, only at most two Remote Desktop sessions are started. That's why I type " mstsc / console " to log in to the server's main session. If you have entered the server, unlock it with the same username, you can access its session. If you don't want to be too big with the Remote Desktop GUI (GUI), you simply need to type " mstsc –v: [server name] / console ".
Remote Desktop is easily installed via Firewall, does not require domain membership or anything similar. You simply need to create an open port rule 3389 for a specific server and limit the IP address or Firewall user. You can set up VPN access, using the server's internal IP address.
If you plan to access the server over the Internet, it is best to build a black and white frame for the server and set up a blank, black desktop bitmap mode. This will help speed up. GUI interface allows you to save more bandwidth.
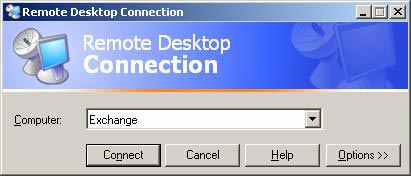
Figure 12
Click on " Options ", the program will provide you with many methods of fixing and repairing in Remote Desktop such as size and color limits shown.
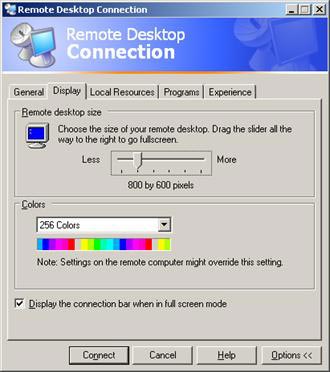
Figure 13
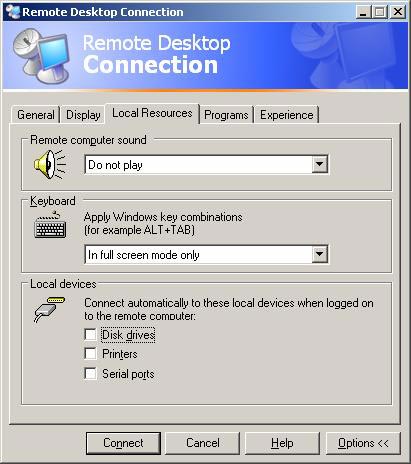
Figure 14
Connecting local and remote devices can really reduce your speed. Of course sometimes you need to transfer files or print, but try to limit these activities. If you are connecting internally, you may be a bit more comfortable. Doing so best also limits you to a few Windows graphic elements.
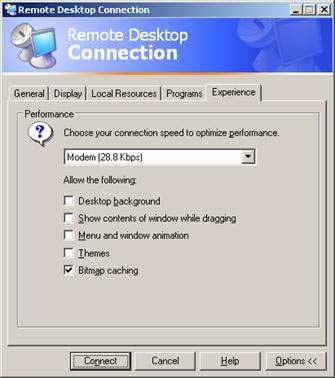
Figure 15
Once the connection is established, it can be recorded for later use.
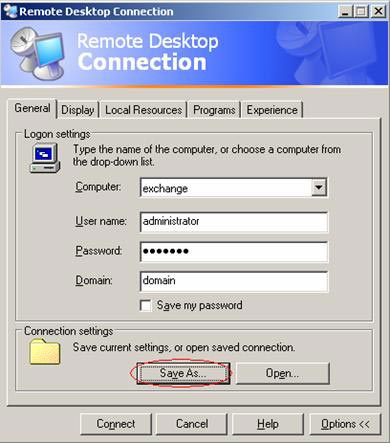
Figure 16
Note that in a Remote Desktop session, the hotkey " Ctrl + Alt + End " replaces " Ctrl + Alt + Del ". If you prefer to use the mouse, you can go to Start -> Settings -> Windows Security . If the " adminpak.msi " program has been installed before, you can use the Remote Desktops MMC Snap-in to add a management console and set up all necessary remote desktop connections.
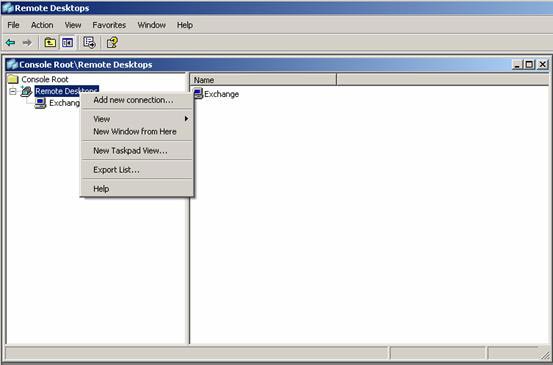
Figure 17
You can download this tool here. You can also download Remote Desktop add-in components for " Active Directory Users and Computers " and right-click on the server to connect remotely.
Conclude
Exchange and Windows allow you to change the way you remotely connect to a server according to your needs and bandwidth. You can use a number of other ways, such as third-party utilities. But most of them work similarly to the tools introduced above and have the same problems.
You should read it
- ★ Manage Exchange Server 2007 using Windows XP workstation
- ★ Backup for Exchange Server with DPM 2007 - Part 3: Backup process
- ★ Checking Exchange Server 2007 with MOM 2005 (Part 1)
- ★ Checking Exchange Server 2007 with MOM 2005 (Part 3)
- ★ Backup for Exchange Server with DPM 2007 - Part 2: Configure DPM 2007