Use document comparison feature in Word 2010
Comparing documents together is a little-known feature of Microsoft Word 2010 but is really handy for everyone, especially for those who work with multiple documents. Sometimes you accidentally save the document under different names and variants, when you go back to open the old document, you find some versions of it while you only need one fully documented document. Compare them to get a single document. Or sometimes many people edit on one document and want to combine it into one complete document. That's when the comparison feature works.
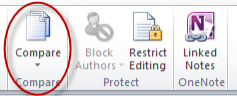
The document comparison feature is easy to use, to start, click the Review tab in the main ribbon, then click the Compare icon:
You will receive a drop down menu as follows:
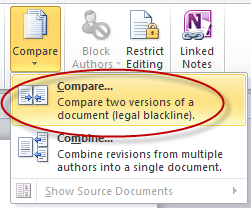
Select Compare . a window will open:
Click the arrow in the Original document section to select the original document, do the same for the modified document in Revised document . When the name of the two documents is selected, the box will appear. Two-way arrow button is used to change the role of original documents and modified documents. You can tick or unmark the box to set comparison options but it's better to leave the default. Click OK to get the result:
Results are displayed in the full Word screen in 4 small windows, we will learn the function of each window. On the left is the Summary window that summarizes the changes between the two documents. Next, the window in the center of the screen displays the document containing both original and edited information. Finally, on the right are 2 windows showing copies of the original and modified documents.
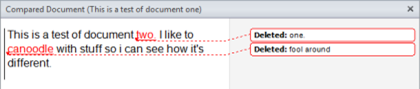
You can see clearly the middle and right windows:
Here you can see the red letters are new modifications, while the dashed letters indicate that they have been corrected.
Also, notice the Tracking feature in the Review tab that is turned on when you use Compare mode:
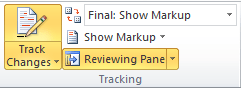
This means that you can use this option when comparing documents. For example, if you click on Track Changes , then Change Tracking Options , you will get the following pop-up window:
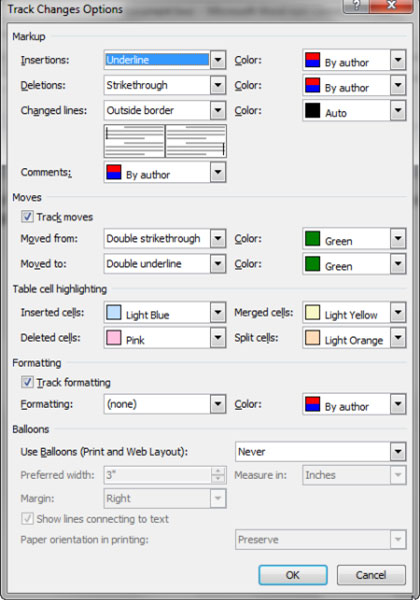
The purpose of these options is to allow you to define attributes of changes that Word registers when comparing two documents.
You can also adjust how Word displays changes in documents, for example you want them to be displayed as " bubbles ", click Show Markup , point to Balloons and then Show Revisions in Balloons :
Here are the results:
In addition, under Change :
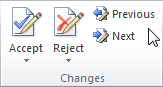
You can click on the Previous or Next button to move back and forth changes in the document and then click Accept to accept or Reject to deny changes at each step every time you move. Once you have edited it, you just need to save the document in the normal way to export the most complete product.
You should read it
- Instructions for using Navigation Pane in Word 2010
- How to create a Template template in Word 2007 and Word 2010
- Add Save and Close options All Documents documents in Word
- Link Download Microsoft Word 2019
- 10 advanced techniques using MS Word
- How to compare two documents in Google Docs
- How to hide images in Microsoft Word for easier reading
- Capture and edit screen images with MS Word 2010
May be interested
- How to Recover Word Documentsthis wikihow teaches you how to recover an unsaved microsoft word document, as well as how to restore unsaved changes to a saved document. you can do this on both windows and mac computers. if you can't recover your word document using...
- Steps to fix Word Count not showing up in Microsoft Wordthe status bar of microsoft word displays the word count for users to see quickly. as you type in the document, the tool automatically updates the word count. this feature proves to be extremely useful when you need to control so that your content does not exceed a specific number of words.
- How to remove personal information from a Word documentmicrosoft word stores additional information such as name, file history, comments, and even where the document is saved. to ensure that personal information in word documents is not exposed, follow the instructions below.
- How to Redline a Document in Microsoft Word'redlining' is a form of editing in which red ink is used to indicate removal or addition of text in microsoft word. you can redline a microsoft word document by using microsoft word's built-in 'track changes' feature, or you can manually...
- How to Format a Word Documentmicrosoft wordhttps://products.office.com/en-us/word is the world's most popular word document program. depending on what kind of legal, formal, or personal paper you're writing, each of these will need its own formatting guidelines. if...
- How to Convert Scanned Documents to Word Documentswith word 2007 or more advanced versions, you can use it to edit a scanned document, which is much faster than retyping the entire document. to enable this feature and convert a scanned document into editable text, follow these steps.
- Create a new Word file, open the file in Word 2013word files are called documents. whenever you start a new project in word, you will need to create a new document, which can be a new document or a sample text .
- Fix word sticking errors in Word 2007word errors in word will affect the content and layout of the entire document. the reason is because it is not compatible with the office suite you are using. so how to handle this situation?
- How to Add a Border to Wordthis wikihow teaches you how to create a border around text, images, or pages in a microsoft word document. open your word document. double-click the word document to which you want to add borders. this will open the document in microsoft...
- Use Comment Boxes in Microsoft Wordmicrosoft word's comments feature lets multiple authors communicate with each other about the text in a word document. used in conjunction with the track changes feature, an editor can explain to the author his or her reasons for making...