Table of Contents
This article examines Tutorial and explains the main developments, practical implications, and context readers should understand.
Create and Backup Customized Tab:
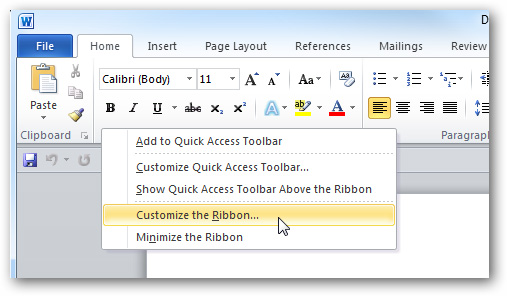
Specifically, in this test, we use Microsoft Office 2010, but with some recent versions, you can apply the same way. To get started, right-click the blank space on the toolbar and choose Customize the Ribbon:
The Word Options screen is displayed, where we can do a lot of options and settings according to user needs or personal preferences:
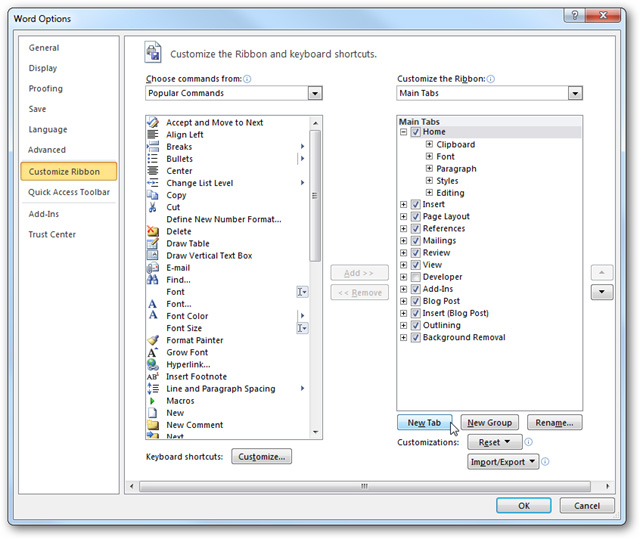
And to create a new customized tab, click the New Tab button:

Name this new tab:

The next thing is quite simple, we just need to drag and drop the corresponding function commands from the left column to the right:

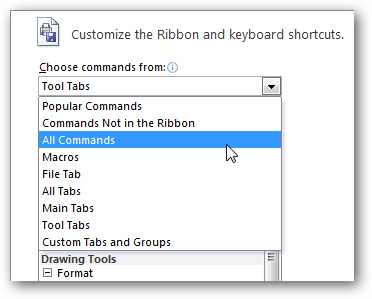
Select the corresponding display method from the dropdown menu by group or all commands:
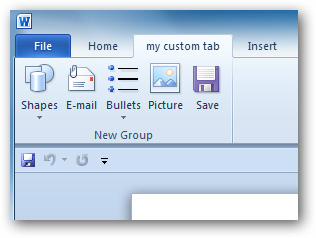
Basically so we have finished creating the custom function tab at will. You can create 1 or more tabs in the same way:

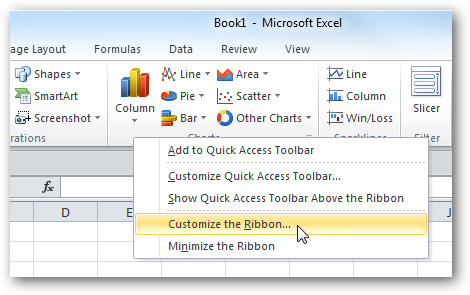
However, you should note that these function tabs exist only in certain applications or environments. For example, if created in Word, it will not be displayed in Excel or PowerPoint:
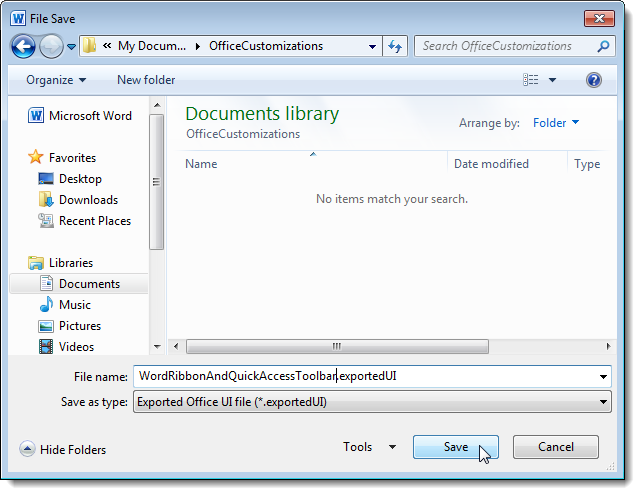
One useful point we can do is the ability to extract these customizations for use on other computers with the same version of Office. To do so, select the Customize Ribbon section at the bottom of the control panel and click Import / Export> Export all customizations, then save the file in a folder on your hard drive:

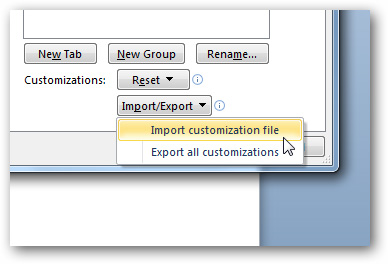
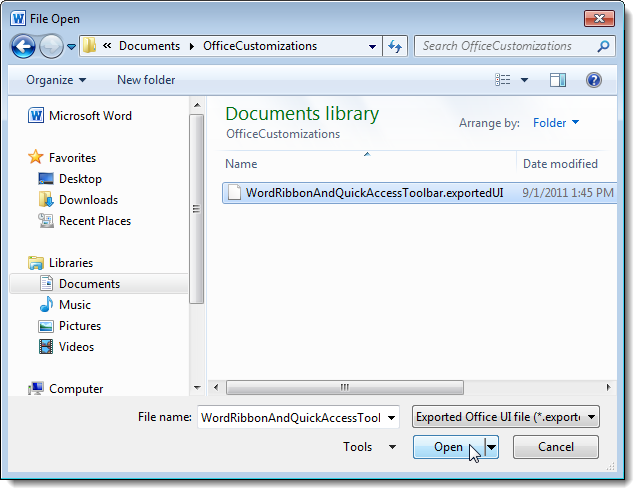
On other computers, if you want to re-use those settings, then select Ribbon Customizations> Import customizations file, point the path to the file just exported at the previous step:
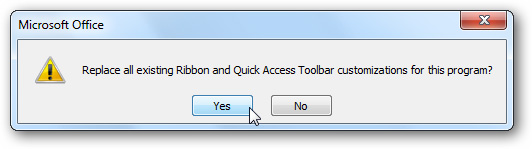
The program will display the following message, click Yes:
And this is the result after importing the settings:
Good luck!
FAQ
What does Backup and Restore Office 2010 Ribbon Toolbar: Tutorial explain?
This article examines Tutorial and explains the main developments, practical implications, and context readers should understand.
Who is most affected by Tutorial?
Create and Backup Customized Tab: Specifically, in this test, we use Microsoft Office 2010, but with some recent versions, you can apply the same way.
What are the key takeaways from this topic?
To get started, right-click the blank space on the toolbar and choose Customize the Ribbon: The Word Options screen is displayed, where we can do a lot of options and settings according to user needs or personal preferences: And to create a new customized tab.
Related Articles
 How to Hide and Show the Ribbon Toolbar in Word and Excel3 minutes read
 Hide the Ribbon Toolbar in Word 2013: Ribbon Word 20133 minutes read
 How to Use Backup and Restore on Windows 7?6 minutes read
 Basic Office Skills in Excel6 minutes read
 Learn About the Quick Access Toolbar on Windows 106 minutes read
 How to Backup and Restore the Office License Key for All Versions4 minutes read
Reader Comments 0
Sign in with email or Google to join the discussion.