How to Add a Border to Word
Method 1 of 2:
Adding a Border to Content
-
 Open your Word document. Double-click the Word document to which you want to add borders. This will open the document in Microsoft Word.
- If you haven't yet created your Word document, open Word, click Blank document, and create the document as needed before proceeding.
-
 Click the Home tab. It's at the top of the Word window. Doing so will open the correct toolbar here.
 -
 Select content. Click and drag your mouse across the text or image(s) around which you want to place a border.
 -
 Find the "Borders" button. This button resembles a square divided into four smaller squares; you'll find it in the "Paragraph" section of options in the toolbar, just right of the paint bucket icon.
- Skip this step on a Mac.
-
 Clicknext to the "Borders" button. This downward-facing arrow is to the right of the "Borders" button. Clicking it prompts a drop-down menu.
- On a Mac, click the Format menu item at the top of the screen instead.
-
 Click Borders and Shading…. It's at the bottom of the drop-down menu.
- On a Mac, you'll find this option in the middle of the Format drop-down menu.
-
 Select a border setting. In the left-most column, click the border option that you want to use.
- For example, if you want a simple border to go all the way around your text, you would click Box here.
-
 Select a border style. In the "Style" column, scroll down until you find the border style you want to use, then click the style.
- If needed, you can also change the border's color and width from the "Color" and "Width" drop-down menus, respectively.
-
 Click OK. It's at the bottom of the window. Doing so will apply your border to the selected text or picture.
Method 2 of 2:
Adding a Border to a Page
-
 Open your Word document. Double-click the Word document to which you want to add borders. This will open the document in Microsoft Word.
- If you haven't yet created your Word document, open Word, click Blank document, and create the document as needed before proceeding.
-
 Position your cursor to create a new section. If you don't want to add a border to every page in the document, place your mouse cursor at the bottom of the page that comes before the page on which you want to add the border.
- If you want to apply the border to every page in the document, skip this step and the next one.
-
 Create a new section. This will ensure that your border isn't applied to the whole document:
- Click the Layout tab.
- Click Breaks in the "Page Setup" section.
- Click Next Page in the resulting drop-down menu.
-
 Click the Design tab. This option is at the top of the Word window.
 -
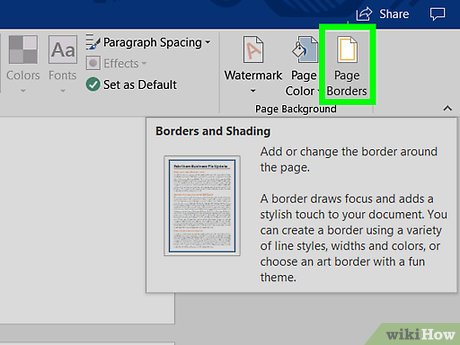
 Click Page Borders. It's on the far-right side of the Design toolbar. Doing so opens a pop-up window.
 -
 Select a border setting. In the left-most column, click the border option that you want to use.
- For example, if you want a simple border to go all the way around your text, you would click Box here.
-
 Select a border style. In the "Style" column, scroll down until you find the border style you want to use, then click the style.
- If needed, you can also change the border's color and width from the "Color" and "Width" drop-down menus, respectively.
-
 Select pages to use. If you created a new section earlier in this method, click the "Apply to" drop-down box, then click the section to which you want to apply the border in the resulting drop-down menu.
- To apply the border to the first page of your section, for example, you'd click This section - first page only in the drop-down menu.
-
 Click OK. It's at the bottom of the page. This will apply the border to your document's specified page(s).
Share by
Samuel Daniel
Update 05 March 2020


