Corel Draw 12 - Draw patterns in circles
After introducing you to the basic tools of Corel Draw 12, starting from this issue, we will in turn present each specific example as practical exercises. First of all is the exercise of drawing patterns in circles.
After introducing you to the basic tools of Corel Draw 12, starting from this issue, we will in turn present each specific example as practical exercises. First of all is the exercise of drawing patterns in circles.
Use the Ellipse Tool (Ellipse Tool) and some of the following commands:
- Rotate : rotate the object.
- Intersect : creates a third object, the intersection of two objects.
- Combine (Ctrl + L): link object, the intersection of objects will be created by empty areas.
- Break Apart (Ctrl + K): return a group of objects exiting the Combine command.
- Align and Distribute : used to compare objects.
Colouration:
Step 1
- Select the Ellipse tool, hold down Ctrl to drag the mouse to draw a circle (Figure 1).
- Select Object - Transformations - Rotate with parameters:
Angle : 60 deg (object rotation angle)

 Figure 1 Figure 2
Select the center of rotation of the object as the bottom of the circle.
- Apply Apply To Duplicate tab, we get a new circle with the bottom center coincide with the original circle (figure 2, 3).
- Click on Apply To Duplicate tab again 4 more times, we get 6 circles with the same center at the bottom (Figure 4).
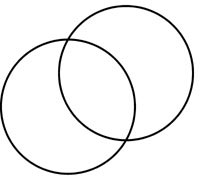
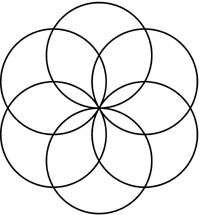
Figure 3
Figure 4
Step 2
- Select two adjacent circles (Figure 5).
- Select Object - Shaping - Intersect , we get the intersection of two circles as an ellipse (Figure 6).
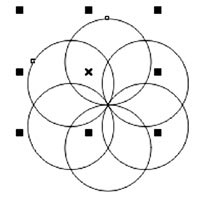
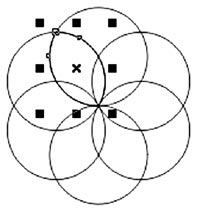
Figure 5
Figure 6
- Similarly, the two steps above have 6 ellipses which are 6 intersections of 6 circles (Figure 7).
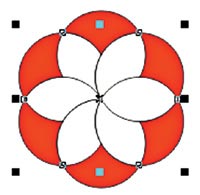
Figure 7
Step 3
- Select two adjacent ellipses.
- Select Object - Shaping - Intersect , we get the intersection of the two ellipses to be a smaller ellipse (Figure 8).
- Similar to the above two steps we have 6 small ellipses which are 6 intersections of 6 large ellipses (Figure 9).
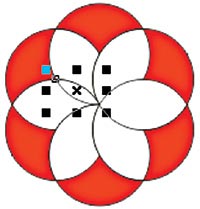
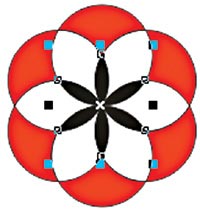
Figure 8
Figure 9
Step 4
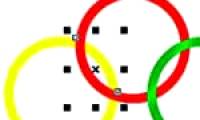
- Draw two circles so that the first image has a diameter larger than the diameter of 6 circles with the same center at the bottom, the second image has a diameter larger than the first one (Figure 10).
- Click on the two circles.
- Select Object - Combine (you can press the shortcut Ctrl + L).
- Select Object - Align and Distribute :
-
Align Centers Horizontally
-
Align Centers Vertically
- Finally, you can color arbitrarily to get the result as shown in Figure 11.


Figure 10
Figure 11
Lam Khe
Was this article helpful?
Your feedback helps us improve.
Related Articles
 Corel Draw: What is Corel DRAW - Introduction11 minutes read
 Corel Shortcuts - All shortcuts in Corel Draw you need to know5 minutes read
 Corel Draw: Use the photo corner effect in Corel Draw3 minutes read
 How to draw circles in Photoshop2 minutes read
 Draw nested circles4 minutes read
 Corel Draw 12: Draw the butterfly2 minutes read
Reader Comments 0
Sign in with email or Google to join the discussion.