Macromedia Flash - Self-designed animated menu
This tutorial is quite complicated but we will try to explain it in the easiest way. Make sure you follow the instructions step by step.
If you don't like to choose a traditional static menu, you can apply this tutorial to give your website a suitable dynamic menu, it can bring style to a professional website. This tutorial is quite complicated but we will try to explain it in the easiest way. Make sure you follow the instructions step by step.
Step 1
Create a new 250 x 140 Flash file and Frame rate is 40fps .
Step 2
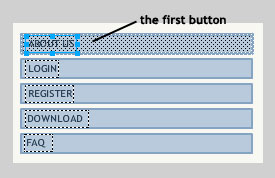
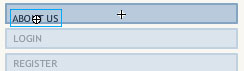
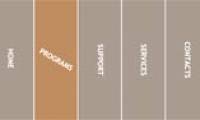
Grab the Rectangle Tool (R) and draw 5 small rectangles (or as many as you want). See the following picture

Step 3
Select the Text Tool (A), go to the Properties Panel (Ctrl + F3), select Dynamic Text and create the letters that display the menu name.


Step 4
Select the first letter (in the example ' About us ') and press F8 on the keyboard (Convert to Symbol) to convert this text into a Movie Clip Symbol.

Step 5
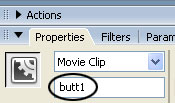
Open the Properties Panel (Ctrl + F3) and enter butt1 . See the following picture
Step 6
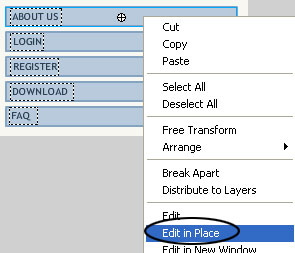
Double-click or right-click the newly created Movie Clip and select Edit in Place
Step 7
Just select each letter (in this case ' About us '), press Ctrl + X (Cut), add a new layer above layer 1 (layer 2), select it and press Ctrl + Shift + V ( Paste in place)
Step 8
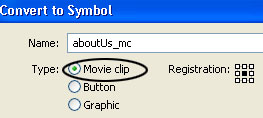
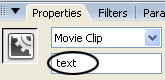
Select layer 2 (text layer) and convert it into a Movie Clip ( F8 ).
Step 9
Then, open the Properties Panel (Ctrl + F3) and enter the text .
Step 10
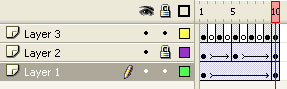
Click on frame 5 of layer 2 (text layer) and press F6 key. Then click on frame 10 and press F6 again (create Keyframe).

Step 11
Go back on frame 5 and use the arrow keys on the keyboard or the mouse to move the text (in this example ' About us ') down a bit (or go horizontal if you like). See the following picture
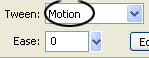
Step 12
Select layer 2 (text layer), open the Properties Panel (Ctrl + F3) and in Tween choose Motion .

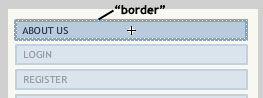
Step 13
Back to layer 1, select only the border of the rectangle and press Ctrl + X (Cut) on the keyboard.
Step 14
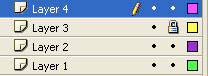
Insert a new layer (layer 3), select it and press Ctrl + Shift + V (Paste in Place)
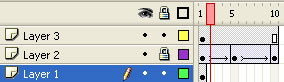
Step 15
Then press 10 times the F6 key (Keyframe) on the keyboard. The result will look like the following figure

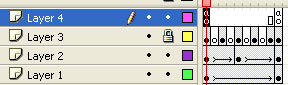
Step 16
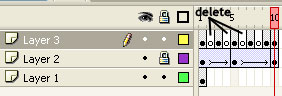
Then select each even keyframe (except frame 10) and press Delete (Del) key on the keyboard. Results after deleting some even keyframes:
Step 17
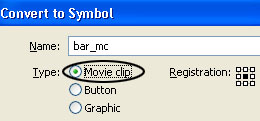
Click on layer 1 and press F8 (Convert to Symbol) to convert it into a Movie Clip Symbol.
Step 18
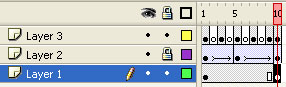
Then select frame 10 and press F6 (Keyframe).
Step 19
Still on frame 10, open the Properties Panel (Ctrl + F3) and set the Color to Alpha with 40% contrast.

Step 20
Still in the Properties Panel (Ctrl + F3), select Motion in Tween.

Step 21
Create a new layer (layer 4)
Step 22
Click on the first frame, open the Action Script Panel (F9) and include the following code:
stop ();
Step 23
Then click on frame 10, press F6 (Keyframe), open the Action Script Panel again (F9) and include the following code:
stop ();
Step 24
Go back to the main scene (Scene 1), insert a new layer and name it Action .
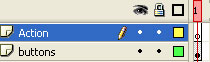
Step 25
Click on the first frame, in the Action Script section, enter the following code:
butt1.onRollOver = over;
butt1.onRollOut = out;
butt1.text.buttonText.text = "ABOUT US";
function over () {
this.gotoAndPlay (2);
}
function out () {
this.gotoAndPlay (1);
}
So we have created the first menu button. Repeat the above steps corresponding to each necessary button. The following are the different codes between each command button:
butt1.onRollOver = over;
butt1.onRollOut = out;
butt1.text.buttonText.text = "ABOUT US";
butt2.onRollOver = over;
butt2.onRollOut = out;
butt2.text.buttonText.text = "LOGIN";
butt3.onRollOver = over;
butt3.onRollOut = out;
butt3.text.buttonText.text = "REGISTER";
butt4.onRollOver = over;
butt4.onRollOut = out;
butt4.text.buttonText.text = "DOWNLOAD";
butt5.onRollOver = over;
butt5.onRollOut = out;
butt5.text.buttonText.text = "FAQ";
function over () {
this.gotoAndPlay (2);
}
function out () {
this.gotoAndPlay (1);
}
Haven't you done it yet? Please see the original file here.
Was this article helpful?
Your feedback helps us improve.
Related Articles
 Macromedia Flash - Create flash menu with sound8 minutes read
 Macromedia Flash - Create menu effects6 minutes read
 Macromedia Flash - Create flash menu yourself6 minutes read
 Macromedia Flash - Create vertical Flash menu5 minutes read
 Macromedia Flash - Effects of lighting on photos3 minutes read
Reader Comments 0
Sign in with email or Google to join the discussion.