Corel Draw 12: Lesson 10: Coloring tools and borders
Coloring tools ( Fill Tool )
Coloring tools with many different styles such as uniform fill ( Uniform Fill ), gradient coloring ( Fountain Fill ) with multiple choices, pattern fill ( Pattern Fill ) . will create effects on color for the object.
Click on the Fill (Fill Tool) tool options panel spread out tools ( Figure 1 ).

Figure 1
- Fill Color Dialog : Colorize uniformly.
- Fountain Fill : Fill the gradation, there are 4 types in the Type box:
- Linear: Fill the transition in a straight line.
- Radial: Color the transition along a circle.
- Conical: Fill the next cone.
- Square: Color the transition according to the square.
The options in the Fountain Fill dialog box are used for different styles.
- Frame Center Offset with two horizontal cells (horizontal) and Vertical (vertical) centering to change colors for 3 types of circles, cones, and squares.
- Frame Color Blend : blend colors with two options Two Color and Custom :
- Two Color : Mix between two colors.
- Custom : Mix between selected colors ( figures 2, 3, 4 ).
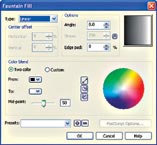
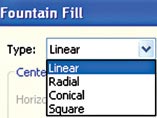
Figure 2
Figure 3
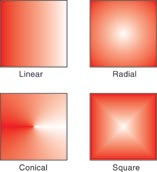
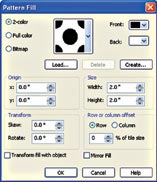
Figure 4
Figure 5
- Pattern Fill : This dialog box performs a patterned fill that creates a background ( Figure 5 ).
Outline Tool ( Outline Tool )
This tool determines the properties for the boundary of the color, thickness, and border type for the object.
Select the Outline Tool , the options spread out ( Figure 6 ).

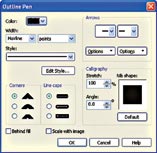
Figure 6
Figure 7
Select Outline Pen Dialog The Outline Pen dialog box is opened, which contains the most complete attributes of the border such as color and border type ( Figure 7 ).
- Color : select the color for the border ( Figure 8 ).
- Width : the thickness of the boundary.
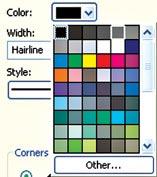

Figure 8
Figure 9
- Style : style that shows borders (dashed lines, lines, etc.) ( Figure 9 ).
- Edit Style opens the Edit Line Style dialog box : create new border styles.
- Corners : types represent the angle of the path ( Figure 10 ).
- Line caps : the beginning of the open line.
- Arrows : make choices to create an arrow for the beginning or end of the object ( Figure 11 ).

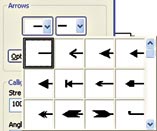
Figure 10
Figure 11
- Calligraphy : with options such as Nib Shape (pen type), Stretch (changing the length of the pen), Angle (turning the pen) make the effect of changing the thickness thickness depending on the direction of the line making the strokes draw like an iron pen with a beveled head.