Instructions on how to choose the print area in Excel
Excel sheets are inherently an interface with data stretching both horizontally and vertically so when printing you will have a few issues worth mentioning. For example, separate print page content or print area limits. Today we will talk about one of those issues with TipsMake, which is how to choose the print area in Excel.
Excel sheets are inherently an interface with data stretching both horizontally and vertically so when printing you will have a few issues worth mentioning. For example, separate print page content or print area limits. Today we will talk about one of those issues with TipsMake , which is how to choose the print area in Excel.
Before embarking on the tutorial, let's take a look at how to select the print area in Excel and why to select the print area in Excel.
When printing on an Excel file, you don't want to print all the data contained in this file, you just want to print out a small amount of space on the entire worksheet.
That's when you need to select the print area in Excel when you want to limit a certain print content, not print the entire data of that Excel Sheet page.

To do this, you must black out the area you want to print. Click and drag to create a selection or click on the upper left corner (or lower right) and then hold Ctrl + Shift and click on the lower right corner (or left top).
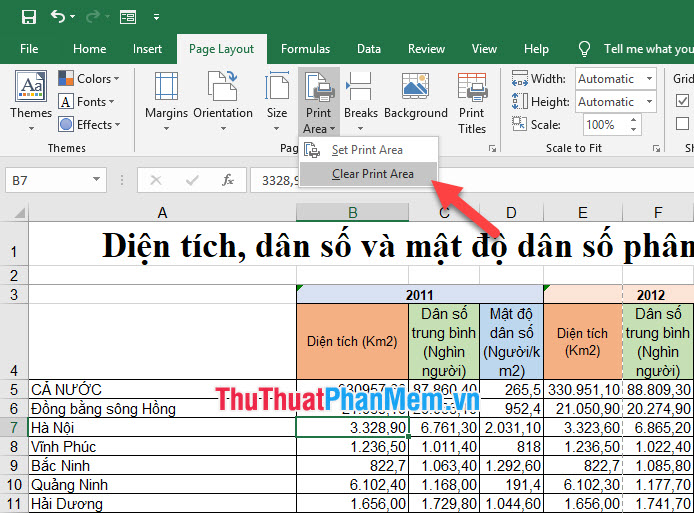
Then open the Page Layout ribbon on the toolbar and find Page Setup . In this section, there will be a Print Area icon , click on it and select Set Print Area to select the highlighted area into a print area in Excel.

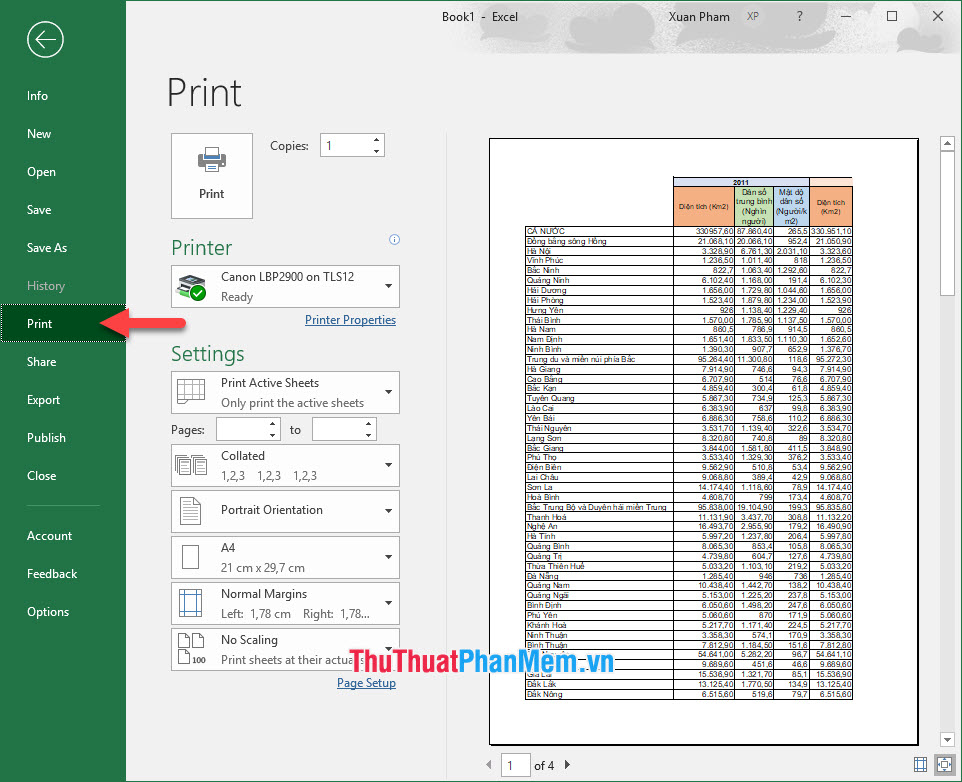
For now, try opening the print mode by going to the File ribbon on the toolbar.
Then click on Print . You can see on the right is the Print Preview area , the A4 page only contains the content of the print area you have limited. At the moment, you can freely print without worrying that the content will spill into another section.
Finally, to clear the selected print area, simply go back to the Page Layout ribbon, then click the Print Area icon in the Page Setup section and select the Clear Print Area row .
Thank you for reading the article of TipsMake.Vn on how to choose the print area in Excel. Hope you can successfully implement this tip so you can take advantage of Excel's benefits of printing data.
Was this article helpful?
Your feedback helps us improve.
Related Articles
 How to Print Part of an Excel Spreadsheet5 minutes read
 How to print a selection in Microsoft Excel4 minutes read
 How to choose the print area on Google Sheets2 minutes read
 How to print Excel, print Excel spreadsheets fast, standard8 minutes read
 How to print an Excel spreadsheet in a page9 minutes read
 Instructions on how to print text, print documents Word, Excel, PDF details5 minutes read
Reader Comments 0
Sign in with email or Google to join the discussion.