How to print Cad drawings properly
How to print Cad drawings properly. On Auto CAD software there are also many features related to printing support for users. But to set up fine print from CAD software, you need to go through many different stages. In some of these articles, Software Tips will guide you on how to print Cad drawings properly..
Auto CAD is a well known and widely used engineering software. With the digital age like today, CAD drawings are more popular than ever. On Auto CAD software there are also many features related to printing support for users. But to set up fine print from CAD software, you need to go through many different stages. In some of these articles, Software Tips will guide you on how to print Cad drawings properly.

Step 1: You proceed to open your CAD drawing on the CAD software.
Step 2: Then you press the Printer icon or Ctrl + P to open the Print section. Here you select the arrow to expand the printing section.

Step 3: When the extension appears, at Plot style table (pen assignments), select acad.ctb mode (1) and click the Settings icon (2).

Step 4: At the installation window, there will be 2 cases happening:
- If you use a color printer: Skip Steps 4 and 5
- If you use a black and white printer: Follow Steps 4 and 5
Because CAD drawings support many colors, if you want to print in black and white, you need to convert the different color strokes to Black so that it is not missing strokes. If not converted when printing, only black strokes will appear and other colors will disappear.
At Plot Styles, select Color 1 and press the Shift key to continue scrolling down and selecting the last color.

Step 5: After selecting all the colors at Plot Styles , in the Properties section, select Color to Black .

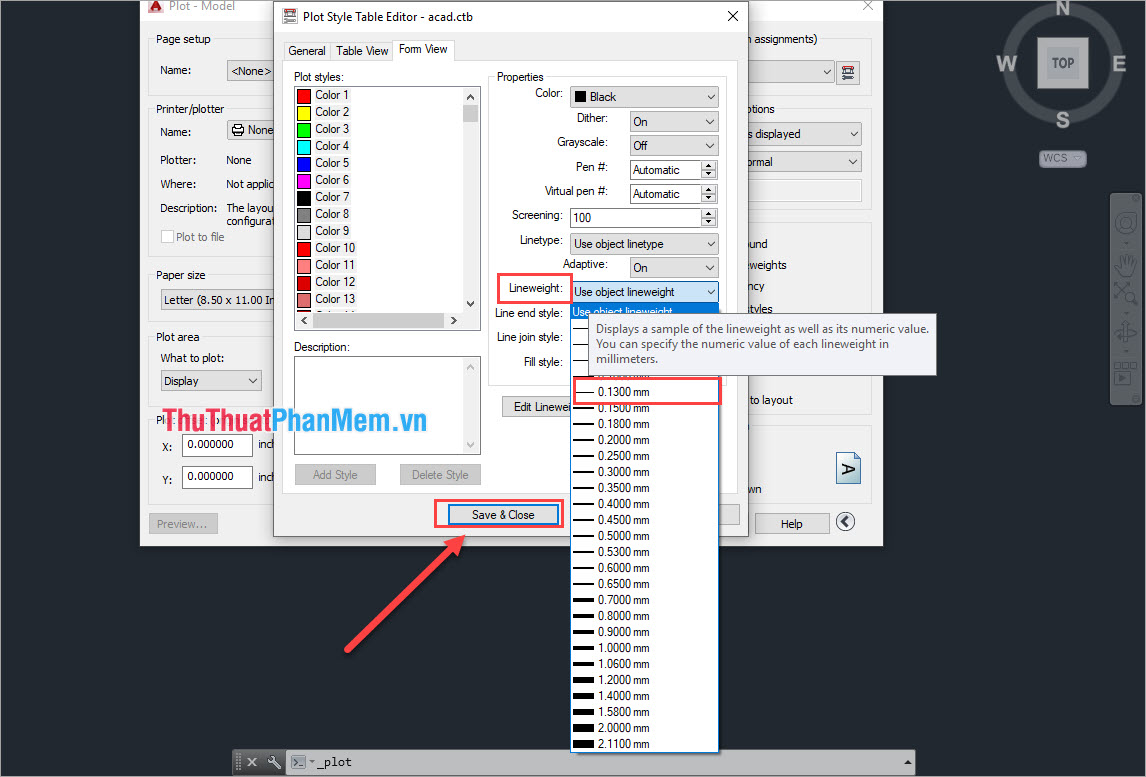
Step 6: Next, you choose the Lineweight is 0.1300mm . This is the line when we print, 0.1300mm strokes bring the most beautiful aesthetic. Finally click Save & Close .
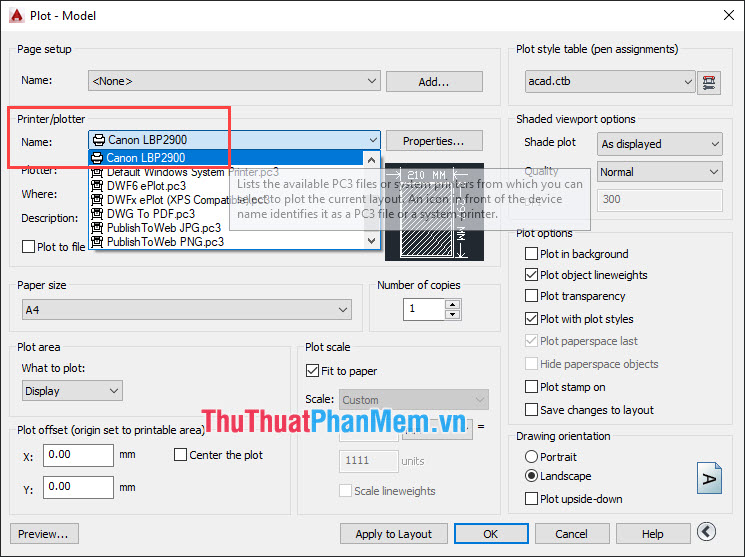
Step 7: You proceed to select the printer at Printer / plotter .
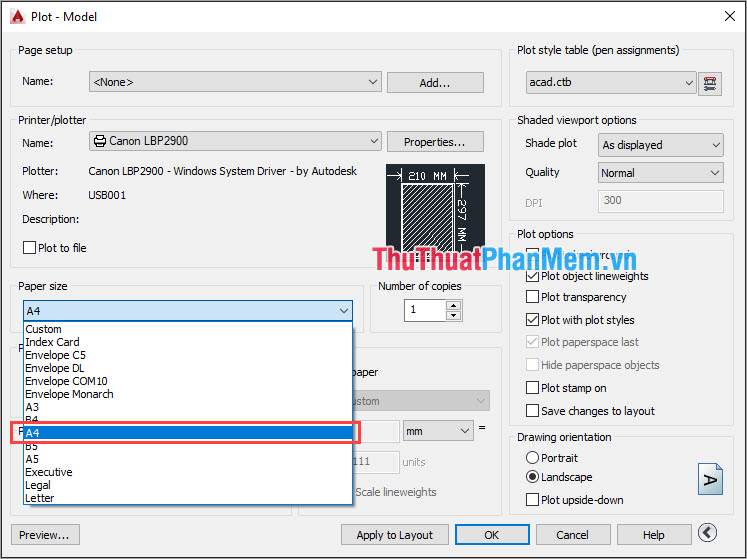
Step 8: Next, at Paper Size, select the paper size you want to print.
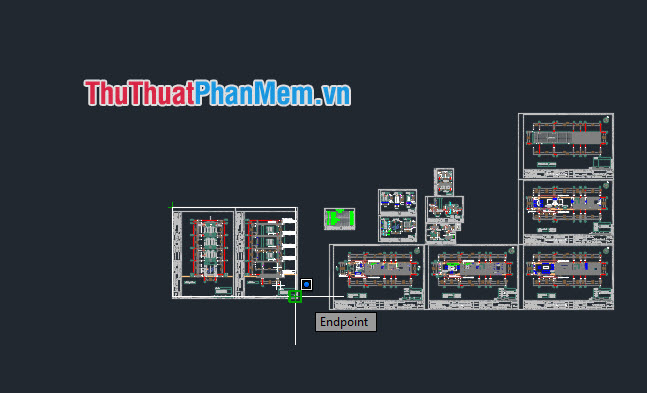
Step 9: To have a print with only the details, important parts and no extra space, select Windows mode in Plot Area (Windows).

Step 10: At this time, Auto CAD will take you to the print window selection. You select the area on the drawing you want to print. If the drawing is large, then divide it into several small prints to display the clearest.
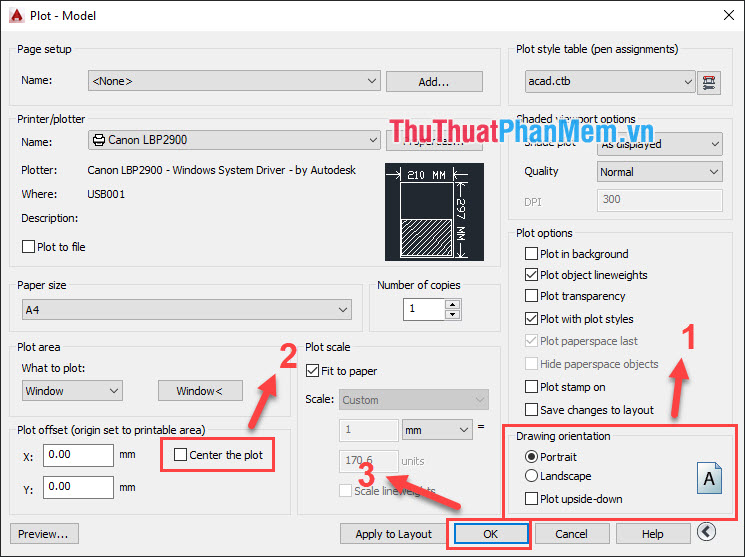
Step 11: Finally, you set up the following information:
- Orientation of drawing: Portrait (portrait - vertical), Landscape (Landscape, horizontal)
- Center the Plot: Automatically centers the paper center.
- Ok: Proceed to print.
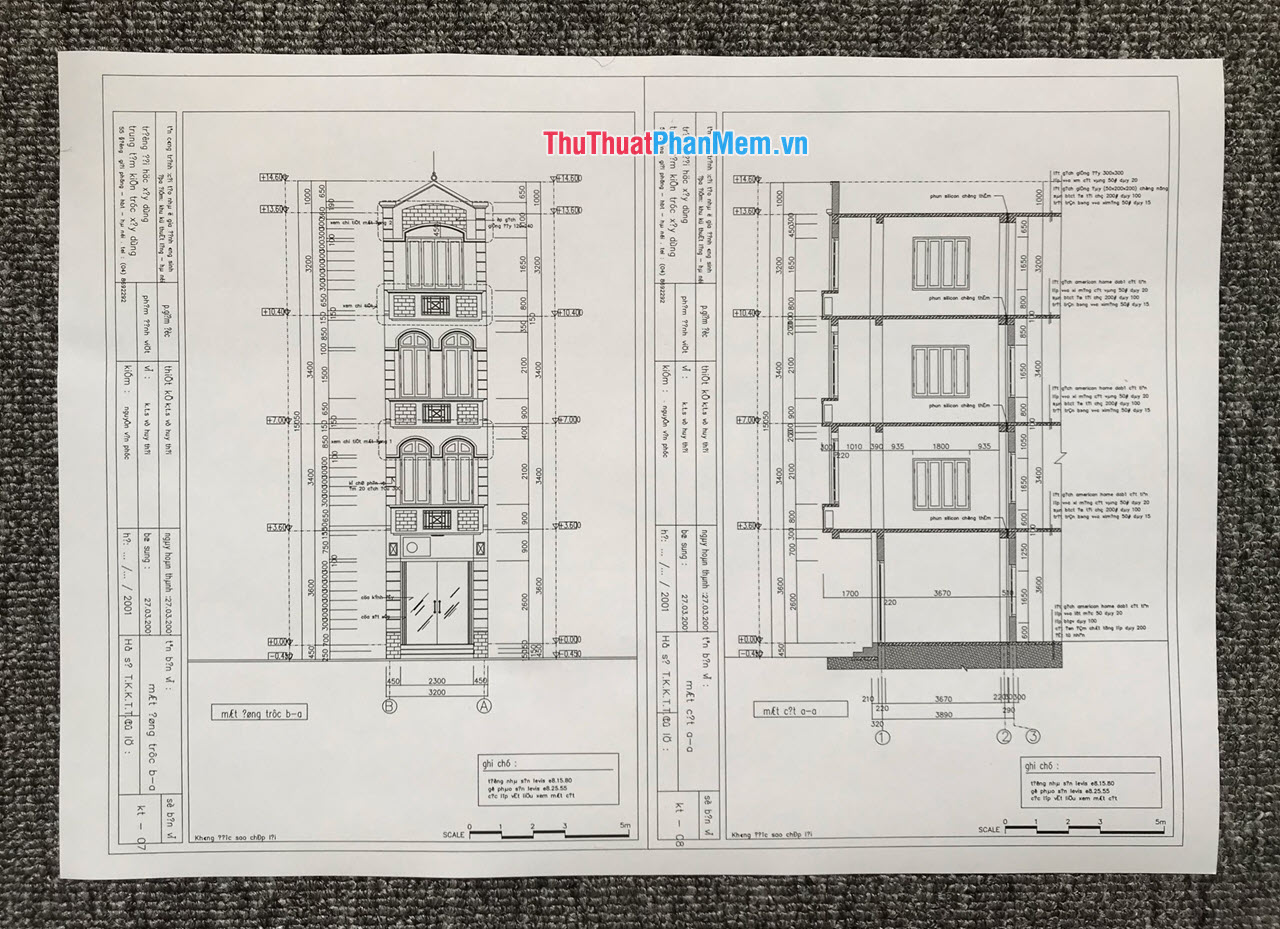
Finally, you get the following result:
Thus, Software Tips have taught you how to print CAD drawings properly and nicely. Good luck!