Instructions for cropping images in Excel are very simple
When inserting an image into Excel, you have the option to crop the image to select only the area of the image you want to take. In case the image is large, covers the content or you only want to take a certain area of the image, just select the crop tool in Excel.
Table of Contents
The Excel tool has been updated with many features for new versions of Excel, supporting users in the process of entering data, even inserting images in Excel to better serve the content being processed. When inserting images into Excel, you have the option to crop the image to select only the area of the image you want to take. In case the image is large, covers the content or you only want to take a certain area of the image, just select the crop tool in Excel. The following article will guide you to crop images in Excel.
Quick guide to cropping images in Excel
Insert image in Excel > Select the crop tool available in Excel > Select the image area you want to crop > Save the new image area after cropping in Excel.
How to crop images in Excel in detail
Step 1:
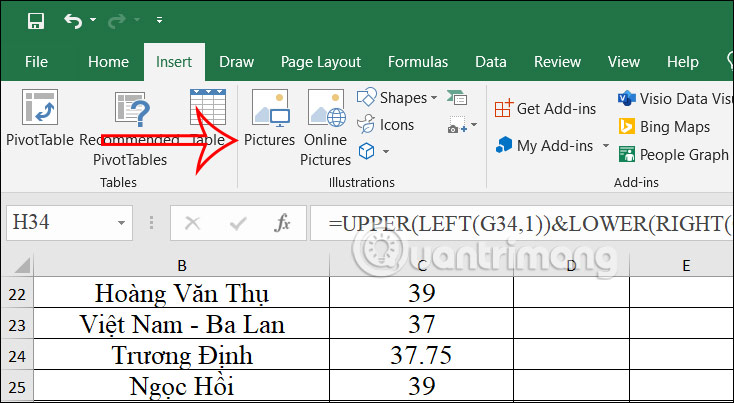
At the interface in Excel, first you click Insert and then select Picture below to insert the image into the document. We will choose to insert the image available on the computer or use online images to insert into the data table if needed.
Step 2:
After the image has been inserted into Excel, right-click on the image and select Crop to display in the interface as shown below.
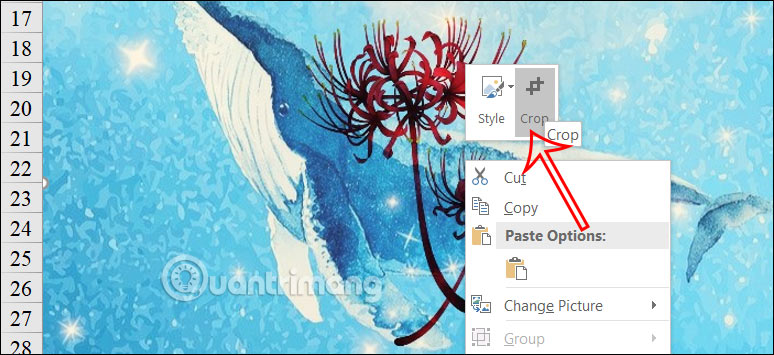
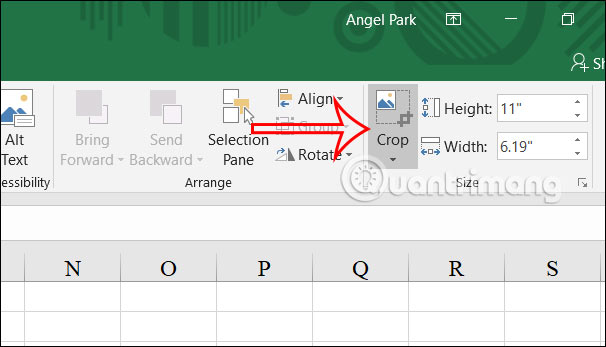
Or you can click on the Crop tool in the Size group as shown.
Step 3:
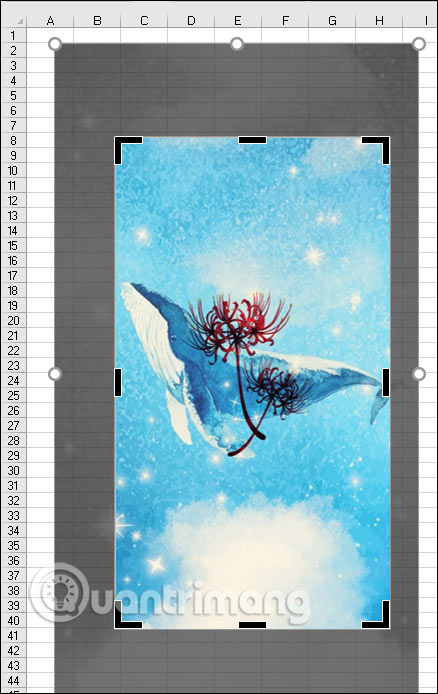
At this time, black borders will appear in the image. You will click and drag the black borders to the position of the image that we want to crop to use.
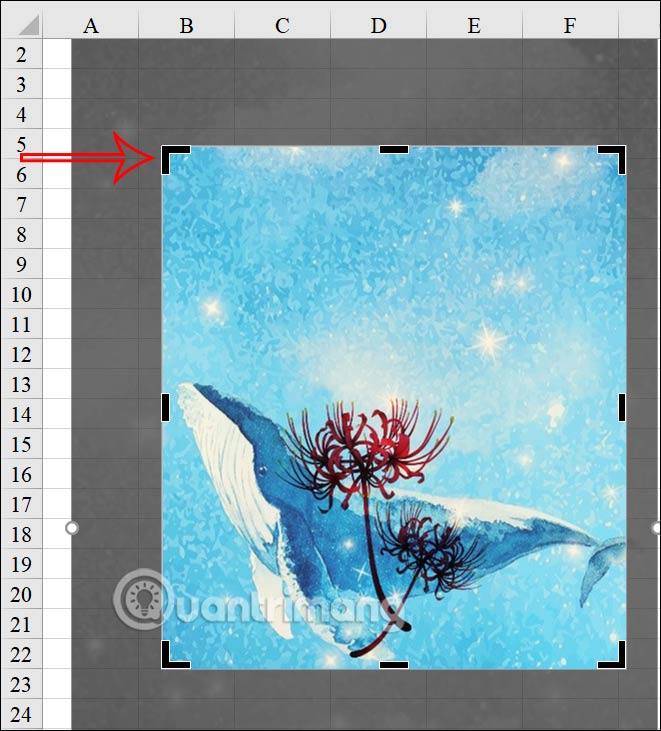
Or in case we want to crop the edges of the image evenly, hold down the Ctrl key and then move the edges and corners accordingly. Then the cropping frame will automatically adjust to crop the image more evenly.
Step 4:
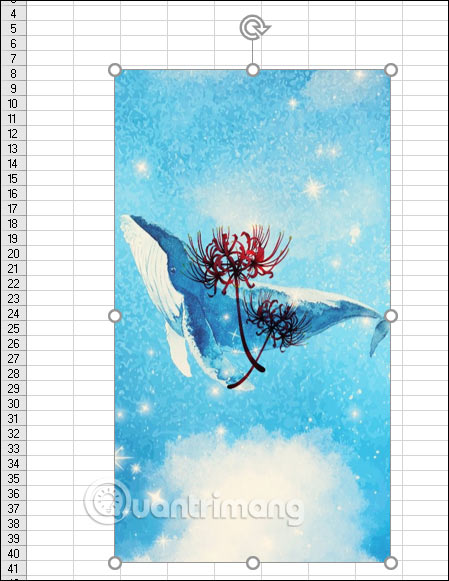
After selecting the area of the image you want to crop, just press Esc to save this new area of the image.
As a result, we have a new image after cropping as shown below. You can save this image if needed, or continue to insert other images into Excel.
Video tutorial on cropping images in Excel
Was this article helpful?
Your feedback helps us improve.
Related Articles
 Cropping and deleting shapes in Adobe Illustrator4 minutes read
 Photo editing on Mac: A complete guide for all your needs.6 minutes read
 Instructions on how to fix the error of not being able to insert images into Excel ULTRA FAST5 minutes read
 MS Excel 2007 - Lesson 9: Insert images and graphics into a spreadsheet3 minutes read
 Instructions on how to crop images online3 minutes read
 Inserting images into Excel without covering text is SIMPLE and QUICK6 minutes read
Reader Comments 0
Sign in with email or Google to join the discussion.