Table of Contents
This practical guide walks through how to use Windows 11's snap layout on Windows 10, explains the main requirements, and highlights common issues that may appear along the way.
How to use Snap Layout in Windows 10
There is Snap Layout feature in Windows 10, which may not be as easy and intuitive as Windows 11 but gives similar results. There are 3 ways to quickly arrange windows in Windows 10: Using the mouse, keyboard shortcuts, and Snap Assist.
1. Sort by mouse
Organizing with the mouse is easy on Windows 10. You just need to select the title bar of any application window and drag it to the corners of the screen. When you release the pointer, it will snap into place.

You can arrange multiple application windows side by side and resize them as needed. Although the mouse method is a bit more manual and time consuming, it is quite an effective method for those who want to use more space on the available screen.
2. Sort by keyboard shortcuts
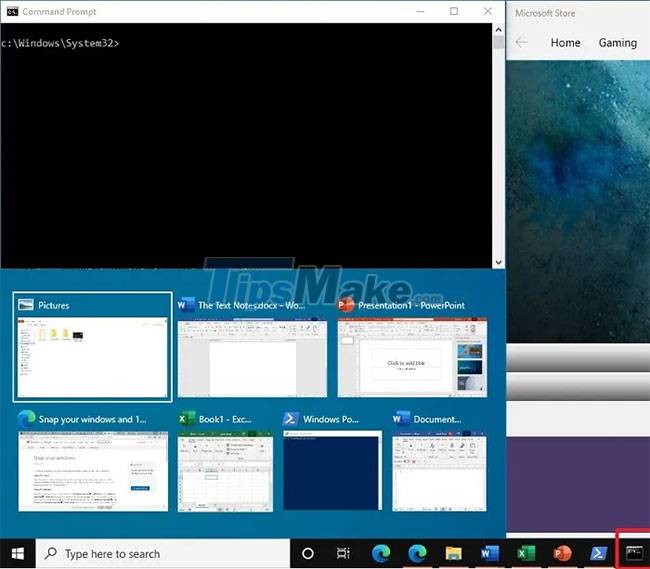
If you want the feeling of automatically arranging equal sized windows in Windows 10, it is better to use the keyboard shortcut: Win + Arrow keys . Go to the open window first, use the keyboard shortcut and it will automatically arrange the program windows.
In the following example for the Command Prompt window, the 'left' arrow key was used in conjunction with the Win key . This brought the Command Prompt into the left corner, taking up almost a quarter of the screen.
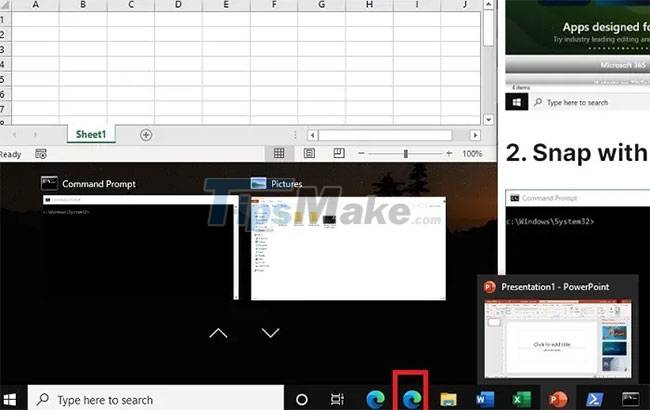
Another example below shows the arrangement of the Microsoft Edge browser window in the right corner of the screen. For this, the "right" arrow key was used in conjunction with the Win key . Other application windows are neatly arranged in a scrollable grid layout.
3. Organize with Snap Assist
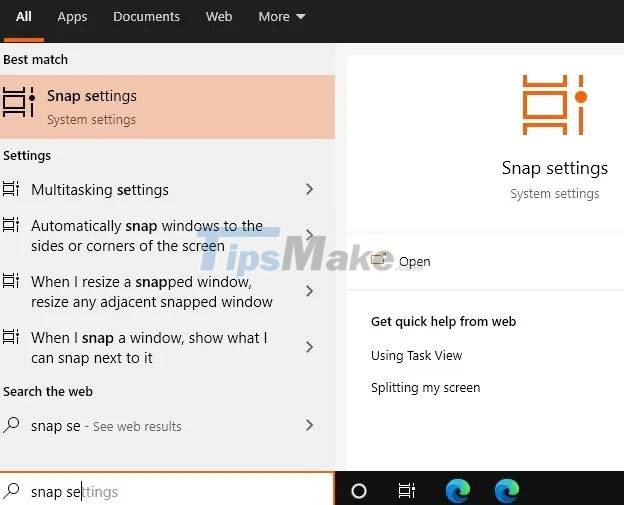
Windows 10 has a dedicated 'Snap Assist' feature that controls how you want windows to be split. It can be accessed from the "Snap settings" system settings in the search box. A similar feature exists in Windows 11 under 'Multitasking' , you can search in a similar way.
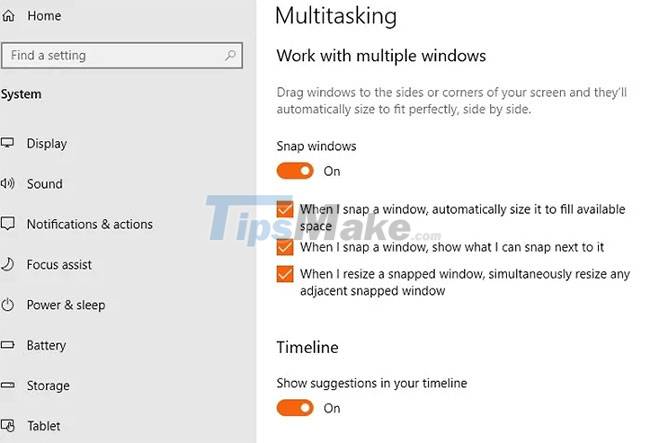
Enable 'Snap windows' to enable the sort function in Windows 10. Also enable other options, such as auto-sizing of available space and simultaneous resizing of adjacent windows. .
Now you just need to click on the thumbnail of the window you want to arrange using Snap Assist. It will be fixed at an angle. The other windows will be resized neatly next to the first so that there is no free space left.
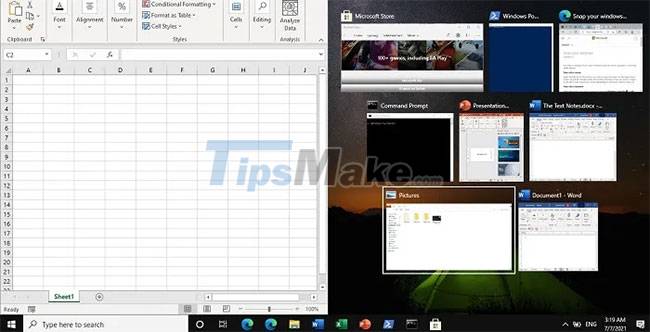
Although Windows 11 significantly improves this feature, the "Snapping" function has actually been available since Windows 7. Although it is not quite the same as Windows 11, there are many benefits to using the Snap Layout feature. in Windows 10.
Key Takeaways
Use the information above as a practical reference for how to use Windows 11's snap layout on Windows 10. Review each step carefully, confirm any requirements, and choose the option that best fits your situation.
FAQ
What does this guide explain about Use Windows 11's Snap Layout on Windows 10?
It explains the main concepts, practical considerations, and useful steps related to use Windows 11's snap layout on Windows 10 without requiring advanced knowledge.
Who can benefit from learning about Use Windows 11's Snap Layout on Windows 10?
This information is useful for readers who want a clear overview, practical guidance, and reliable steps related to use Windows 11's snap layout on Windows 10.
What should I check before applying this information?
Review the requirements, confirm that your device, software, or situation matches the instructions, and back up important data before making major changes.
Related Articles
 How to Turn Off Snap Layout in Windows 114 minutes read
 AI Addition for Snap: Complete Guide3 minutes read
 How to Turn Off Snap Feature in Windows 103 minutes read
 How to Enable // Disable the Aero Snap Feature in Windows 104 minutes read
 How to Create Custom Snap Layouts in Windows Using Powertoys6 minutes read
 Snap. Do Removal Guide on Chrome, Firefox and Internet Explorer4 minutes read
Reader Comments 0
Sign in with email or Google to join the discussion.