How to Create Custom Snap Layouts in Windows Using PowerToys
With PowerToys, you can create custom snap layouts for your Windows 10 or 11 PC and multitask with ease.
Table of Contents
With the Snap Layouts feature in Windows, you can snap your windows into different positions and arrange your desktop to your liking. While the feature is useful, it doesn't give you the option to edit the predefined layouts or customize them in any way.
Fortunately, you don't have to stick with the default snap layout options. With PowerToys, you can create custom snap layouts for your Windows 10 or 11 PC and multitask with ease. Find out more in the following article!
How to Create Custom Snap Layouts in PowerToys
PowerToys' FancyZones feature allows you to arrange your windows into custom layouts. Here's how you can use its layout editor to create and save custom layout snaps.
1. Download and install PowerToys from the Microsoft Store.
2. Once installed, open the PowerToys app using the search menu.
3. Select the FancyZones tab from the left sidebar.
4. Turn on the switch next to Enable FancyZones .

5. Click the Launch layout editor option .
6. Select the screen for which you want to design the layout.
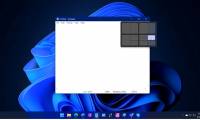
7. Click the pencil icon next to one of the layout templates to edit.
8. In the following window, use the slider to change the number of zones, the distance around the zone, and the distance marker.
9. Click the Save button to save your changes.

If the existing layout templates aren't enough for you, PowerToys also gives you the option to create new snap layouts from scratch. Here's how to do it:
- In the PowerToys app, navigate to the FancyZones tab.
- Click the Create new layout button .
- Enter a suitable name for your custom layout and choose your preferred layout type.
- Click the Create button .
- Click the plus icon to add new areas and resize them as you like.
- After creating your snap layout, click the Save & apply button .

You can repeat the steps above to create as many custom layouts as you want.
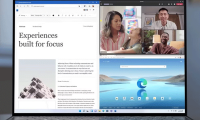
By default, applications and programs on your computer will use the Windows 11 snap layout when you move the mouse pointer over the Maximize button or drag a window to a corner. To use a custom snap layout created with PowerToys, you need to hold down the Shift key and then drag the window to one of your zones.

How to Customize FancyZones Settings in PowerToys
In addition to creating personalized snap layouts, PowerToys offers many options to customize the look of the area, modify window behavior, exclude specific applications, and more. Let's see how to use them.
Open PowerToys and navigate to the FancyZones tab. In the Zone appearance section , you can customize the look and feel of the zones by adjusting the color, opacity, and other aspects.

Similarly, in the Window behavior section , you can use checkboxes to specify how the window should behave when you use FancyZones. For example, you can configure windows to revert to their original size when unsnapped using the Restore the original size of windows when unsnapping check box .
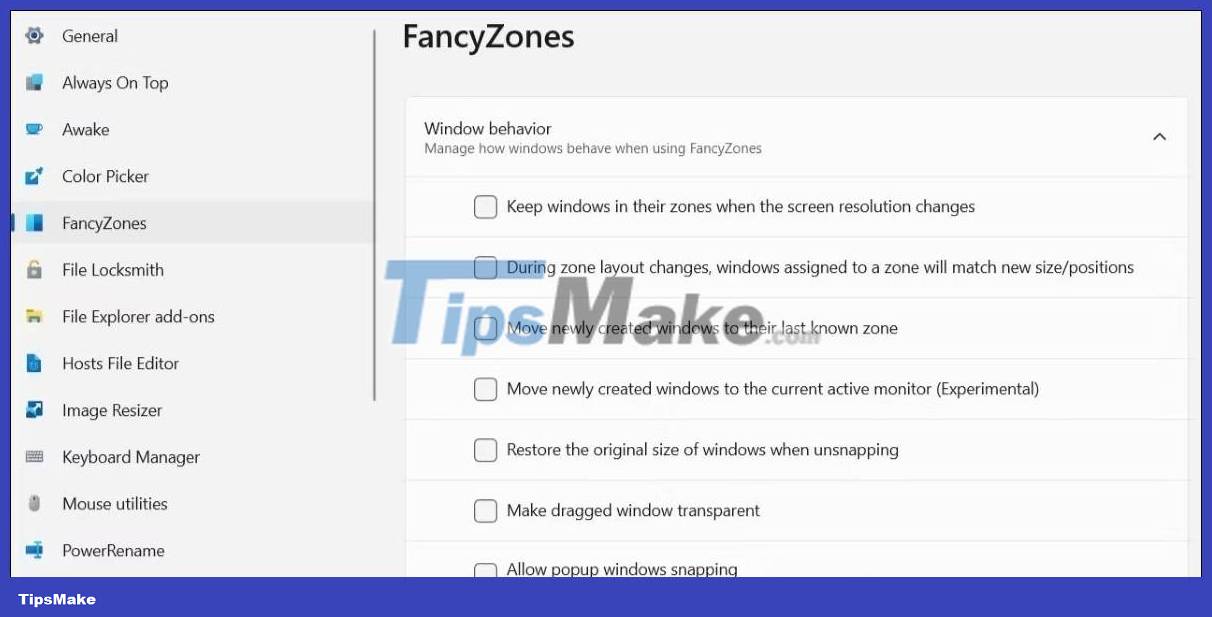
If you're used to using the keyboard shortcut Win + arrow keys to snap windows on your computer, you can configure PowerToys to override Windows Snap. To do that, turn on the toggle next to Override Windows Snap , then use Win + arrow keys to arrange windows.

With FancyZones, you can prevent specific apps and programs from snapping into areas. To do so, scroll down to the Excluded apps section in the FancyZones tab. Then enter the name of the app you want to exclude. For example, if you wanted to prevent File Explorer from snapping to areas, you would type explorer.exe in the text field.

Was this article helpful?
Your feedback helps us improve.
Related Articles
 How to use Windows 11's Snap Layout on Windows 104 minutes read
 How to fix Snap Layouts not working in Windows 115 minutes read
 Why are Windows 11's Snap Layouts better than Window Tiling in macOS Sequoia?5 minutes read
 Use Custom Views to view specific spreadsheet layouts in Excel3 minutes read
 How to use PowerToys on Windows 105 minutes read
 PowerToys will soon support creating app spaces and launching with just one click3 minutes read
Reader Comments 0
Sign in with email or Google to join the discussion.