How to restore the old context menu in Windows 11
If you miss the simplicity and speed of the old right-click menu, you can restore it.
Why is Windows 11's context menu so bad?
Windows 11 is supposed to be a step up from Windows 10, but for many users, Windows 11 feels like a new skin on the same old skin. In fact, with its focus on minimalism, Windows 11's changes often feel more designed for the mobile experience than for improving usability on the desktop.
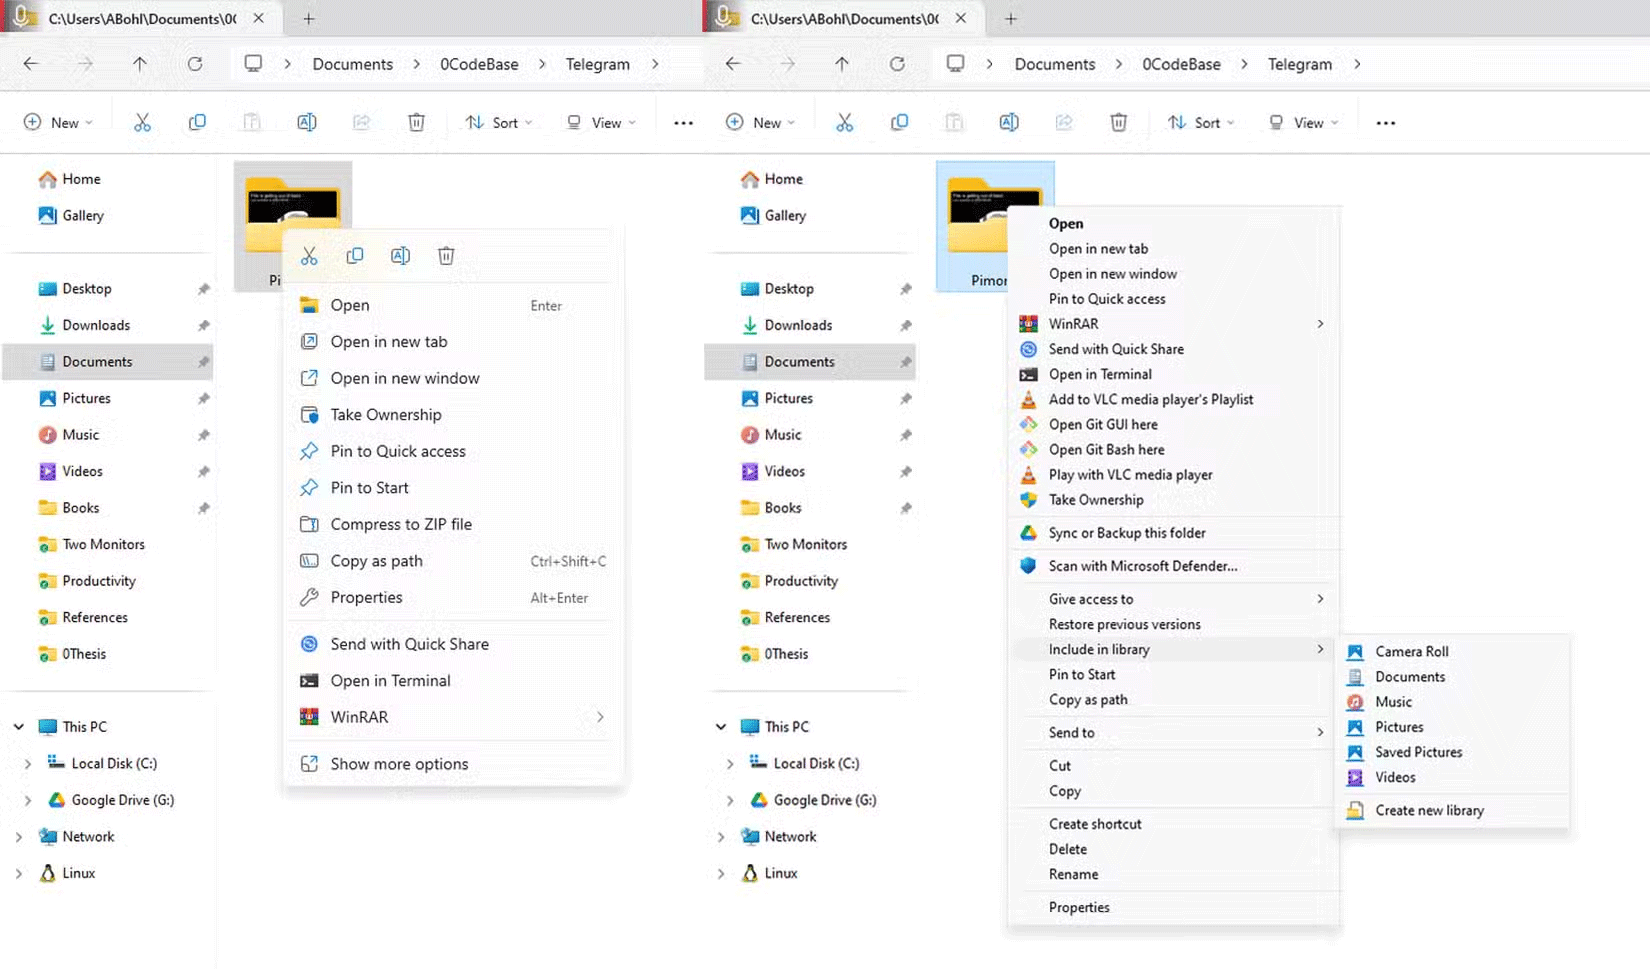
One of the biggest annoyances in Windows 11 is the context menu. Instead of the familiar function menu from Windows 10, you'll find an overly simplified version. It only offers basic actions, most of which can be performed more quickly with keyboard shortcuts. Adding to the confusion, essential options like cut, copy, paste, and rename have been replaced with confusing icons.

If you want full access to the options, you have to click Show more options , which restores the classic menu — but at the cost of an extra click. The change in styling between the new and old menus makes this transition even more frustrating. The classic menu isn't gone; it's just hidden behind an unnecessary step.
The fact that Windows 11 still keeps the classic context menu behind this mask allows it to be restored as the default menu. While Microsoft doesn't provide a built-in toggle to switch between the two menus, there is a way to do this using the Registry Editor.
How to restore the old context menu in Windows 11
Restoring the classic right-click menu in Windows 11 is simple with a quick Registry tweak. To get started, press Win + R on your keyboard, type regedit and press Enter to open the Registry Editor.

Warning : Modifying the Registry can potentially cause problems for your system, so only proceed if you are confident you can follow instructions correctly and know what you are doing.
In Registry Editor, navigate to HKEY_CURRENT_USER > Software > Classes > CLSID in the left pane. Be sure not to confuse this with the .cls folder - they are completely different.

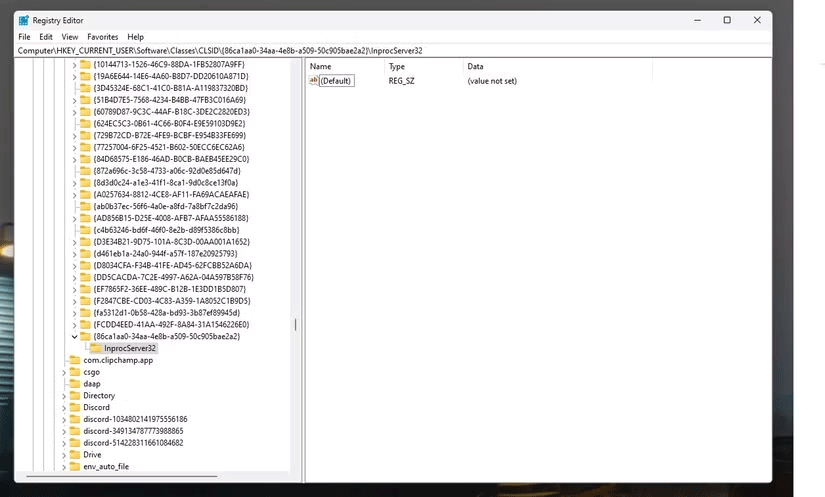
Right click on CLSID , go to New and select Key. Name this new subkey {86ca1aa0-34aa-4e8b-a509-50c905bae2a2}.

Next, you will need to add a subkey within this key. Right-click on the new key, select New > Key and name it InprocServer32.

Now, select InprocServer32 in the left pane. You will see a default value titled (Default) on the right. Double click on it and press OK without entering any text. This will initialize the subkey with a blank value.

That's it! To apply these changes, you'll need to restart Windows Explorer. Open Task Manager by pressing Ctrl + Shift + Esc , locate Windows Explorer , right-click it, and select Restart .
Now, when you right-click in Windows Explorer, you will see the old classic context menu.
You should read it
- ★ How to add items to the 'Create New' context menu in Windows 10
- ★ This small application helps bring the context menu interface of Windows 10 to Windows 11
- ★ Microsoft is committed to improving the context menu experience on Windows 11
- ★ How to fix slow context menu in Windows 10's File Explorer
- ★ What is the Menu key? And how to remap it?