How to delete options in the Windows context menu
Have you ever right-clicked on a file or folder and wondered where the options to mess up this context menu and how to delete them? Please read the following article.
Instructions for deleting options in the context menu
- Delete the item from the context menu by editing the Registry
- Delete the item in the Shell key
- Delete the Shellex key entry
- Explore other locations by file type
- Delete items from the context menu with the tool of NirSoft
Windows has a wide range of options in the context menu by default and this list will increase as you install many applications. Sometimes applications 'fight' together to save a portion of the "land" in this right-click menu and most people don't use half of them. This article will guide you to delete items in the context menu by editing the Registry or using a free third-party application.
You don't need to put too much effort into turning a long context menu:

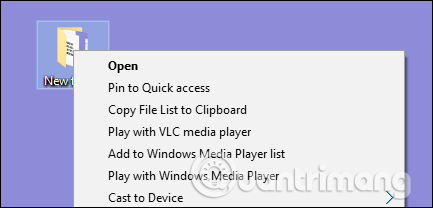
This is a neat and clean context menu like this:

Delete the item from the context menu by editing the Registry
If you want to clean up everything in the context menu without using third-party software, Registry Editor is the right choice.
Warning: Registry Editor is a powerful tool and its abuse will lead to system instability or even inactivity. You should back up the Registry before making changes to prevent a problem from occurring.
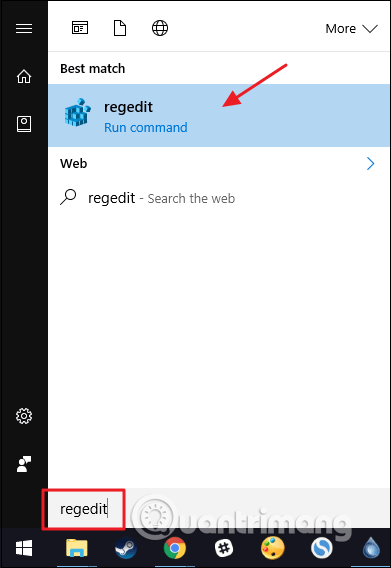
Open Registry Editor by clicking Start and typing regedit , then press Enter and grant permission to make changes to the computer.
The items on your context menu are not in the same place in the Registry, so you need to find the items used for files and folders by searching in the following keys in the left navigation.
HKEY_CLASSES_ROOT * shell
HKEY_CLASSES_ROOT * shellexContextMenuHandlers
HKEY_CLASSES_ROOTAllFileSystemObjectsShellEx
You will find specific context menu items for the folder in the following keys:
HKEY_CLASSES_ROOTDirectoryshell
HKEY_CLASSES_ROOTDirectoryshellexContextMenuHandlers
You will need to handle the context menu items found in these positions a bit differently. Here's how to handle items in some popular keys.
Delete the item in the Shell key
Take a look at an example to delete an item below to understand how to do it. In this example, when installing VLC video player software, it will add an entry to the context menu called Add to VLC media player's Playlist .
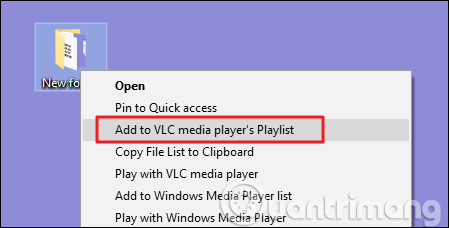
To delete this item in the context menu, in Registry Editor, find the following key:
HKEY_CLASSES_ROOTDirectoryshellAddtoPlaylistVLC
You will see this key in the key shell. Items in the key shell are often easy to detect and handle.
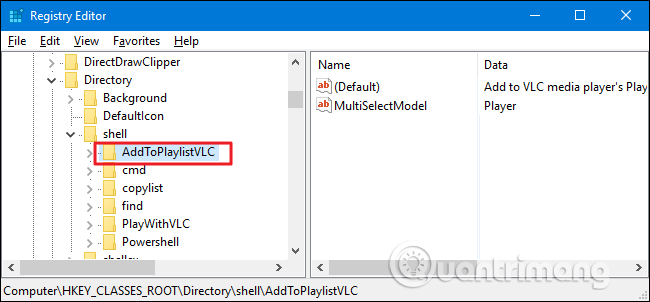
Here we will have a few ways to handle it. You can completely delete the AddToPlaylistVLC key and it will disappear from the context menu. However, unless you back up the Registry or export that key to a REG file, you won't be able to get it back if you change your mind.
- How to create a hacked Windows Registry file yourself
The second option is to disable it instead of deleting that key. To do this, right-click the AddToPlaylistVLC key or the key you want to delete and select New> String Value , naming the new value LegacyDisable .

As soon as you create the LegacyDisable value, the change will be applied immediately. Right-clicking on a file or folder in File Explorer and the Add to VLC media player's Playlist item is no longer in the context menu.
If you occasionally want to use an item in the context menu but don't want it to clutter this frequently used menu, you can hide it in the extended context menu, only when you hold down the Shift key while right-clicking on the message. item or file. To do this, right-click the AddToPlaylistVLC key or other key you want to hide and select New> String Value , name this value Extended .
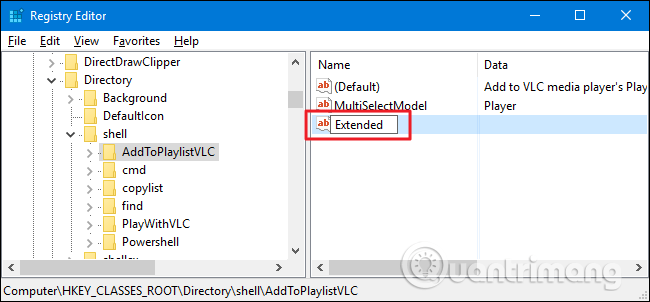
Now, it only appears when you right-click a folder while holding the Shift key.
Delete the Shellex key entry
You may have noticed that some Registry keys listed at the beginning of this section have shellex (shell extensions) in the name instead of just the shell. You need to handle these key types a bit differently. In this example, we will find the following key:
HKEY_CLASSES_ROOTDirectoryshellexContextMenuHandlers
Shellex items will be a bit more difficult to handle, but you can still find items to delete under the key name on the left. Here we will work with the DropboxExt key inside the ContextMenuHandlers key.
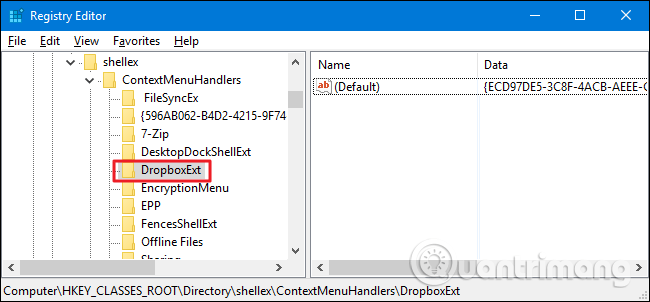
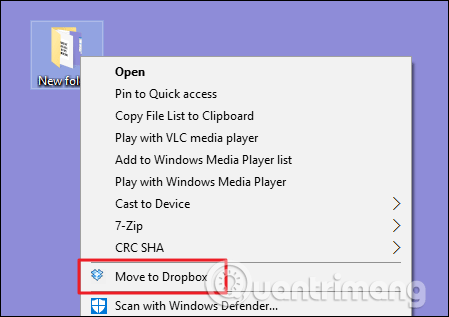
When installing Dropbox, it adds the Move to Dropbox command to the context menu. If you prefer drag and drop, you'll rarely use this command and want to delete it from the right-click menu.
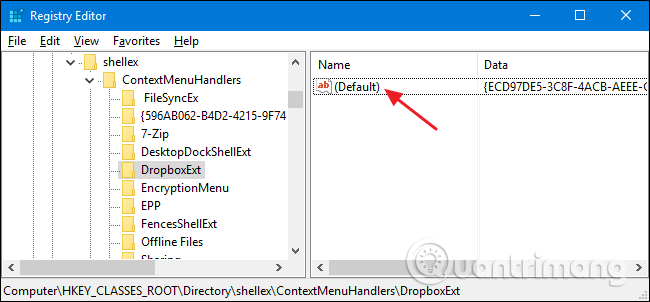
You cannot use tricks such as the above mentioned LegacyDisable and Extended values with items in the shellex key. You can still delete the DropboxExt key to remove it from the context menu (make sure to back up the key), but it is easier to disable it. You just need to select the key on the left, double-click the value (Default) inside that key to open its properties window.
On the properties window, in the Value data box, modify the existing value by adding a few dashes before it, but be careful not to delete any of its available values. In this way, if you change your mind, just delete the dash to restore it. When done, click on OK .
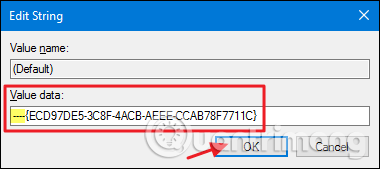
You will see changes immediately on the context menu.
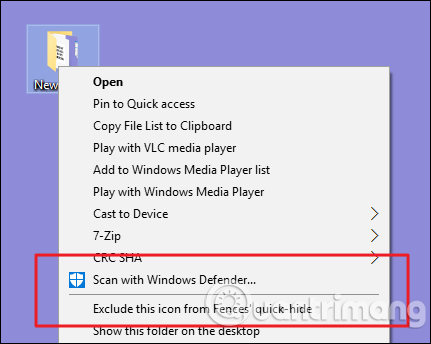
However with the items in the shellex key, you have no way to hide the options in the extended context menu in the way you do with the items in the key shell.
Explore other locations by file type
If you want to delete the context menu items only see right click on specific file types, you can do that. These items are stored elsewhere, not the usual locations we just searched for. To find it, you need to specify the file extension key by looking in HKEY_CLASSES_ROOT.
For example, suppose that when you right-click on an Excel document, you will see the item to open the file (XLSX).
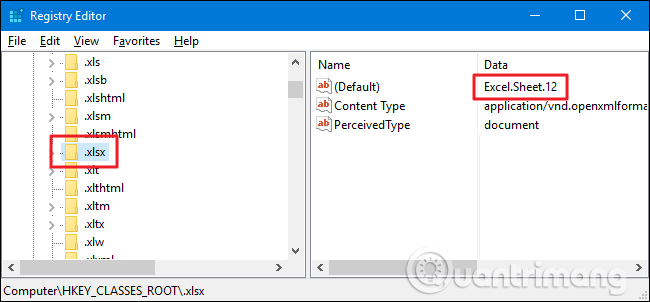
You will start by finding the following Registry key for the XLSX extension:
HKEY_CLASSES_ROOT.xlsx
The data column for the key shell (Default) indicates the actual file type of the file is Excel.Sheet.12.
Now, you can browse to that extension key:
HKEY_CLASSES_ROOTExcel.Sheet.12shell
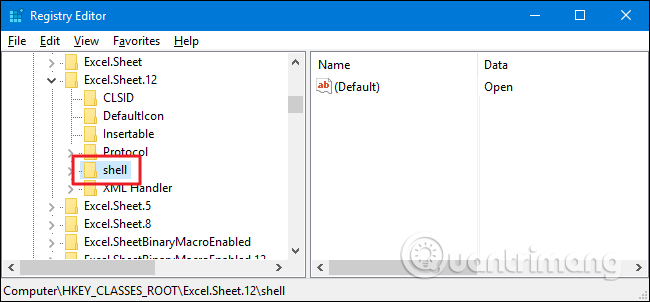
After finding the correct key shell, you can use the same tricks in the previous section to delete, disable or hide items on the extended context menu.
Delete items from the context menu with the tool of NirSoft
Instead of editing the Registry, you can download two tools from NirSoft to clean up the context menu. Why do you need two tools? Because a tool will handle shell entries and a shellex item handle. Both tools are easy to use.
Start by downloading both tools. The first tool is ShellMothyView, which handles common shell items. The second tool is ShellExView, which handles shellex items. Scroll down to the bottom of both pages to find download links. Both of these tools work with most versions of Windows 98 through Windows 10. You will need to get the 32 bit or 64 bit version, depending on whether you are running 32-bit or 64-bit versions of Windows.
Download ShellMothyView following the link below:
http://www.nirsoft.net/utils/shell_menu_view.html Download ShellExView following the link below:
http://www.nirsoft.net/utils/shexview.html The first tool we will test is ShellMothyView, which allows managing all common shell items with an easy-to-use interface. After downloading and extracting the tool, double-click the EXE file to run it. This is a portable tool so you don't need to install it.

In ShellMothyView window, just browse down the list until you find the item you want to disable. You can only disable items with these tools without deleting or hiding them on the extended context menu. These tools disable items by creating a LegacyDisable string value inside the appropriate key when manually editing the Registry.
When you find the item to disable, click the Disable button on the toolbar (red light).
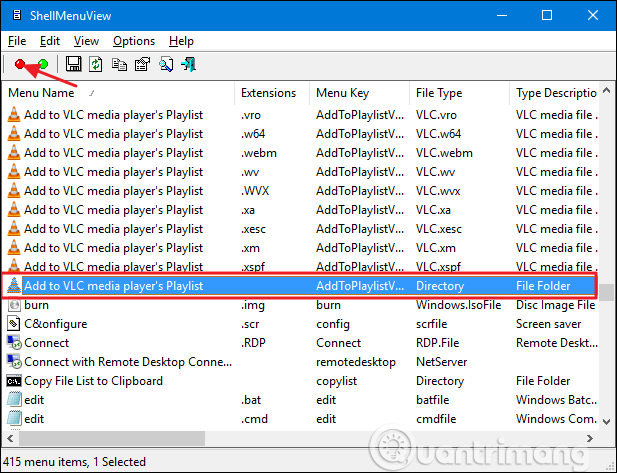
Another useful feature of this tool is that it allows to disable a variety of items in the context menu.
If you want to delete items in the shellex key, you need to use ShellExView's second tool. This tool works similarly to the first tool. You just need to select one or more items and then click the Disable button to remove it from the context menu.

I wish you all success!
You should read it
- ★ The context menu of Windows 11 will have a new eye-catching design
- ★ This small application helps bring the context menu interface of Windows 10 to Windows 11
- ★ 2 simple ways to remove SkyDrive Pro option in Windows 10 Right-click Menu
- ★ Microsoft is committed to improving the context menu experience on Windows 11
- ★ How to add / remove 'Open in Windows Terminal' context menu in Windows 10