How to Move Columns in Excel
This wikiHow teaches you how move a column to another location in Microsoft Excel for Windows or macOS. Click the letter above the column you want to move. This selects the column..
Method 1 of 2:
Dragging the Column
-
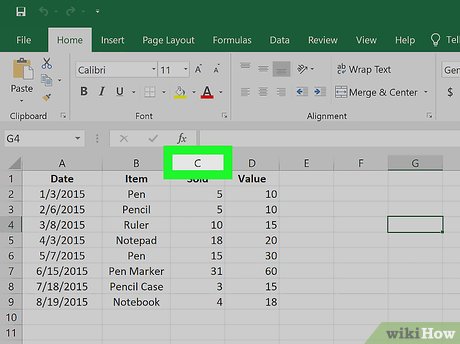 Click the letter above the column you want to move. This selects the column.
- To move more than one (adjacent) column at the same time, hold down Ctrl (PC) or ⌘ Command (Mac) as you click each column letter.
-
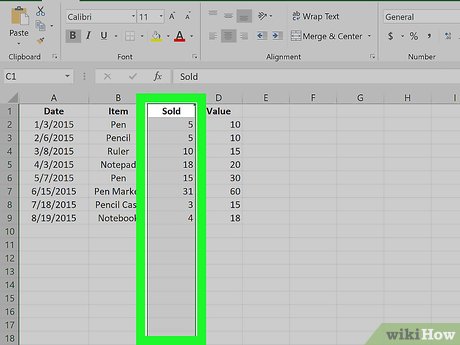 Hover the mouse over the border of the selected area. The cursor will turn to a four-pointed arrow (PC) or a hand (Mac).[1]
 -
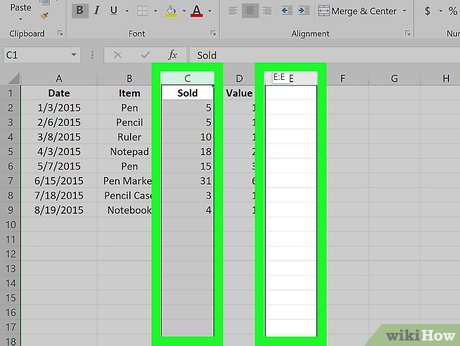 Drag the column to the desired location. Click and drag the selected column(s) to the location where you want to move it, and then release the mouse button.
Method 2 of 2:
Cutting and Pasting
-
 Click the letter above the column you want to move. This selects the column.
- To move more than one (adjacent) column at the same time, hold down Ctrl (PC) or ⌘ Command (Mac) as you click each column letter.
-
 Press Ctrl+X (PC) or ⌘ Command+X (Mac). This 'cuts' the data in the column, which really just selects it and adds it to the clipboard.
- The column data will remain in its place until you paste it into its new location.
- You can also cut the column by clicking the scissors icon on the Home tab. It's in the 'Clipboard' section near the top-left corner of the app.
- If you cut the wrong column, press Esc to return the data to its original location.
-
 Right-click the letter above the column to the right of where you want to move the data. A drop-down menu will expand.[2]
- When you insert your copied data, it'll be moved to the left of the column you right-click here.
-
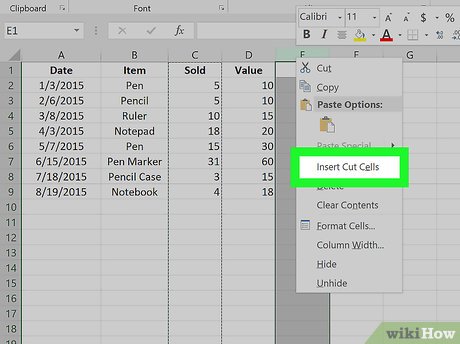 Click Insert Cut Cells on the right-click menu. Excel will insert the cut column to the left of the one on which you right-clicked.
- If you want to undo the pasted column, press Ctrl+Z (PC) or ⌘ Command+Z (Mac).
- Alternatively, you can click the drop-down icon next to the Insert button on the Home toolbar at the top, and select Insert Cut Cells or Insert Cells here. This will also insert and move your data the same way.