Manipulating tables editing in Excel
The following article provides detailed instructions for you to edit tables in Excel.

1. Insert rows and columns in tables:
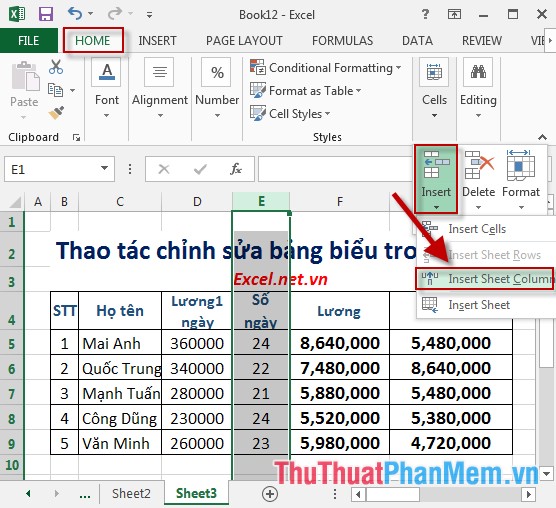
- For example, you want to insert 1 column after salary column 1 day:
Step 1: Select the Number of days column -> Go to the Home tab -> Cells -> Insert -> Insert Sheet Column:
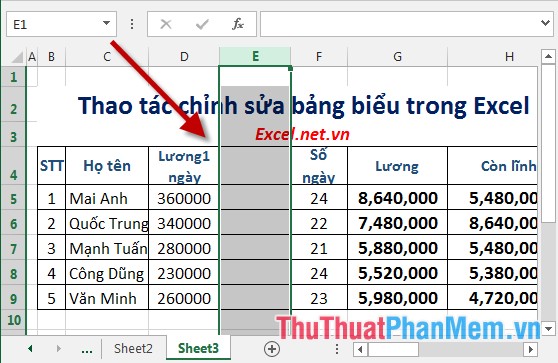
Step 2: After selecting the new column is inserted in the desired position. Notice the column is inserted to the left of the selection column:
- Example inserting 1 row after the 2nd row in ordinal number:
Step 1: Select the 3rd row of the employee Manh Tuan -> Go to the Home tab -> Cells -> Insert -> Insert Sheet Rows:

Step 2: After selecting the new row is inserted. Notice that the new row is inserted above the selected row:

2. Merge cells in Excel.
Step 1: Select the cells to merge
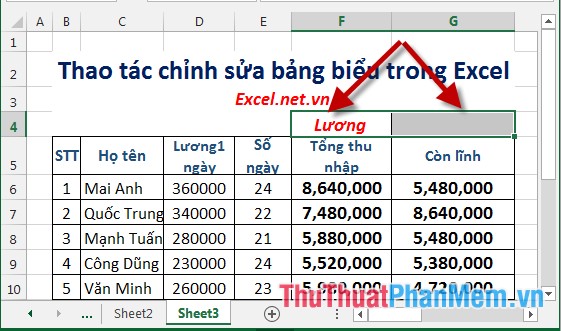
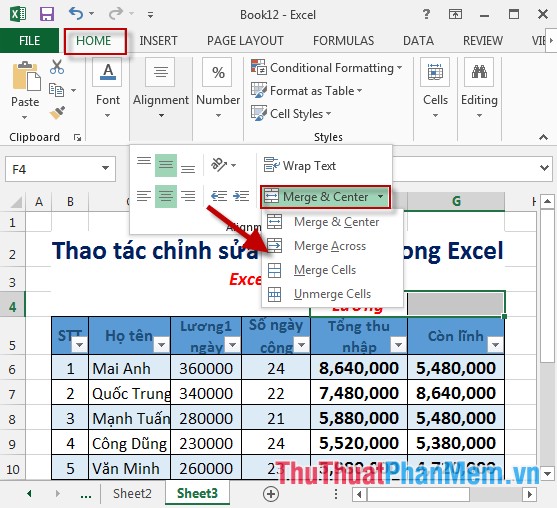
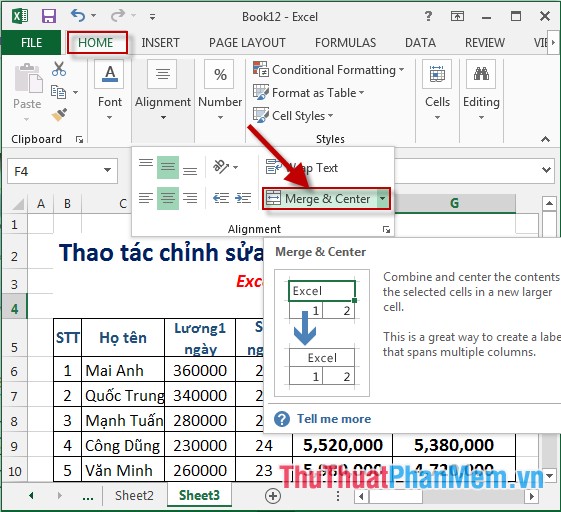
Step 2: Go to the Home tab -> Alignment -> Merge & Center ( or you can choose other types of Merge in the dialog box ):
Step 3: After selecting the combined cells, the results are:
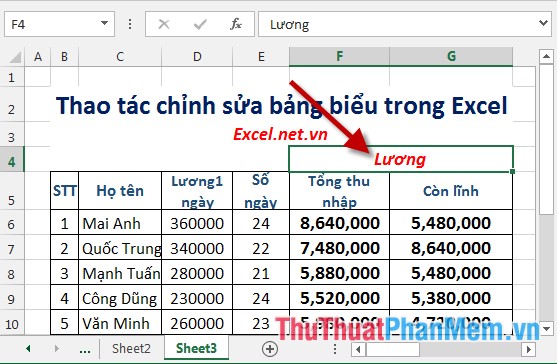
- In case you want to split multiple cells back to the old state, do as follows: Go to Home tab -> Alignment -> click Merge & Center again:
3. Align the text position in the data box:
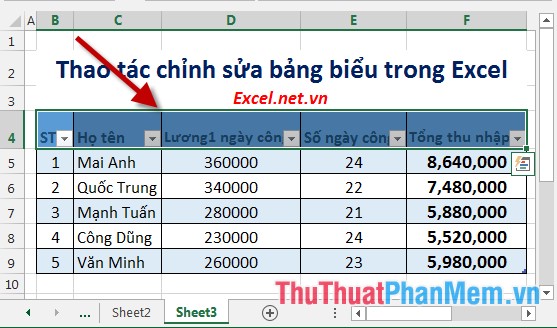
For example, the column header text lines at the bottom and the left, want to align so that the text is in the middle position compared to the cell in the table.
- Method 1:
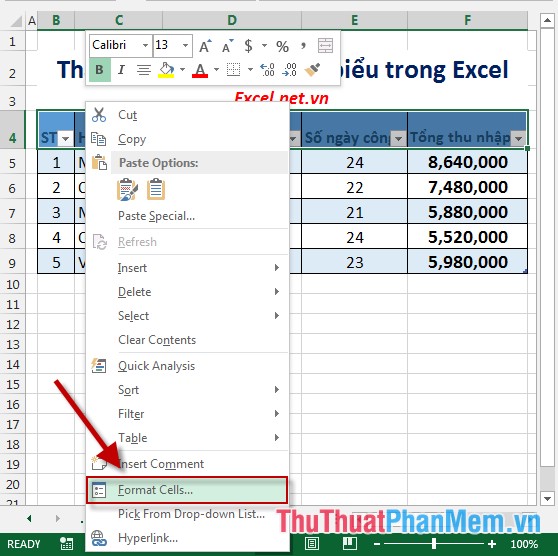
Step 1: Select the headline to format -> right-click and select Format Cells:
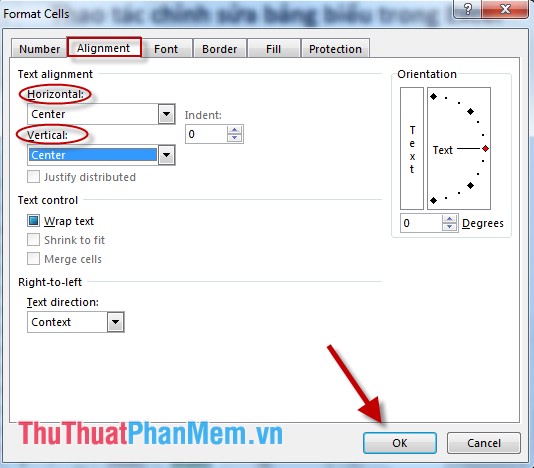
Step 2: The Format Cells dialog box appears, select the Alignment tab in the section:
+ Horizontal: Select Center.
+ Vertical: Select Center.
Finally, click OK to complete:
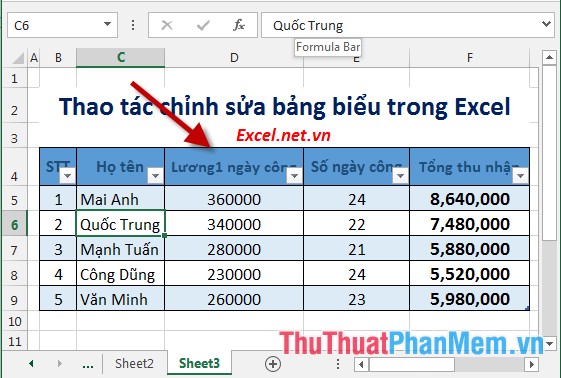
Step 3: After clicking OK, the text is edited to fit the size of the cell:
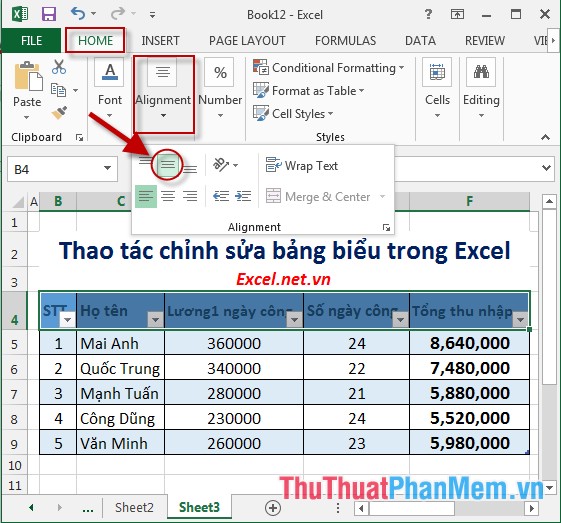
- Option 2: Select the subject line to align -> Home -> Alignment -> click on the Middle Align icon :
The above is a detailed guide for manipulating table editing in Excel 2013.
Good luck!
You should read it
- ★ Instructions on how to create diagonal lines in Excel box
- ★ How to create an Excel table, insert a table in Excel
- ★ How to create and delete tables in Excel
- ★ How to format borders and background colors for Excel tables
- ★ Steps to create relationships between multiple tables using Data Model in Excel