Table of Contents
The Simplest Way to Create a Virtual Drive Using Virtual Drive is easier to approach with a clear overview and reliable steps. This guide organizes the essential information, highlights practical details, and explains what to check along the way.
Key Takeaways
- Review instructions for creating virtual drives with VirtualDrive pro.
- Follow the recommended steps in order to avoid common mistakes with the simplest way to create a virtual drive using virtual drive.
- Review compatibility, settings, or requirements before making changes.
Instructions for Creating Virtual Drives with VirtualDrive Pro
Step 1: Download and install the software on your computer. Download Virtual Drive
Step 2: After installation is complete, open the program. Program interface after installation is complete.
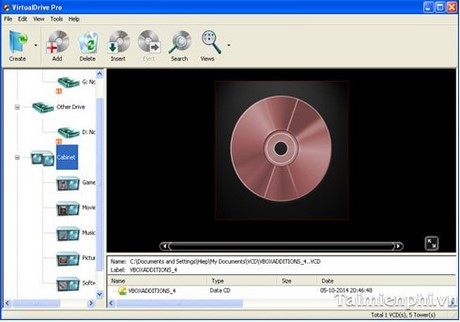
Step 3: At the program interface, select Create, a new window appears.
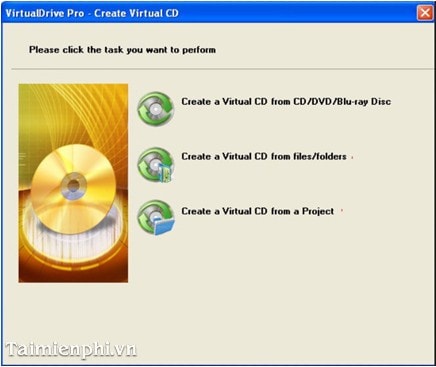
Step 4: If you want to Create a virtual disc from a real disc, select Create a Virtual CD from CD/DVD bru-ray Disc.
A new window appears with the VCD label option: Name the virtual drive, uncheck the Eject the disk when the build process is complete item if you don't want the program to automatically eject the disk from the real CD/DVD drive after completing the process.

- Next, open the Advanced Settings option.

You select the drive you want to create in the Source section and lead to the virtual drive storage location in the Save VCD File section.
Select Password / Retype Password if you want to set a password for the virtual disk.
Options for compression levels and compression capacity in the Data Compression section: The Browse / Comment option will support automatic execution of files with messages every time a virtual disk is inserted into the optical drive.
Select Save then Start to let the program perform the task.
Step 5: If you want to Create a virtual disk from any folder or file, select Create a Virtual CD from Files/Foder.
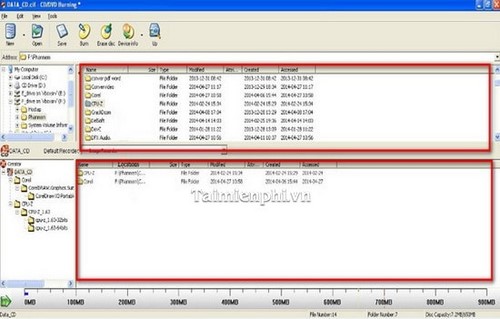
The upper frame is the name of the data that needs to be put into the virtual disk; The lower frame is the data storage area. You drag and drop the data that needs to be put into the lower data frame.
OK, When finished, click the Save button.
Here you name the virtual disk file, choose a storage location, and Save.
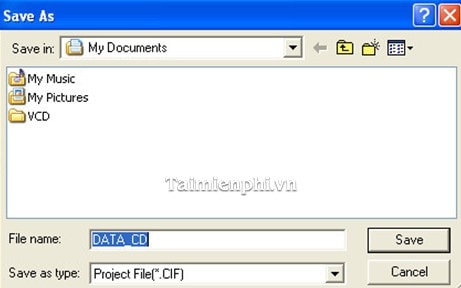
Step 6: If you want to create a virtual disk from a project, select Create a Virtual CD from a Project.
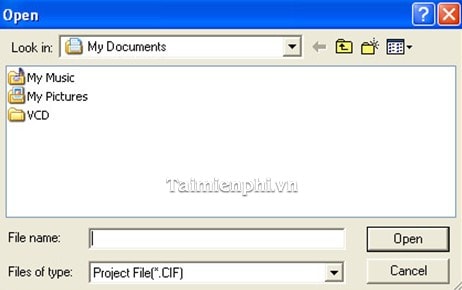
Select the location where the Project is stored and select Open. The program will automatically write the project to a virtual disk.
Step 7: Open My Computer, right-click to open the drive and enjoy.
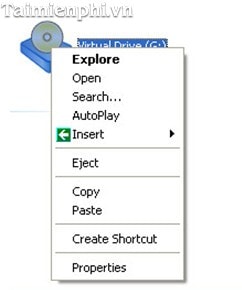
With Virtual Drive, accessing virtual drives becomes faster and more convenient. This software not only helps create virtual drives on Windows 10 but also supports storing and securing data effectively. You can refer to software such as UltraISO, PowerISO if you need an alternative solution.
Final Thoughts
The most reliable way to handle the simplest way to create a virtual drive using virtual drive is to follow the process in order, verify each important setting, and test the result before moving on. Use the guidance above as a practical reference, then adjust the details for your device, software version, or specific goal.
FAQ
What should I know first about The Simplest Way to Create a Virtual Drive Using Virtual Drive?
In this article, let's learn with Free Download how to create a virtual drive using Virtual Drive in the simplest way.
How do I get the best results with The Simplest Way to Create a Virtual Drive Using Virtual Drive?
Use current software or equipment, follow the steps in order, review the recommended settings, and test one change at a time so you can identify what improves the result.
What should I do if The Simplest Way to Create a Virtual Drive Using Virtual Drive doesn't work as expected?
Check compatibility, permissions, connectivity, and version-specific settings. Restart the relevant device or app, then repeat the process carefully before trying a more advanced fix.
Related Articles
 Here's How to Create a Virtual Hard Disk on Windows 102 minutes read
 How to Create a Virtual Drive on Windows with Simple VHD Manager3 minutes read
 Create a Virtual Machine on a USB Drive with VirtualBox4 minutes read
 Delete the Virtual Drive in Windows 73 minutes read
 How to Create a Virtual Drive with UltraISO Software3 minutes read
 How to Create a Virtual Drive (Virtual Hard Disk) on Windows 10 Without4 minutes read
Reader Comments 0
Sign in with email or Google to join the discussion.