'Turn' a folder into a virtual drive on Windows 10
On Windows, users can easily "attach" one or more folders to a virtual drive on Windows for faster access when needed. And anything saved to the virtual drive will be saved to the location of that directory. Folders "mounted" as virtual drives will not appear continuously, but only present in the current user session by default. If you log out, restart or shut down the computer, all existing virtual drives will be erased (no longer attached).

If you are interested, this article will show you how to turn any folder into a virtual drive on Windows for faster access when needed, please read the reference.
Mount the folder as a virtual drive
Open Windows PowerShell and enter the "subst" command, then press ENTER to browse through the list of virtual drives currently available on the computer.

Next, enter the following command in Windows PowerShell:
subst: "Full path of folder"
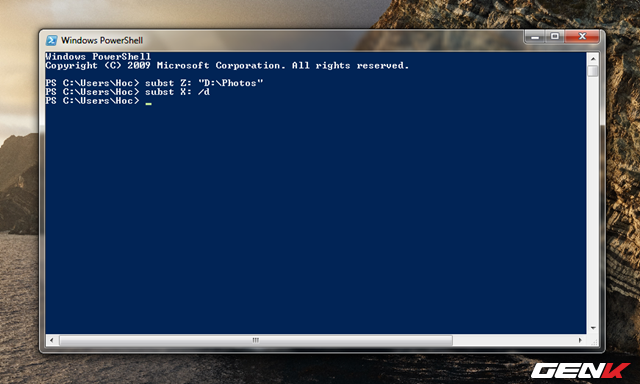
Where "" is the drive letter you want to use and " Full path of folder " is the full path of the directory you want to mount as the virtual drive. For example, here "Z" will be the drive letter you choose and the directory path you want to mount as a virtual drive is "D: Photos", then we will have the following specific command, do not forget to press ENTER to execute.
subst Z: "D: Photos"

After running the command, the directory you mount will appear in the drive list with the name of the character you set.

Delete the mounted virtual drive from the directory
When you want to delete the mounted virtual drive, simply run the command with the syntax:
subst: / d
Where "" is the character name of the mounted virtual drive. For example, here we will delete the virtual drive "X", the complete command will be:
subst X: / d

And this is the result.

Set Windows to automatically store a mounted directory task as a virtual drive even when logged out, started, or shutdown
As mentioned above, attaching a folder as a virtual drive is only available at the current session, if you log out, start or shut down the previous mounting task will disappear. Therefore, if you want Windows to automatically store tasks, even when you log out, start or shut down, do the following.
Open Notepad and enter this command

Proceed with "" replacing the name of the virtual drive letter that you have attached and want to store the operation for. And "Full path of folder" becomes the full path of the folder you mount as the virtual drive. Thus we will get the full command as shown.

Then, save the file as ".bat".

Finally, visit the " C: ProgramDataMicrosoftWindowsStart MenuProgramsStartup " path and paste the file saved above into it.

Very simple, right?