How to enable or disable Secure Sign-In on Windows 10
Windows is the operating system most targeted by hackers. Therefore, you should reinforce your PC's defense system to keep it safe, even online and offline. This article will show you how to enable or disable Secure Sign-In on Windows 10.
Table of Contents
Windows is the operating system most targeted by hackers. Therefore, you should reinforce your PC's defense system to keep it safe, even online and offline. This article will show you how to enable or disable Secure Sign-In on Windows 10.
- Learn about Tamper Protection, the new security feature on Windows 10
- How to automatically lock the computer when a user leaves with Dynamic Lock on Windows 10
- Turn off Windows Defender on Windows 10
Secure Sign-In is an additional component on the Windows 10 login screen. It does not prevent people from accessing the PC if there is login information. Instead, Windows 10 will clear the login field until a key chain is entered. Then enter the password or PIN as usual.
This feature is intended to prevent malware. Malicious code may be in the background and forge a Windows 10 login screen to get your login information. Since applications and programs often do not have access to the Ctrl + Alt + Del command, you can bypass the fake login screen using the Secure Sign-In enabled by entering these 3 keys.
Enable or disable Secure Sign-In using the Netplwiz command
To get started, open Run by pressing Win + R , type netplwiz in the text field and then click the OK button (or press Enter ) to continue.

Alternatively, you can access the User Accounts by typing netplwiz in the Taskbar search field and selecting the appropriate results.
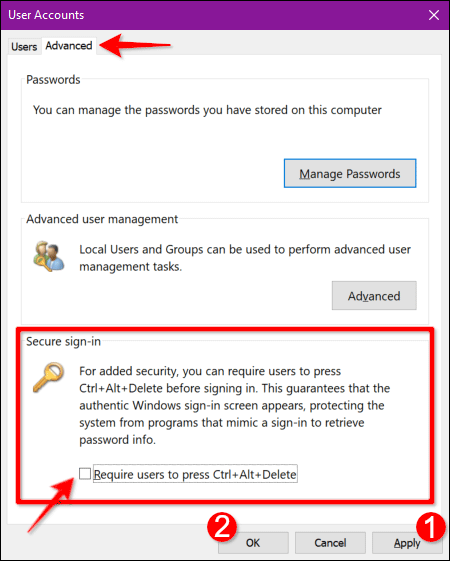
The User Accounts control panel will appear on the screen, click on the Advanced tab (if not opened by default). Check or uncheck the option of Require Users to Press Ctrl + Alt + Delete in the Secure Sign-In .
Click the Apply button and then click the OK button to finish.
Enable or disable Secure Sign-In using Local Security Policy
This is another method that is somewhat more complex than the User Accounts guide. Use this method if you want to avoid the Windows registry.
Open Run, type secpol.msc in the text field and then click the OK button (or press Enter ).
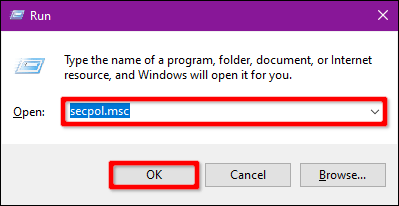
Similarly, you can also access Local Security Policy by typing secpol.msc in the taskbar's search field and selecting the appropriate results.
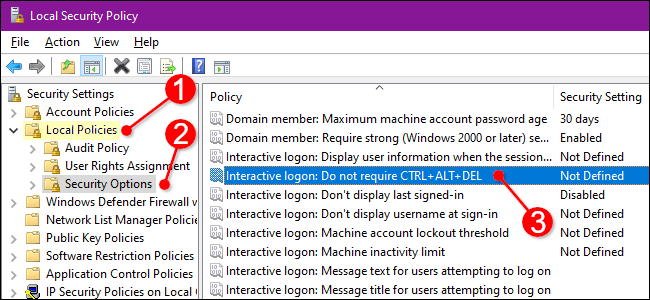
In the Local Security Policy window, expand Local Policies on the left and select the Security Options folder below. Next, scroll down to the right and double click on Interactive Logon: Do Not Require CTRL + ALT + DEL .
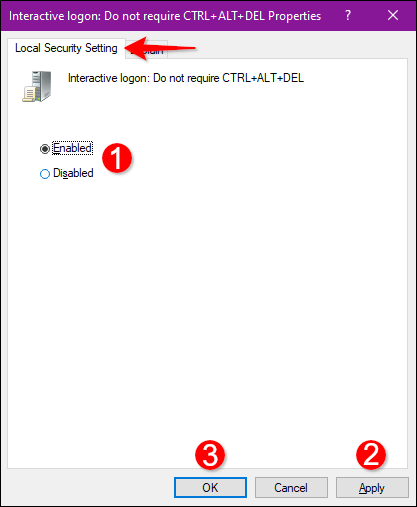
The Properties dialog box appears on the screen with the Local Security Setting tab displayed by default. Click the Enabled or Disabled button to enable or disable this feature. Then click the Apply button and click OK .
Enable or disable Secure Sign-In using the Registry
Another way to enable or disable Secure Sign-In is to use Local Security Policy. Keep in mind, however, that any changes in the registry can destabilize the system. You should back up the registry and the system before making changes.
Launch Run, type regedit and click on OK or press Enter .
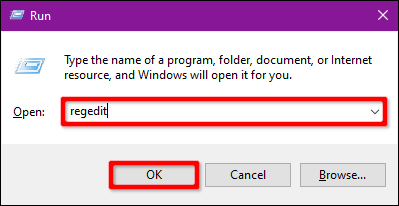
You can also use the Taskbar to open the Registry Editor.
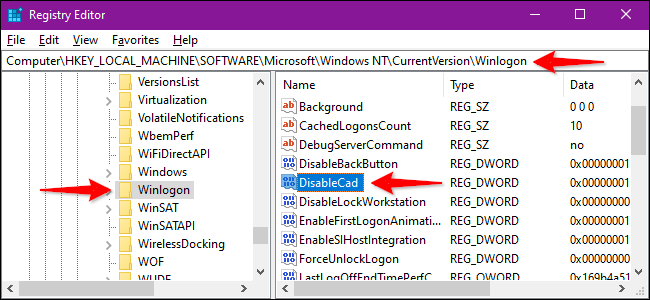
In Registry Editor, expand the following folder in order:
HKEY_LOCAL_MACHINE > SOFTWARE > Microsoft > Windows NT > CurrentVersion
In the CurrentVersion folder, select Winlogon to display its settings in the right pane. Double click DisableCad to edit the value.
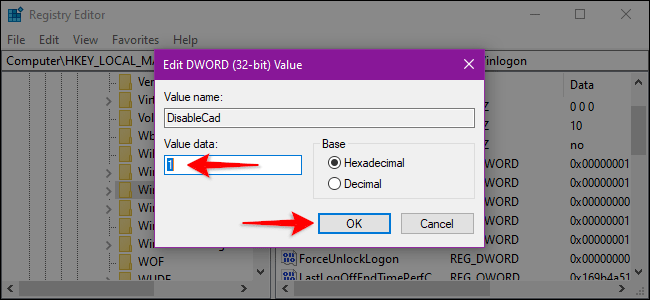
In the Edit DWORD (32-bit) Value box that appears, change Value Data to one of the following values:
- On = 0
- Off = 1
Click the OK button to finish. Restart the computer to save settings.
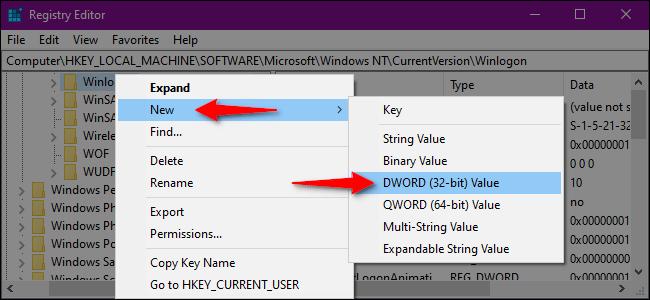
Note : If you don't see the DisableCad item in Winlogon settings, right-click on Winlogon , select New in the menu that appears, and then click DWORD (32-bit) Value in the next list. Name the new DWORD as DisableCAD and change its value.
Good luck!
Was this article helpful?
Your feedback helps us improve.
Related Articles
 How to enable or disable Secure Sign-In on Windows 10, Windows 116 minutes read
 How to enable and disable Secure Sign-In in Windows 104 minutes read
 How to disable / enable UEFI Secure Boot in Windows 105 minutes read
 How to check Secure Boot has been enabled on your computer or not?4 minutes read
 How to enable or disable UEFI Secure Boot in BIOS8 minutes read
 Enable or disable Secure Boot via the ASUS UEFI BIOS utility5 minutes read
Reader Comments 0
Sign in with email or Google to join the discussion.