
How to Install FreeNX Server on Ubuntu 9.04 Jaunty
Method 1 of 2:
Command Line
-
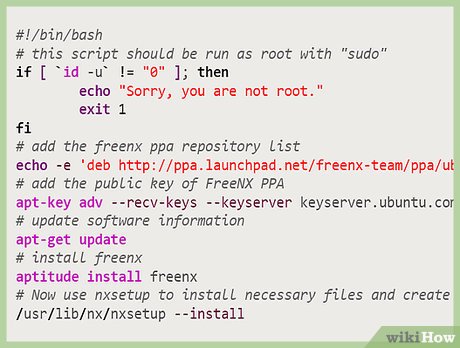 Create and run the Bash script. It should be run with a root set to "sudo"
!/bin/Bash if [ `id -u` != "0" ]; then echo "Sorry, you are not root." exit 1 fi
-
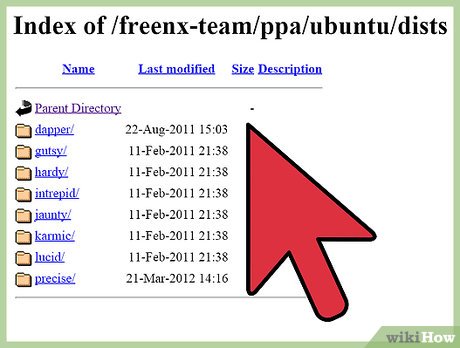 Add the freenx ppa repository list.
echo -e 'deb http://ppa.launchpad.net/freenx-team/ppa/ubuntu jaunty mainndeb-src http://ppa.launchpad.net/freenx-team/ppa/ubuntu jaunty main' >> /etc/apt/sources.list.d/freenxppa.sources.list
- Add the public key of FreeNX PPA.
apt-key adv --recv-keys --keyserver keyserver.ubuntu.com 2a8e3034d018a4ce
- Update software information.
apt-get update
- Install FreeNX.
aptitude install freenx
- Use nxsetup to install necessary files and create the special user "nx".
/usr/lib/nx/nxsetup --install
Method 2 of 2:
Graphical User Interface
- Add FreeNX PPA.
gksudo gedit /etc/apt/sources.list deb http://ppa.launchpad.net/freenx-team/ppa/ubuntu jaunty main deb-src http://ppa.launchpad.net/freenx-team/ppa/ubuntu jaunty main sudo apt-key adv --recv-keys --keyserver keyserver.ubuntu.com 2a8e3034d018a4ce
- Install FreeNX Server.
sudo apt-get update sudo aptitude install freenx (y)
- Configure FreeNX Server.
sudo /usr/lib/nx/nxsetup --install
- For server behind a firewall, default key may be okay, (n) for any public system or for greater security, Generate a custom Key Pair (y)
Update 04 March 2020
You should read it
- How to install an SSD for PC
- How to install Windows 8.1 from USB
- Install Windows XP from a USB Flash drive
- How to install Windows 10 from USB with ISO file
- Things you need to know about how to install Windows today
- Install Win 7 from your hard drive, no need for USB, install Win disk
- How to install Windows with WinToHDD without USB, DVD
- Install Windows 10 with a super fast USB in just a few simple steps
- Install Python Package with PIP on Windows, Mac and Linux
- 8 ways to fix the problem of not being able to install Firefox on Windows
- How to install Windows on WinPE
- Install Win 10 for Android tablet
Maybe you are interested
How to change where Windows screenshots are saved How to enable Notification Cooldown on Android 16 How to lose 4kg in a week thanks to zucchini Runeterra Legend has officially launched and instructions on how to install it Apple Arcade launches new RPG Legend of the Skyfish 2 Instructions to turn on, turn off the keyboard sound on Android