How to install Windows 8.1 from USB
In the current popular way of installing Windows, many people choose to install Win from USB because you only need a small, uncomplicated device like installing Win with DVD in the traditional way. You can install Win 7 from USB, installing Win 10 with USB or Win 8.1 with USB is easy.
Even if Windows fails, you can install Win easily and the installation speed is 3 times faster than using a DVD. No need to prepare a DVD, a disk reader, just a compact USB device, we can install a new Windows system easily. The following article will guide you how to install Windows 8.1 from USB.
- How to fix keyboard and mouse error when Boot USB installs Win
- How to set up BIOS to boot from USB / CD / DVD, external hard drive
- Create partition during Windows 7 installation process
Instructions for installing Windows 8.1 from USB
Before proceeding to install Win 8.1, users need to prepare the requirements: USB 4 GB or more, when extracting gile. ISO Win 8.1 is large in size at about 3.52 GB.
- Download Rufus software to boot USB.
ISO file of Win 8.1. To download the ISO file, readers can download the link below.
- Download the Windows 8.1 ISO file
Step 1:
First of all we will create a USB boot using Rufus software. Please check that the Boot standard of the computer is Legacy (BIOS) and UEFI (UEF). If the computer you are using is 32-bit Windows then it is definitely the Legacy Boot standard. If it is 64-bit Windows to check the reader follow the article The concept of UEFI standard in the computer.
After checking, you proceed to create USB Boot with Rufus. How to do it in the article How to create USB Boot, USB install Windows by Rufus.
Note at the interface of Rufus, if Boot Standard Legacy select MBR partition scheme for BIOS or UEFI-CMS, if UEFI standard, then select MBR partition scheme for UEFI. Then select Start to start creating USB Boot.

After creating USB Boot, they will be installed as shown below.

Step 2:
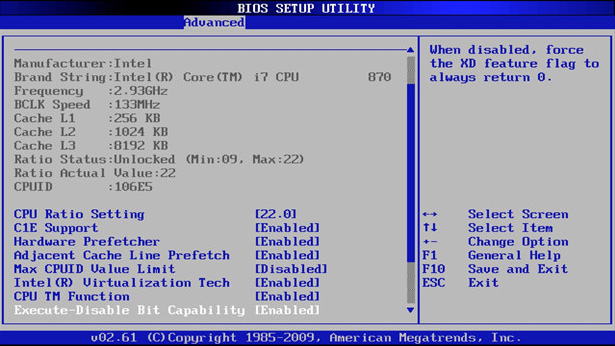
Plug the USB into the computer and then press the Boot Option key displayed on the screen. Depending on the manufacturer, there will be shortcuts to access the different BIOS interfaces. To know what keyboard shortcuts you need to use, visit the article How to access BIOS on different computers.
Step 3:
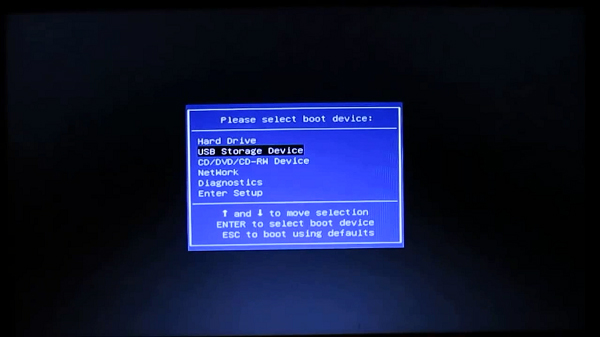
In the next interface, use the arrow to move up and down, click USB Storage Device and press Enter to install Windows 8.1 from USB.
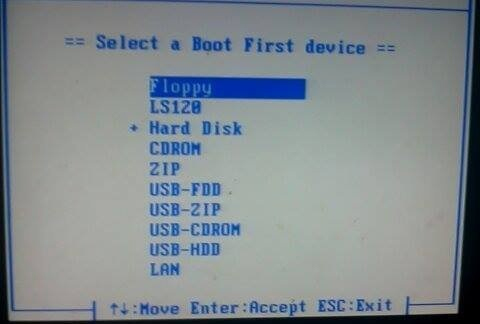
Note , the BIOS interface of each model will be different, so clicking the USB device will be different. For example, with the interface as below, we will click on Hard Disk .
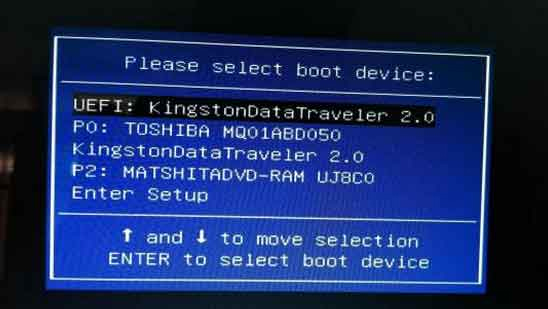
Or with standard UEFI models, users will click on the line with the form UEFI: on the USB device in use .
Step 4:
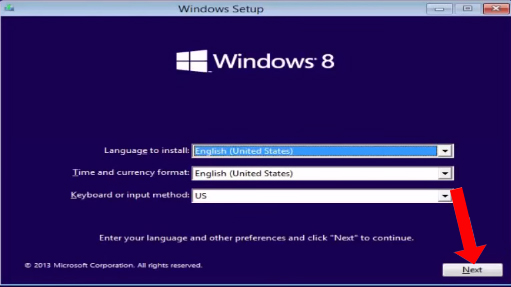
Wait for the computer to recognize the device, then appear the language, time, and keyboard interface.Language section to install and Keyboard or input method are all selected as English (United state).
Part Time will choose Vietnam. Then click the Next button below.
Step 5:
Click on Intall Now to install the operating system. Wait for the Setup is starting screen to finish.
Step 6:
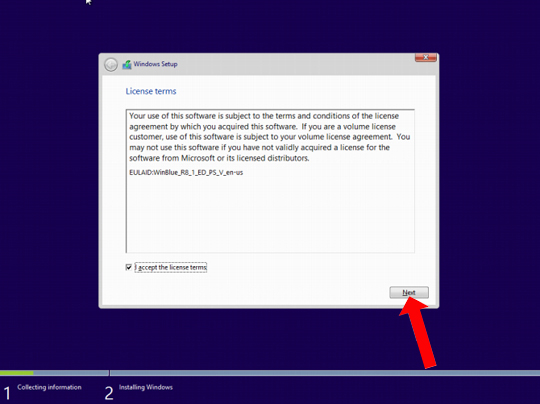
If Windows installation terms appear, click I accept the license terms and click on Next .
Step 7:
The Windows installation option appears, click Custom: Install Windows only (advanced) .

Step 8:
Next we will proceed with the Windows drive partition. The next interface will give users the names of the drives and partitions available on the computer. The column Total size is the partition size, the Free space column is the unused space of the partition.

Please determine the size of the C drive on your computer and then delete the old operating system partition and partitions below 1GB, select Delete .
Finally, we will leave an empty partition called Unallocated Space and drives larger than 1 GB. Click on the New word and keep the parameters and click Apply to create a new drive.

Step 9:
Select the drive with the largest capacity and then click Next to choose to install Win 8.1 on that drive.
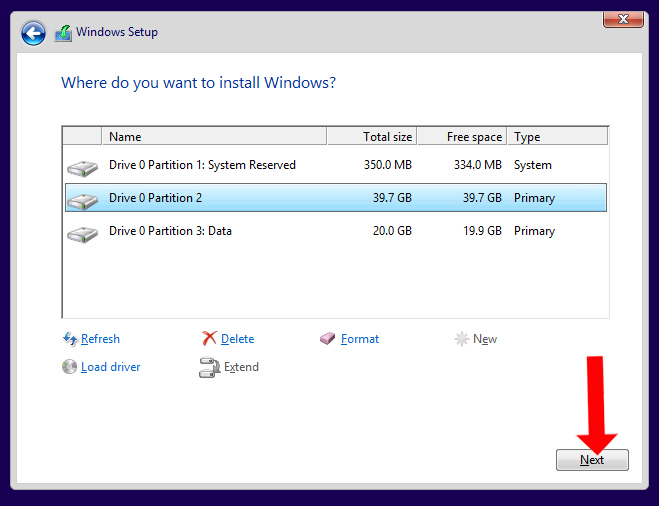
Finally the computer will perform the setup process automatically.
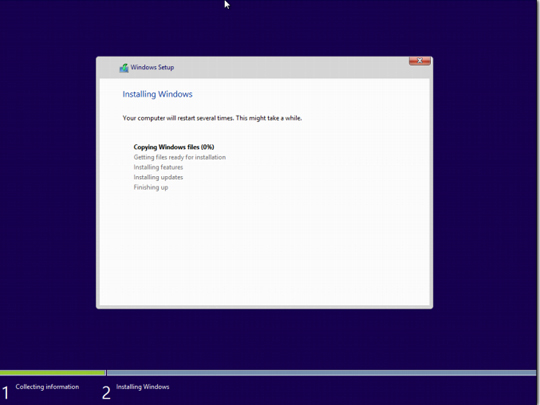
Step 10:
The computer will restart automatically and you will unplug the USB from the computer, then the computer will continue to reboot. When the Personalize screen appears, name your computer, select the background color and click Next.
Then there are basic setup steps for the computer. If the user has some knowledge about computers, then you can choose Custom to customize the setting details, otherwise it is best to use Use express settings .
Finally, enter your computer username, password and other setup steps.
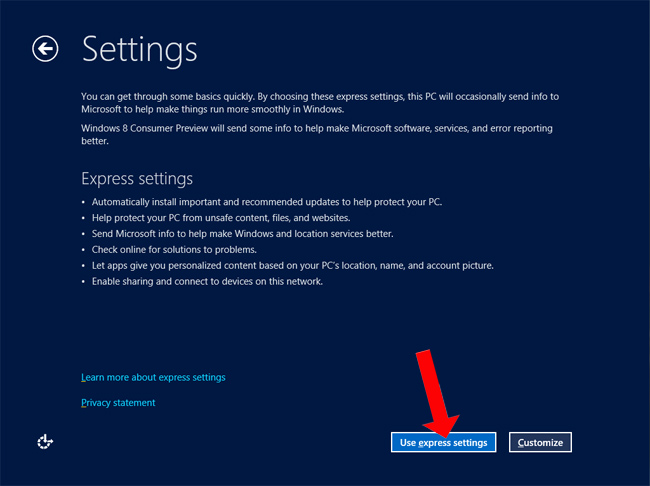
When installing the operating system Win 8.1 will install to the driver. In case your computer lacks any driver, please refer to the article 5 basic ways to update, update drivers for your computer, or use some software to automatically install drivers for your computer.
See more:
- How to download the official Windows 10 ISO file without Media Creation Tool
- How to automatically update drivers on Windows using SnailDriver
- Instructions for installing drivers for Windows with DriverPack Solution
I wish you all success!
You should read it
- ★ Install Windows 10 with a super fast USB in just a few simple steps
- ★ How to install Windows 10 from USB with ISO file
- ★ Things you need to know about how to install Windows today
- ★ Instructions for installing Windows 8.1 on Mac
- ★ Install Win 7 from your hard drive, no need for USB, install Win disk