How to install Windows 10 from USB with ISO file
If you have not installed the Win, the ghost machine ever, do not know how to enter the boot screen, do not know anything about the standard Legacy or UEFI, do not need to worry too much. Installing Win is not as scary as you think it is, only a few clicks are fine. In this article, TipsMake.com will guide you to install Windows 10 from USB.
Installing Win 10 from USB requires USB boot or ISO file Windows 10. Installing Windows 10 with USB is not too difficult if you follow the instructions to install Win 10 details below of TipsMake.com.
Prepare to install Windows 10 from USB
- ISO file Windows 10: Microsoft still allows downloading Windows 10 genuine ISO file from its website but must use a small tool, you can refer to the article How to download ISO file of Windows 10 from Microsoft or do not want to use the tool Download this link to download Windows 10
- USB: Minimum capacity of 6GB, 8GB recommended.
- Software to create USB boot: I use Rufus, would you like to use Hiren's BootCD, Windows 7 USB / DVD Download Tool, ZOTAC WinUSB Maker, WinSetupFromUSB, .
- Other phones or computers are networked to read this article.
Instructions for installing Windows 10 from USB
Step 1: Create USB boot
Select a software to create USB boot, I have listed above, installed on the machine. The general process will be:
- Plug the USB into the device, save the file you need because the USB boot process will delete them clean (format)
- Add Windows 10 ISO file to the USB boot program
- Select the type of system (UEFI or Legacy), file system (usually NTFS)
- Start creating USB boot
This process takes about 10 to 15 minutes, depending on the ISO file size, USB recording speed. If you have not figured out how to do it, you can refer to the instructions to create USB boot using Rufus, I have written very detailed already.
Step 2: Restart the computer
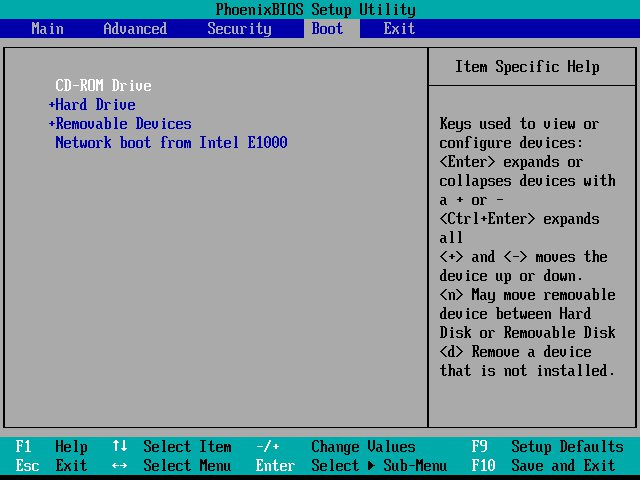
There are some devices that will automatically boot USB and boot into the operating system on USB when restarting. If your computer is not in this number, please restart the computer, during the reboot, press F2 or F12 (depending on the model) to enter the option to set up Boot Boot Setup Setup.
To find out exactly which computer you are entering into the BIOS with the shortcut key, refer to some instructions on BIOS Instructions on different computers.

After entering the BIOS interface, use the arrow keys to navigate to the Boot tab> Removable Devices (or USB Storage Device or External Drive depending on the model), press Enter to select the operating system load from USB.
If you need more detailed instructions, come here: How to set up BIOS to boot from USB / CD / DVD, external hard drive.
Step 3: Start installing Windows 10
After performing the above steps, we proceed to install Windows 10. First we set the time, keyboard language and then click Next .

Step 4:
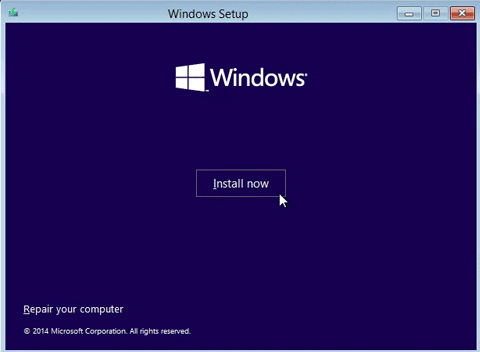
Next click the Install button to proceed with the installation.
Step 5:
Switch to the new interface and click on the option below I don't have a product key .

Step 6:
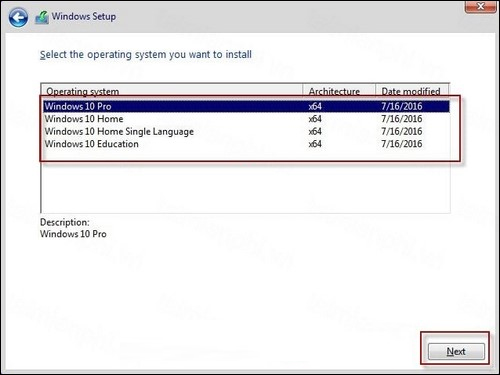
Soon, we will be choosing to install the Windows 10 operating system that we want to have in the list, then click Next.
Step 7:
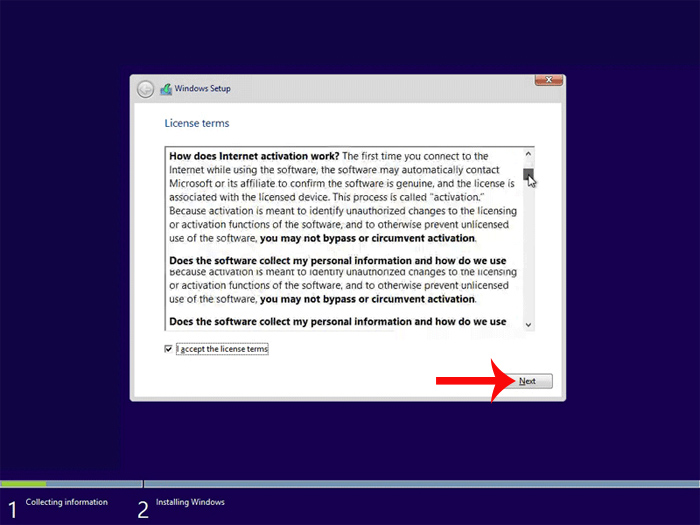
Microsoft will issue the terms of use, click on I accept the license terms then click Next .
Step 8:
In this new interface click on Custom: Install Windows only (advanced) .

Step 9:
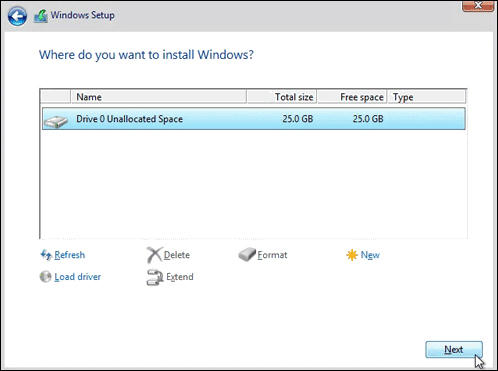
The next job is to select the hard drive to install Windows 10 operating system and then click Next to go to the next step.
Step 10:
Next, the installation process will take place shortly thereafter. This process will take about 10-15 minutes, depending on whether the computer configuration is fast or slow.
Step 11:
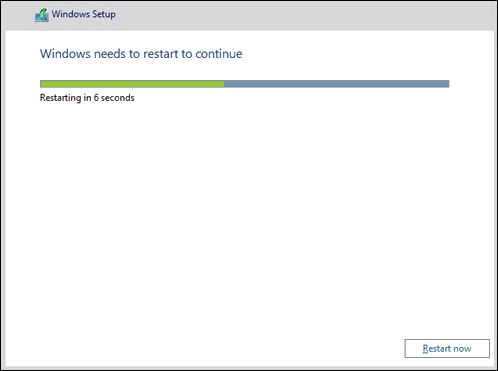
When the installation is complete, the computer will restart and return to the setup screen for the first time.
Step 12:
We click Use Express settings for the computer to set up the system for the first time to use, or click Customize to proceed with the options settings.

Step 13:
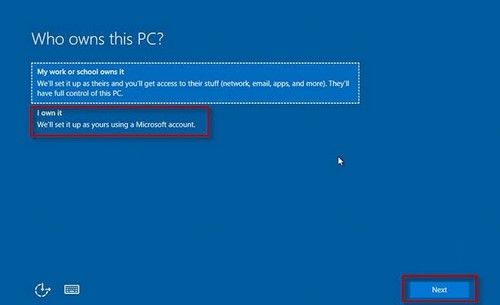
Then click I own it then click Next .
Step 14:
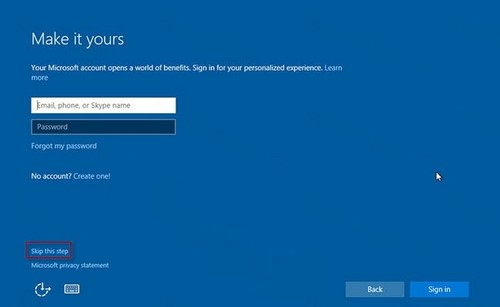
On the next screen, we will see the Microsoft account login interface, click Skip this step to skip this account login step.
Step 15:
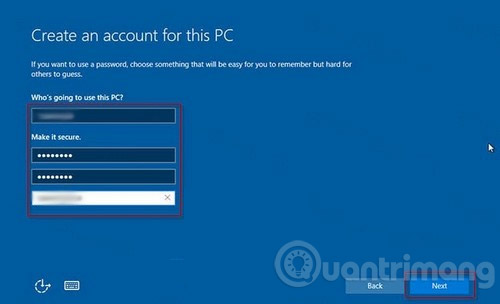
Next, the user creates a login account on the computer, then click Next .
Step 16:
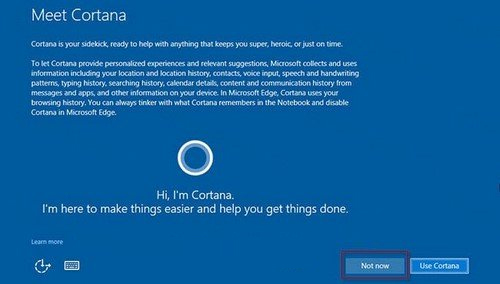
The interface to introduce the virtual assistant Cortana will appear later, press Not now to temporarily ignore this interface.
Step 17:
The computer will set up for the first run, you are not allowed to turn off the computer during setup.
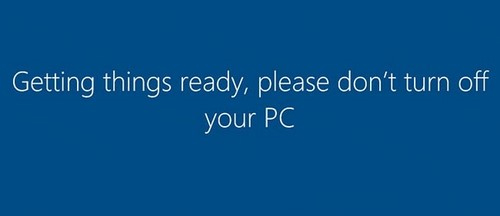
Once the setup is complete, the user will be taken to the complete Windows 10 screen interface. Now you can install any software or application for your computer.

Refer to the following articles:
- Install Windows 10 with Refresh Windows Tool from Microsoft
- How to install Windows 7 from USB
- Instructions to upgrade to Windows 10 from Windows 7/8 / 8.1
I wish you all success!
