How to change where Windows screenshots are saved
We can completely change the location of saving screenshots on the computer, depending on the needs and convenience of each person. Below are instructions for changing the location of saving Windows screenshots.
Table of Contents
By default, Windows saves screenshots in a folder that is quite difficult to find, so you will need to perform many operations to find screenshots on your computer . However, we can completely change the location of screenshots on the computer, depending on the needs and convenience of each person. Below are instructions for changing the location of Windows screenshots.
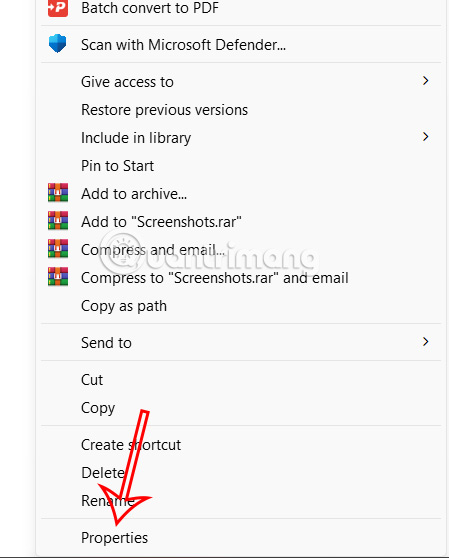
- Find the Screenshots folder, right-click and select Properties
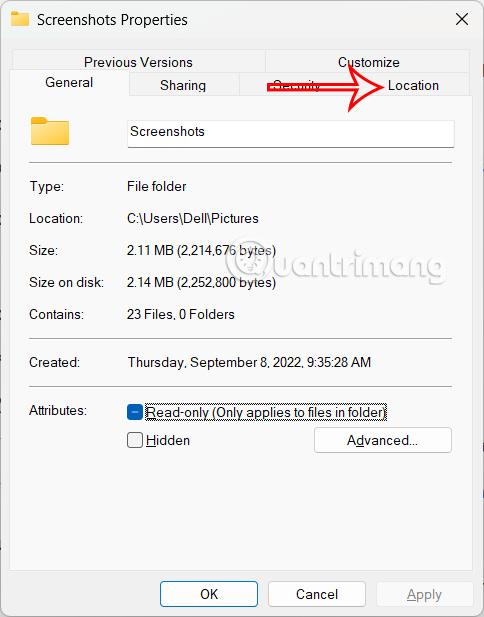
- Click the Location tab to change the folder location.
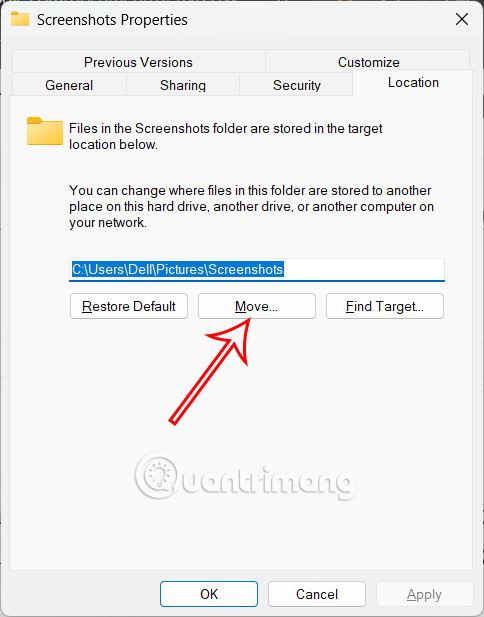
- Click Move to change and select a new folder to save the screenshot.
- Click Apply to save changes
Instructions for changing Windows screenshot saving location
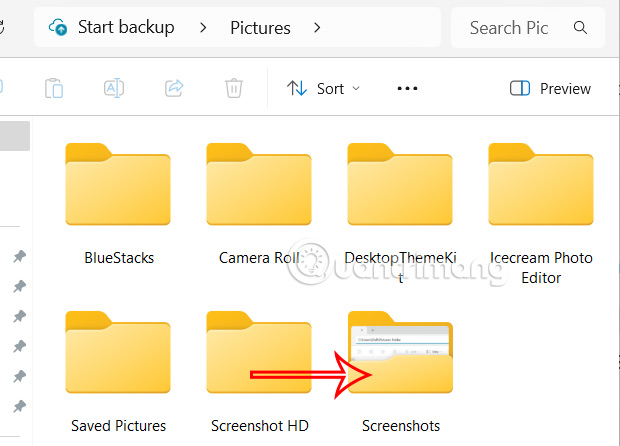
Step 1:
Open File Explorer on your computer and navigate to the folder where the screenshots are saved by heading This PC > Pictures > Screenshots.
Step 2:
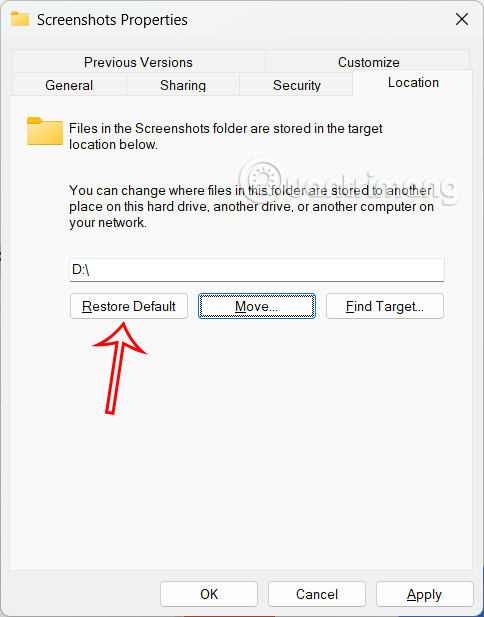
Right-click on the Screenshots folder, select Properties in the displayed list. If on Windows 11, click Show more options.
To display the new folder, the user clicks on the Location tab .
Step 3:
Then we click the Move button to move the screenshot folder to another location.
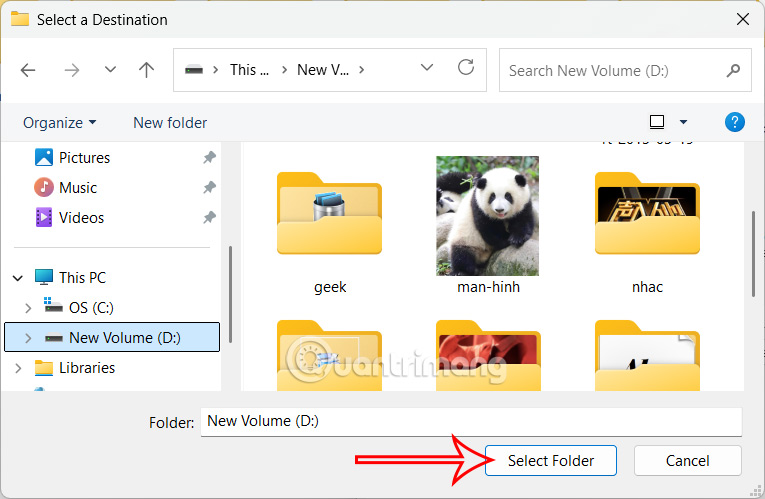
Now the folder interface is displayed for us to select the new location to save the Windows screenshot folder, click Select Folder to apply the changes.
Step 4:
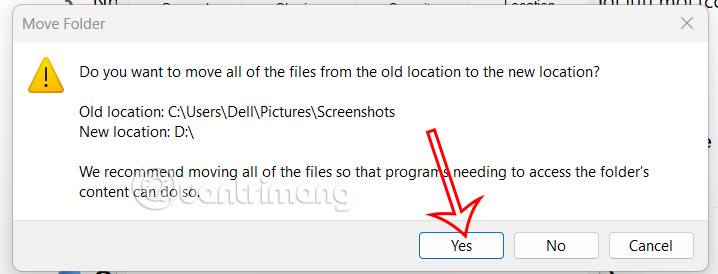
Continue to click Apply to save the new changes. The system will then ask you to move all screenshots to the new folder. To move all screenshots to the new folder, click Yes .
In case you want to restore to the old position, click Restore to do so.
Was this article helpful?
Your feedback helps us improve.
Related Articles
 7 Screenshots Hackers Like You To Save In Your Gallery6 minutes read
 How to Take Screenshots in Windows Phone 82 minutes read
 How to capture computer screen fast, self-saved, without software9 minutes read
 How to take scrolling, long screen screenshots in Windows12 minutes read
 How to change the location to save screenshots on Windows3 minutes read
 3 Quick Ways to Take Screenshots in Windows 83 minutes read
Reader Comments 0
Sign in with email or Google to join the discussion.