How to insert a signature into Word 2010, 2013, 2016, 2019, 2020
Inserting a signature into Word helps confirm the legitimacy and copyright of the document. You can use the Signature Line function in Word to add handwritten or digital signatures to documents, creating professional and trustworthy documents for work or legal transactions.
Table of Contents
You can insert a signature into Word in ways such as scanning a handwritten signature, adding a digital signature, an electronic signature to a Word file, below are detailed instructions for inserting a signature into Word 365, 2021, 2019, 2016, 2013, please refer and apply.
1. How to insert a signature in Word versions
If you're planning to add a signature to a document before printing, adding a signature line is the simplest way for you to add a signature to your Word document. To add a signature line to any document, you need to do the following:
Step 1 : Open the document file on your Microsoft Word, press " insert " and select " Signature Line "

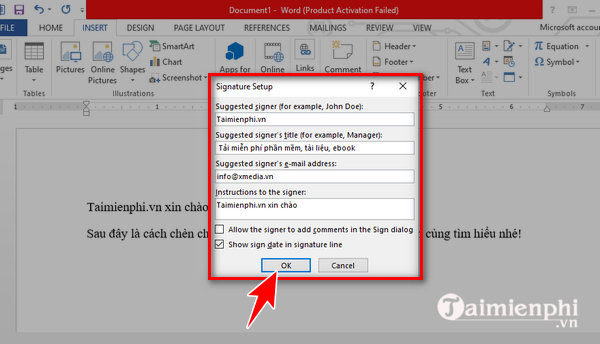
Step 2: In the signature setup box, you need to fill in detailed information for your personal signature.
- Suggested signer : Suggested signer
- Suggested signer's title: Suggested signer 's title
- Suggested signer's e-mail address: Signer's email address
- Introduce to the signer: Introduce to the signer
After setting up basic signature information, press " OK " to set up your signature.
Step 3: Immediately, a signature line will be inserted with a cross and a line to indicate the signing position. You can now place it in an appropriate location in your Word document. The signature will appear in this location after you print the Word document.

2. How to insert electronic signature in Word
To add a digital signature to your Word document, you first need to add a signature line to the Word file and install a security certificate for your digital signature. Specifically, the steps you need to take are as follows:
Step 1 : Follow the steps in section 1 to add a signature line to the document
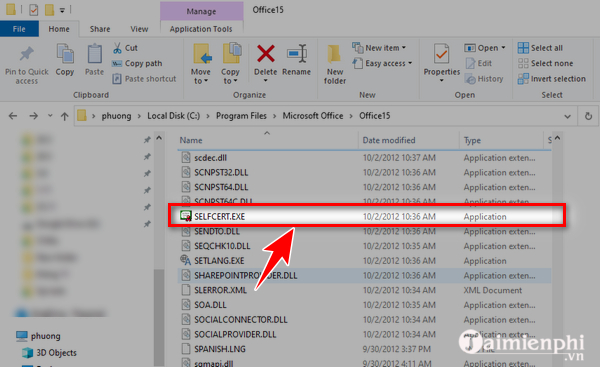
Step 2 : Find the file " Selfcert.exe " in the Office installation folder on your personal computer and double click on the file to open.
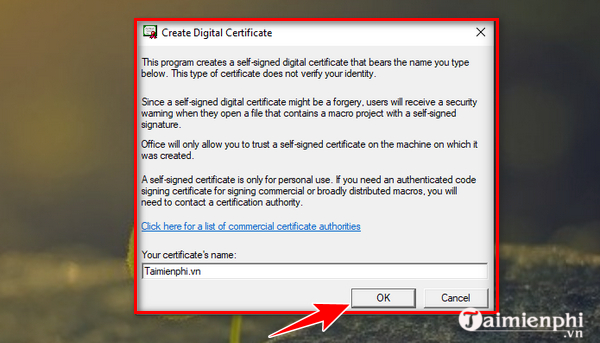
Step 3: In the Selfcert tool, enter a name for your security certificate in the " Your Certificate Name " box and then click " OK " to create it.
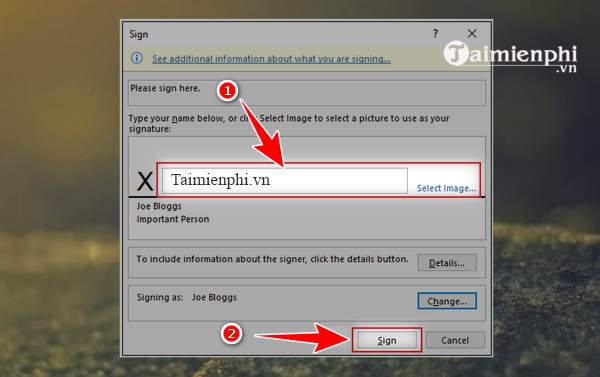
Step 4 : Once you have installed the digital certificate, go back to the Word document and double-click your signature line.
- The " Sign " box appears, enter the name displayed on the digital signature or click " Select Image " to insert an image of your handwritten signature.
- Click " Sign " to insert your electronic signature into the Word document.
After signing, Word will confirm that the signature has been added.
3. How to insert a handwritten signature into Word
If you want to add a handwritten signature to a Word document file, you need to take a photo of your handwritten signature, take a scan, and then insert the signature image into the Word document file. Specifically, the steps are as follows:
Step 1 . Sign your name on a piece of paper. Next, use your phone camera to take a photo of the signature in JPG, PNG image format.
Step 2 : Use the photo editing tool on your phone to crop the photo to the desired size and save.
Step 3: Send a photo of the signature from your phone via personal email and download to your computer.
Step 4: To add a signature to your document, go to the Insert tab on the Word toolbar, select the Image containing the signature you just saved to your computer.

Step 5: To edit the signature image in Word, click on the dots in the corners of the image, hold down the shift key and drag the image to the desired size.
Step 6 : At this point, your Word document will display the signature as shown below.

Above are 3 detailed ways to scan signatures into Word. You can refer to and apply to insert handwritten signatures, digital signatures, and electronic signatures into your Word documents and make them more professional.
Currently, Microsoft Word is still the leading word processing software, used by many people around the world to write and create documents to express information on contract quotes, etc. In many cases, Word users who also want to quickly add handwritten or digital signatures to text files to personalize and avoid problems related to hand signing or printing documents later should follow the instructions above. Please.
In addition, to know more text editing tips, you can learn more about aligning margins in Word to make your text more beautiful.
Was this article helpful?
Your feedback helps us improve.
Related Articles
 How to insert a signature in Word5 minutes read
 How to Add a Digital Signature to an MS Word Document5 minutes read
 How to Add a Digital Signature in an MS Word Document12 minutes read
 How to Insert a Signature in Pages on Mac3 minutes read
 How to quickly and beautifully remove signature background in Word3 minutes read
 How to Create a signature for Gmail and insert photos, links, Anchor Text into Gmail signatures6 minutes read
Reader Comments 0
Sign in with email or Google to join the discussion.