How to insert an Outlook contact in Word
Word supports inserting many types of files into the document so that we can access them right from the document interface, without having to open them manually. And you can completely insert contacts from Outlook into Word for immediate contact, or immediately provide information to document viewers.
Table of Contents
To insert an Outlook contact you will need to add the address bar on the Ribbon, completely different from inserting the contents of an Excel document, or inserting pictures in Word. The following article will guide inserting contacts right in Word.
Instructions for inserting contacts in Word
Step 1:
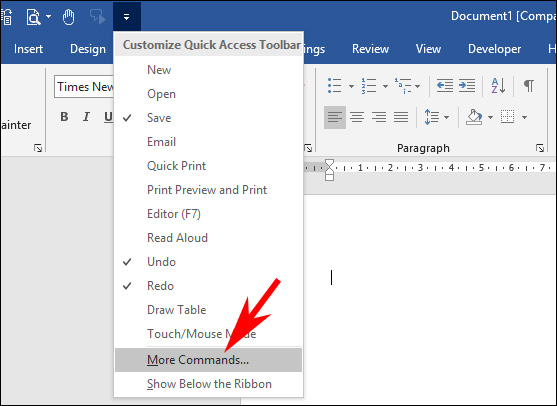
At the interface in Word we click the triangle icon on the Ribbon, select More Commands in the displayed list.
Step 2:
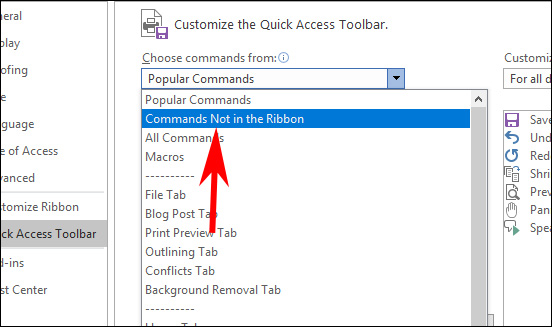
Displaying a new interface, we click to select Commands Not in the Ribbon from the drop-down list of Choose Commands From.
Now displaying many options, you go to the Address Book command and click the Add button to add to the Quick Access Toolbar in Word. Click OK to save.

Step 3:
Go back to the interface in Word and you should see the Address Book icon you inserted earlier. Click this icon to insert contacts into Word.

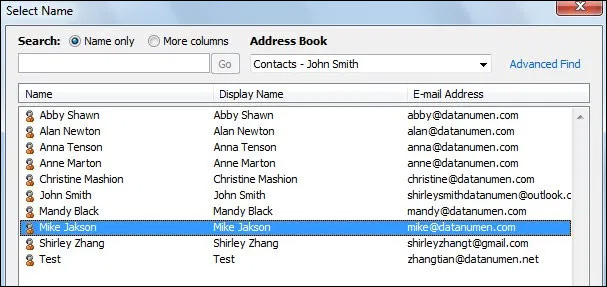
Immediately after that appeared the interface to save contacts on the computer. At the interface you select the contacts you want to insert into Word and then click OK to proceed with the insert.
Was this article helpful?
Your feedback helps us improve.
Related Articles
 How to insert a table into an Outlook email3 minutes read
 Instructions on how to share contacts in Microsoft Outlook6 minutes read
 How to insert emoticons (smileys) in Outlook email4 minutes read
 How to Block Contacts on Outlook Mail5 minutes read
 6 ways to work faster in MS Outlook9 minutes read
Reader Comments 0
Sign in with email or Google to join the discussion.