Table of Contents
This updated guide examines How to Add a Digital Signature in an MS Word Document and organizes the essential facts, background, and practical takeaways in clear American English.
Method 1
Using DocuSign
 Open the document in Microsoft Word. Double-click the Word document you want to add a digital signature to.
 Install the DocuSign add-in. DocuSign is a free add-in that will allow you to add your signature to any Word document. To install DocuSign, do the following:
- Click the Insert tab.
- Click Add-ins in the "Add-ins" section of the toolbar.
- On a Mac, you'll highlight Add-ins...
- Click Get Add-ins in the drop-down menu.
- On a Mac, you'll click Store...
- Click the search bar in the upper-left side of the window.
- Type indocusignand press↵Enter.
- Click Add to the right of the "DocuSign for Word" heading.
- Click Trust this add-in and/or Got it if prompted.
 Click theDocuSigntab. It's at the top of the Word window.
 ClickSign Document. You'll find this in the DocuSign toolbar. Doing so prompts the DocuSign menu to open.
 ClickCREATE ACCOUNT. It's in the DocuSign menu.
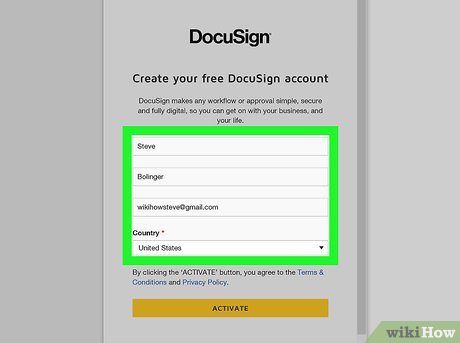 Sign up for DocuSign. Enter your first name, last name, and a working email address, then click the yellow SIGN UP button near the bottom of the window.
 Verify your email address. To do so:
- Open the inbox for the email address that you used to create your account.
- If you've ever used DocuSign, you may not receive a confirmation email. If you do not receive a confirmation email, skip this step.
- Open the "DocuSign via DocuSign" email.
- Click the yellow ACTIVATE button in the email's body.
- Enter and re-enter a password for your account.
- Click ACTIVATE .
- Open the inbox for the email address that you used to create your account.
 Log into DocuSign in Microsoft Word. This will prompt the DocuSign document window to open:
- Click Sign Document again if the right-hand sidebar is gone.
- Click LOG IN
- Enter your email address and click CONTINUE
- Enter your password and click LOG IN
 ClickCONTINUE. It's a yellow button at the top of the DocuSign document window.
- You may first have to click Sign Document one more time before this window will open.
 ClickSignature. It's on the left side of the page. If you already have a DocuSign signature on file, this displays a thumbnail image of your signature next to your mouse cursor. If you do not have a signature on file, this displays a yellow image that says "Sign" next to your mouse cursor.
 Click the spot into which you want to insert your signature. If you already have a signature on file through DocuSign, this places your signature where you clicked. If you do not have a signature on file, this displays a window you can use to create a new signature.
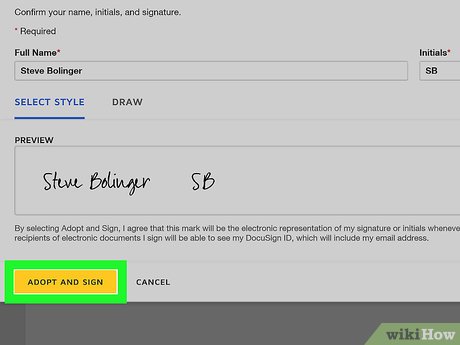 Click the yellowADOPT AND SIGNbutton. It's at the bottom of the window. You should see your signature appear in your selected spot.
- You can change your signature style by clicking Change Style above the signature box and to the right. Then click the style you want to use.
- You can also click the Draw tab and draw your own signature using a mouse or touch screen.
 ClickFINISH. It's a yellow button near the top of the page. A pop-up window will appear.
 Type a recipients name and email address. Use the first two bars at the top of the window to type the name and email address of the person you want to send the signed document to,
- You can also add recipients by clicking Add Recipient below the bar. Then type the name and email address of the new recipient.
 Type a subject for the document (Optional). Use the line labeled "Subject" to type a subject for the email. For example, you could type the name of the document.
 Type a brief message. Use the large text box on the bottom to type a brief message. The message must be less that 250 characters long.
 ClickSend and Close. It's the yellow button at the bottom of the window. This sends the signed document as an email.
Method 2
Adding a Signature on Windows
 Make sure that you have a Digital ID. to sign a Microsoft Word document, you must have a digital certificate that verifies your identity. These are typically applied to documents which are sent from companies who require a signature.[1]XResearch source
- A Digital ID certificate costs several hundred dollars to obtain for a year, so you most likely won't use this method if you're only trying to sign an informal document.
- You can add a signature using the DocuSign add-on if you're attempting to add a signature for personal or informal use only.
 Open the document in Microsoft Word. Double-click the Word document you want to add a digital signature to.
- If you want to start a new document, open Microsoft Word, then click Blank document on the main Word page.
 Click theInserttab. It's at the top of the window.
- If you haven't yet saved the document, first do so by clicking File , clicking Save As , entering a file name, and clicking Save .
 ClickText. It's below an icon that resembles a blue "A" under the "Insert" tab. This displays a drop-down menu below the icon.
 ClickSignature Line. It's in the top-right corner of the drop-down menu below "Text". Clicking it prompts a pop-up window to appear.
- On some versions of Microsoft Word, the Signature Line option is an icon that resembles a pencil on a piece of paper. If so, click the icon, then click Microsoft Office Signature Line in the drop-down menu if prompted.
 Add the signature details. Type the information you want to appear below the signature line, such as name, title, email address, and any instructions you want to leave for the signer, into the Signature Setup window. You can also do the following:
- Check the "Show sign date in signature line" box if you'd like the date of the signature to be inserted automatically.
- Check the "Allow the signer to add a comment in the Sign dialog box" box if you'd like to enable comments from whoever signs the document.
 ClickOK. It's at the bottom of the window. This will close the window and, after a brief moment, insert a signature box.
 Right-click the signature line, then clickSign. This opens a window you can use to sign on the signature line.
- You can also double-click the signature line to do this.
 Enter your name. You can either type your name next to the "X" or use your mouse to ink your name.
 ClickSign. The "Signature" badge will appear at the bottom of the document next to the word count, indicating that the document has been signed.
- If you don't yet have a digital ID from a Microsoft partner, you won't be able to complete this step.
Method 3
Adding a Signature on Mac
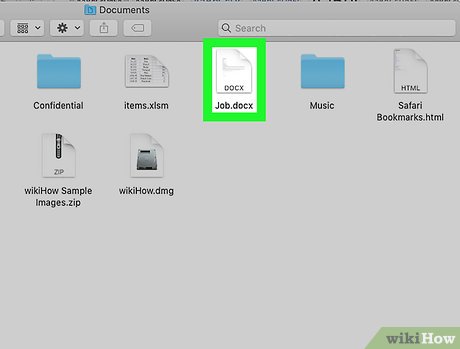 Open the document in Microsoft Word. Double-click the Word document you want to add a digital signature to.
- If you want to start a new document, open Microsoft Word and click File , then click New Document in the drop-down menu.
 ClickFile. It's in the upper-left corner of the screen,
 ClickSave As. It's in the drop-down menu that appears when you click "File". A small window will open.
 Click the drop-down menu next to "Format". This allows you to select a file format to save the Word document as.
 ClickPDFin the resulting drop-down menu. This will allow you to save your document as a PDF file.
 ClickExport. It's a blue button at the bottom of the window.
 Open Finder and navigate to the PDF file you just saved. The finder has an icon that resembles a blue and white smiley face It's in the dock at the bottom of the
 Click the PDF file. This selects the PDF file.
 ClickFile. It's in the menu bar at the top of the screen.
 SelectOpen Within the drop-down menu. This displays a sub-menu as a pop-out.
 ClickPreviewin the pop-out menu. This opens the PDF file in the Mac Preview app.
 Click the marker icon. It's the icon that resembles a marker tip located to the left of the Search bar.
 Click the Signature icon. It located to the right of the "T" icon and looks like part of a cursive signature on a small line.
 ClickTrackpadorCamera. If you have a laptop with a trackpad or a computer with an external trackpad or drawing tablet, you can click Trackpad . If you don't have a trackpad but you have a webcam, select Camera instead.
- If a digital signature is already saved, you may have to click Create Signature first.
 Create your signature. You have a couple of different options to add your signature:
- Trackpad:
- Click Click Here to Begin
- Write your signature on the trackpad with a finger.
- Press a key on the keyboard.
- Click Done
- Camera:
- Write your signature on white paper.
- Hold it up to the camera.
- Align the signature over the line.
- Click Done
- Trackpad:
 Click the signature you just created. It's in the signature drop-down menu. This will place your signature into the center of the document.
- You may first have to click the "Signature" icon again.
 Drag your signature to reposition it. Click and hold in the center of your signature and drag it to the area you want to place it in.
- You can resize the signature by clicking on any of the corners and dragging them in or away from the center of the signature.
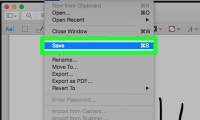
 ClickFile. It's in the menu bar at the top of the screen.
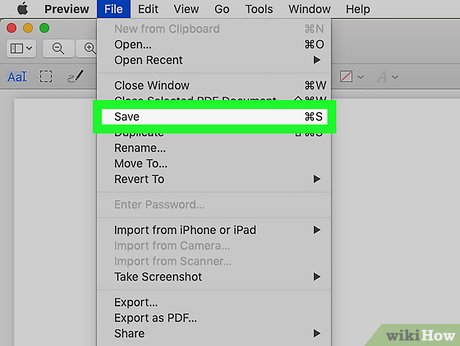 ClickSave. It's in the drop-down menu. This saves the document with your digital signature.
FAQ
What is How to Add a Digital Signature in an MS Word Document about?
It provides a structured overview of click, explains the main context, and highlights practical takeaways for readers.
Why does this topic matter?
Understanding the main concepts helps readers evaluate the issue, avoid common mistakes, and make better-informed decisions.
How should readers use this information?
Use the guidance as a practical starting point, confirm details that may have changed, and follow current product, safety, or security recommendations.
Related Articles
 How to Add a Digital Signature to an MS Word Document: Practical Guide6 minutes read
 Insert Signature into Word: How to Insert a Signature in Word5 minutes read
 How to Insert a Signature into Word 2010, 2013, 2016, 20196 minutes read
 How to Create a Digital Signature in Word Simply and Quickly5 minutes read
 How to Create Document Signature on iPhone3 minutes read
 Quickly and Beautifully Remove Signature Background in Word: Step-by-Step Guide5 minutes read
Reader Comments 0
Sign in with email or Google to join the discussion.